Finding the right webhosting is difficult, complicated, and expensive. For the Lorekeeper community, I've labored to provide a straightforward, tailored webhosting option at a competitive price point, under the name Perabyte Hosting. It comes with composer installed by default, free email, reliable cron jobs, and more! You can read more details here.
This guide will walk you through on how to set up this hosting by yourself. You can click on any images in this guide to make them larger.
If you encounter errors at any point in the guide, STOP. Ask for help in the Lorekeeper Discord, or otherwise resolve the error before moving on. You risk messing up further if you continue despite an error.
If you encounter issues specifically with the control panel/Perabyte itself, please create a ticket under the "Support" section on the billing website.
Prerequisites
This guide assumes you already have a local, working copy of Lorekeeper. You need to set up a local before you can set up a live website. Follow the directions in the official documentation here for how to set up your local copy.
You will also need to have configured an SSH key. You can read how to do that in the official documentation here.
While this guide is written with any operating system in mind, screenshots will mention PuTTY and use Windows.
Buying a Domain Name
First, you will need a domain name. You can think of this as your home address -- a domain name is a label that tells the browser where your website is located, and not the website itself.
Since I can't offer domain privacy services, I do not offer domain names through Perabyte. I highly recommend Namecheap. For ease, this guide will assume you are using Namecheap, but you can use any registrar you want. I've also heard good things about Porkbun.
Spend some time browsing for the domain name you'd like, and once you've picked it out, purchase it!
Some notes:
Make sure you enable any domain privacy services. Any good registrar will offer privacy for free. The owner of any given domain is freely available information on the internet. By enabling domain privacy, you ensure that you aren't sharing your home address to the rest of the internet!
Don't change any DNS settings for now. We'll cover how to do that later.
Buying Hosting
You will be working with two websites over the course of this guide. The billing website, billing.perabyte.host, and the URL of your server, which may vary.
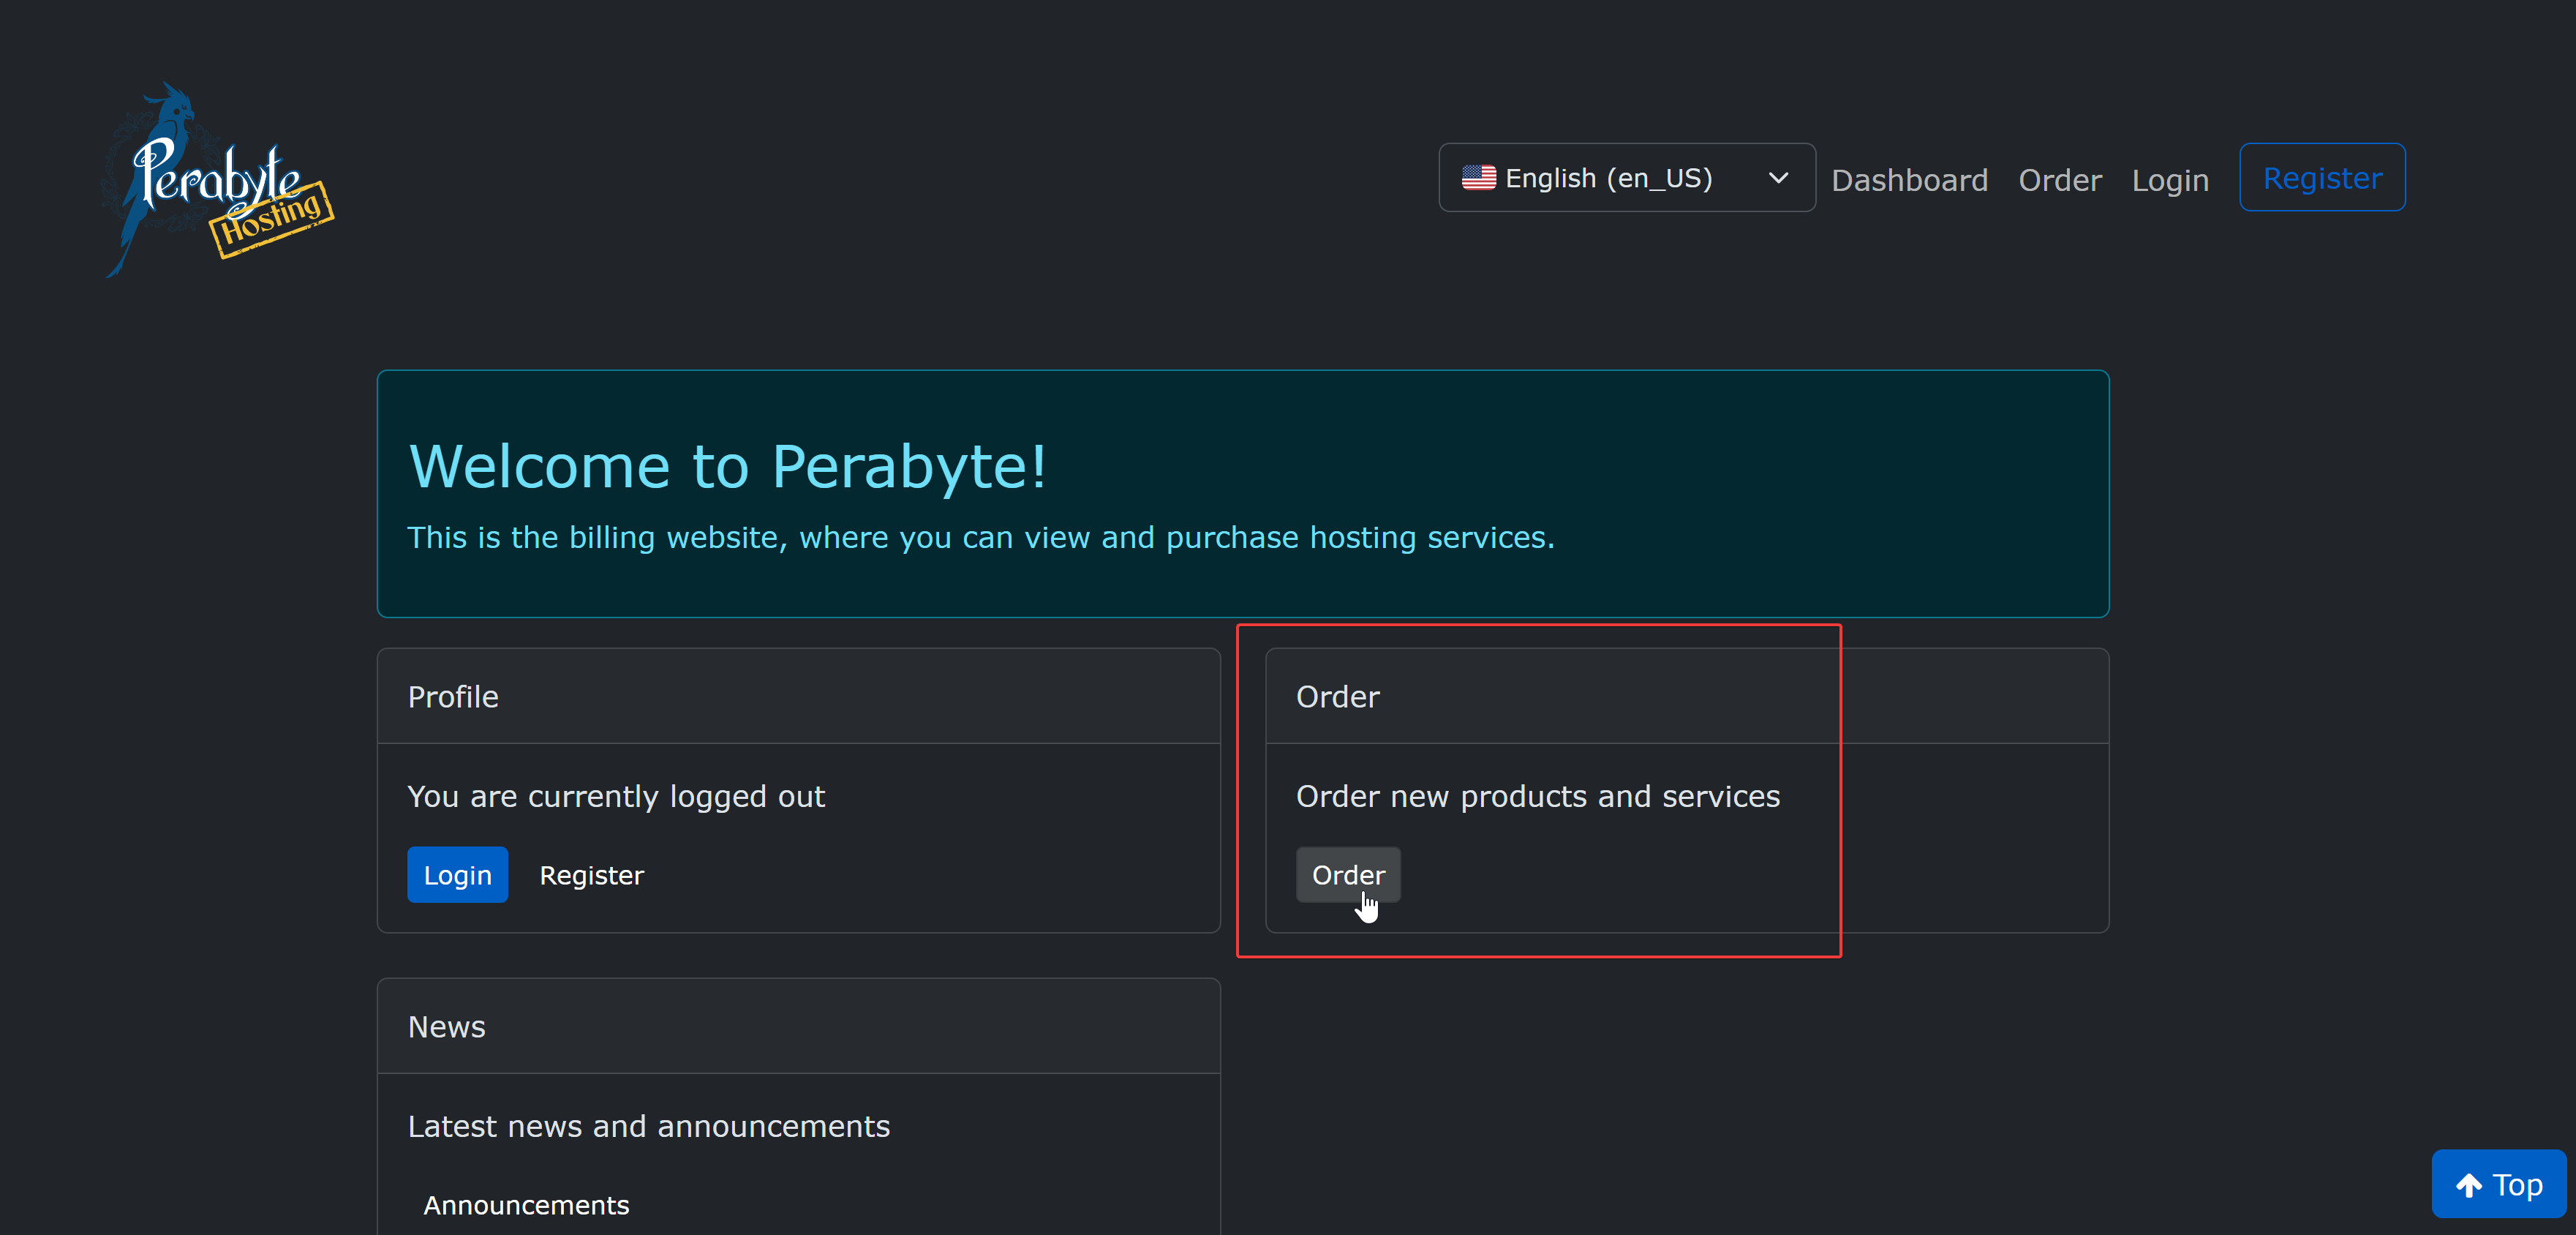
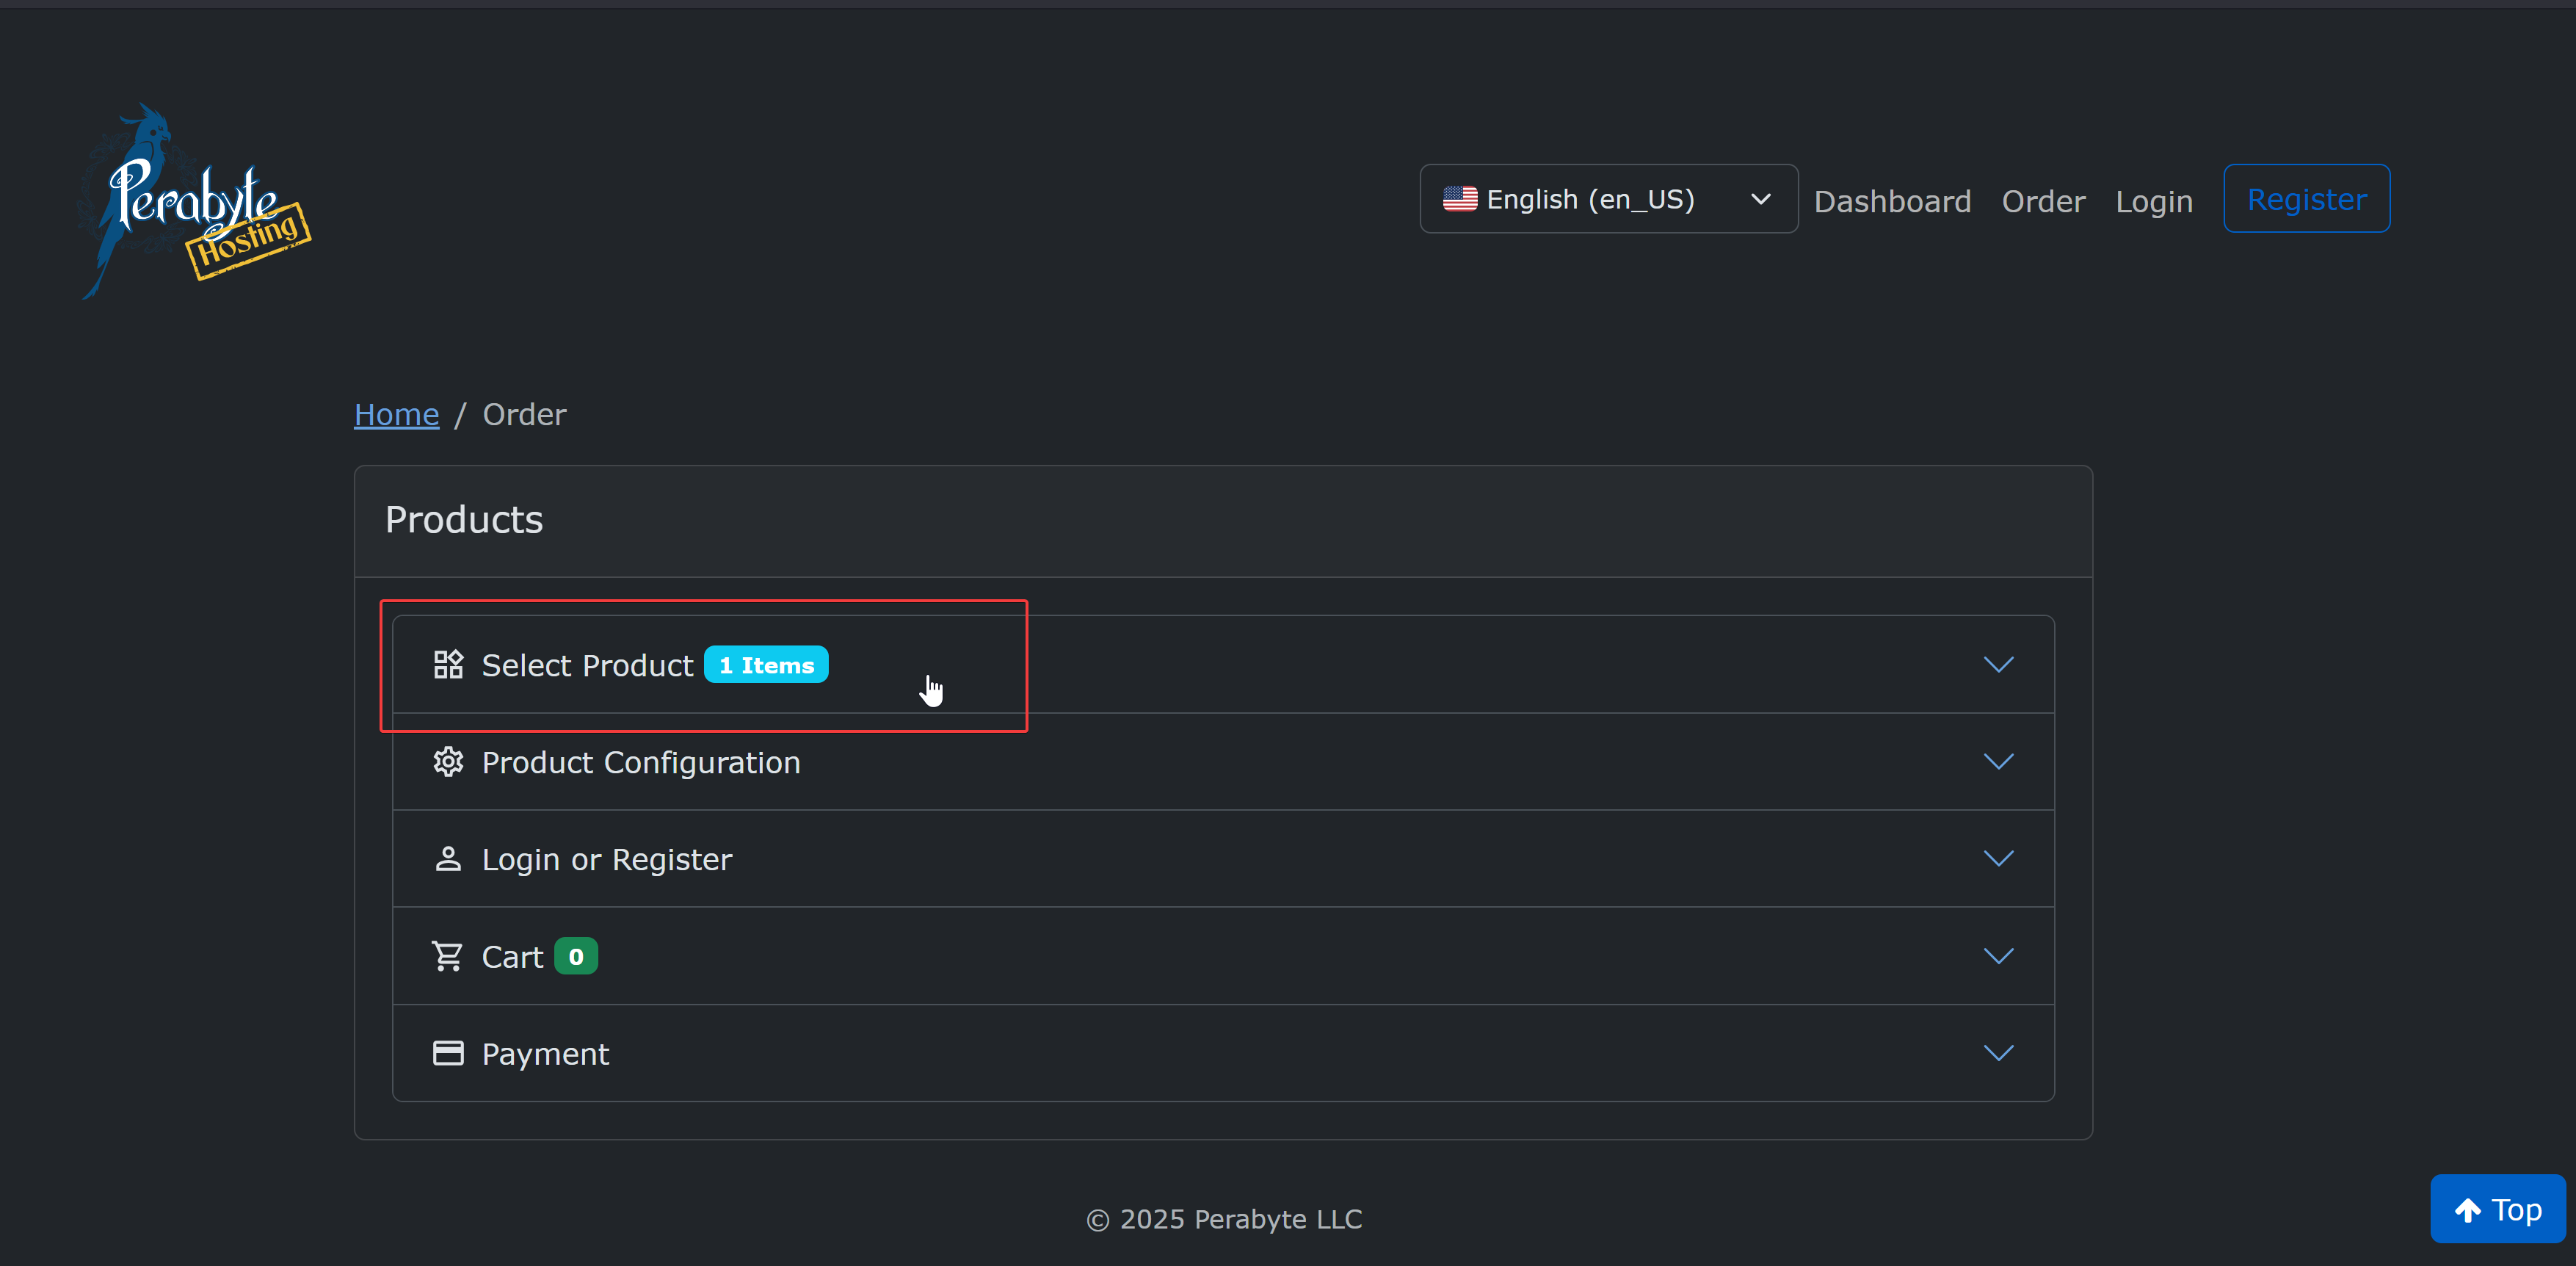
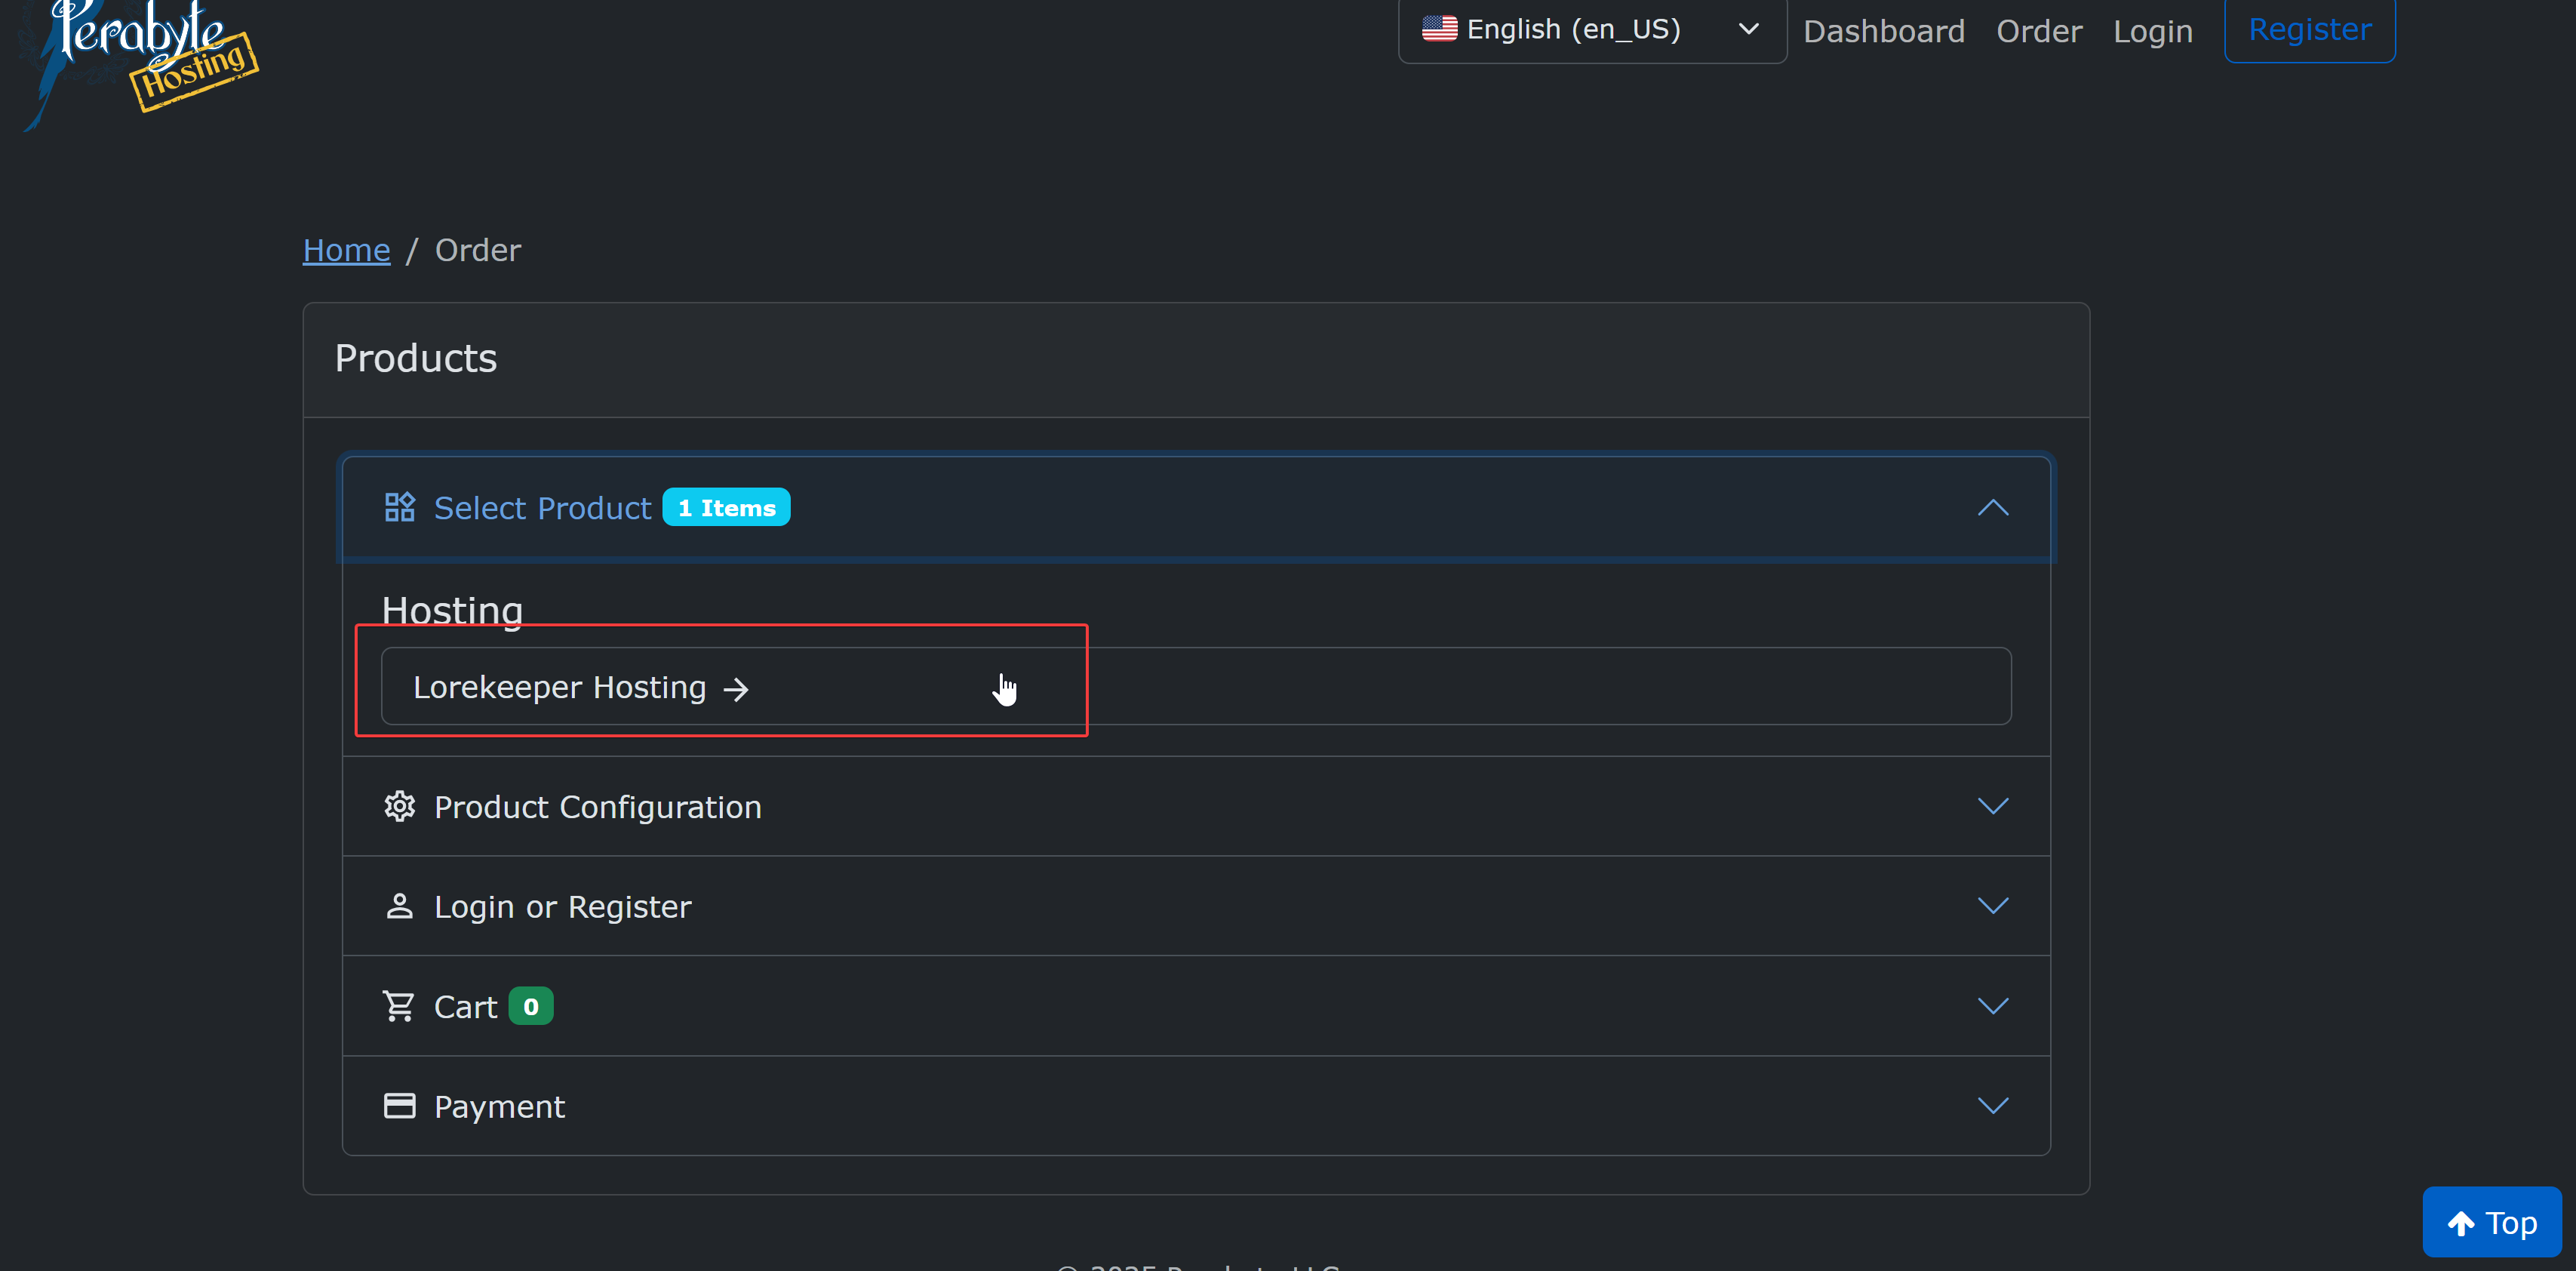
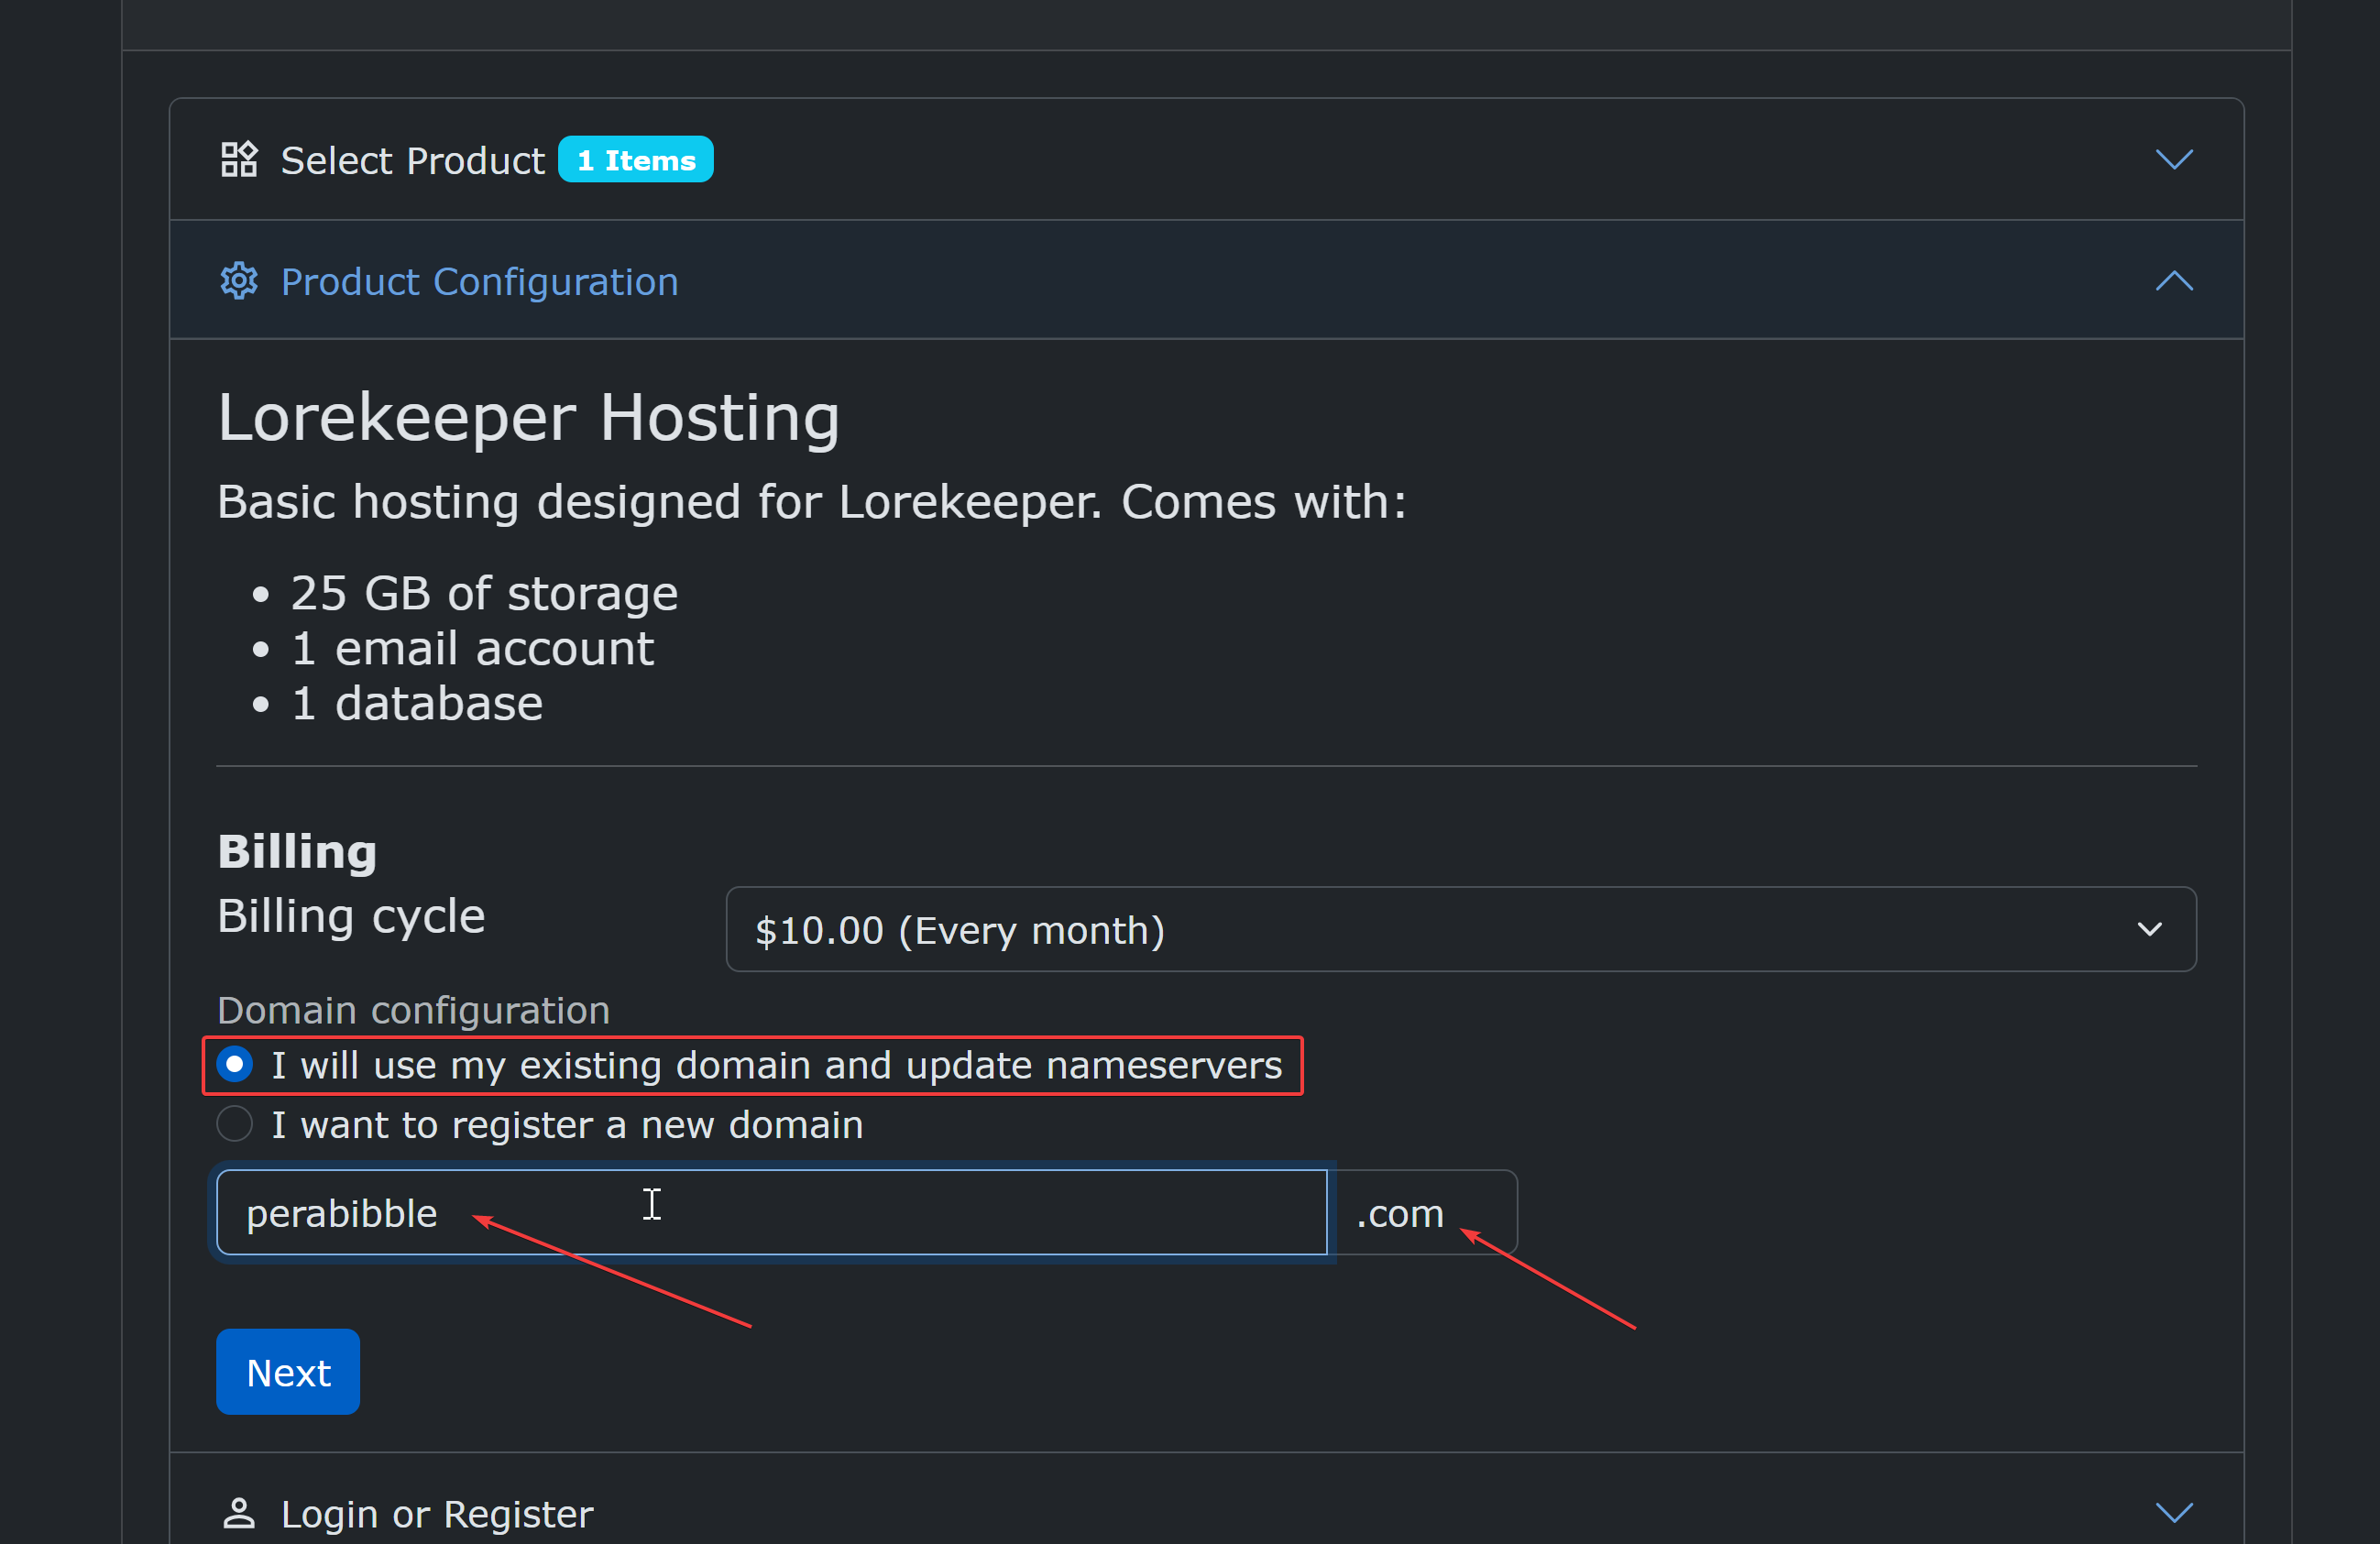
Click "Select Product" and then "Lorekeeper Hosting".
Click "I will use my existing domain and update nameservers", then type in the domain name you purchased. (You may need to click on the second box to change the ending if it does not end in .com). Double check and make sure you haven't entered any typos!
Next, create your account and purchase the hosting.
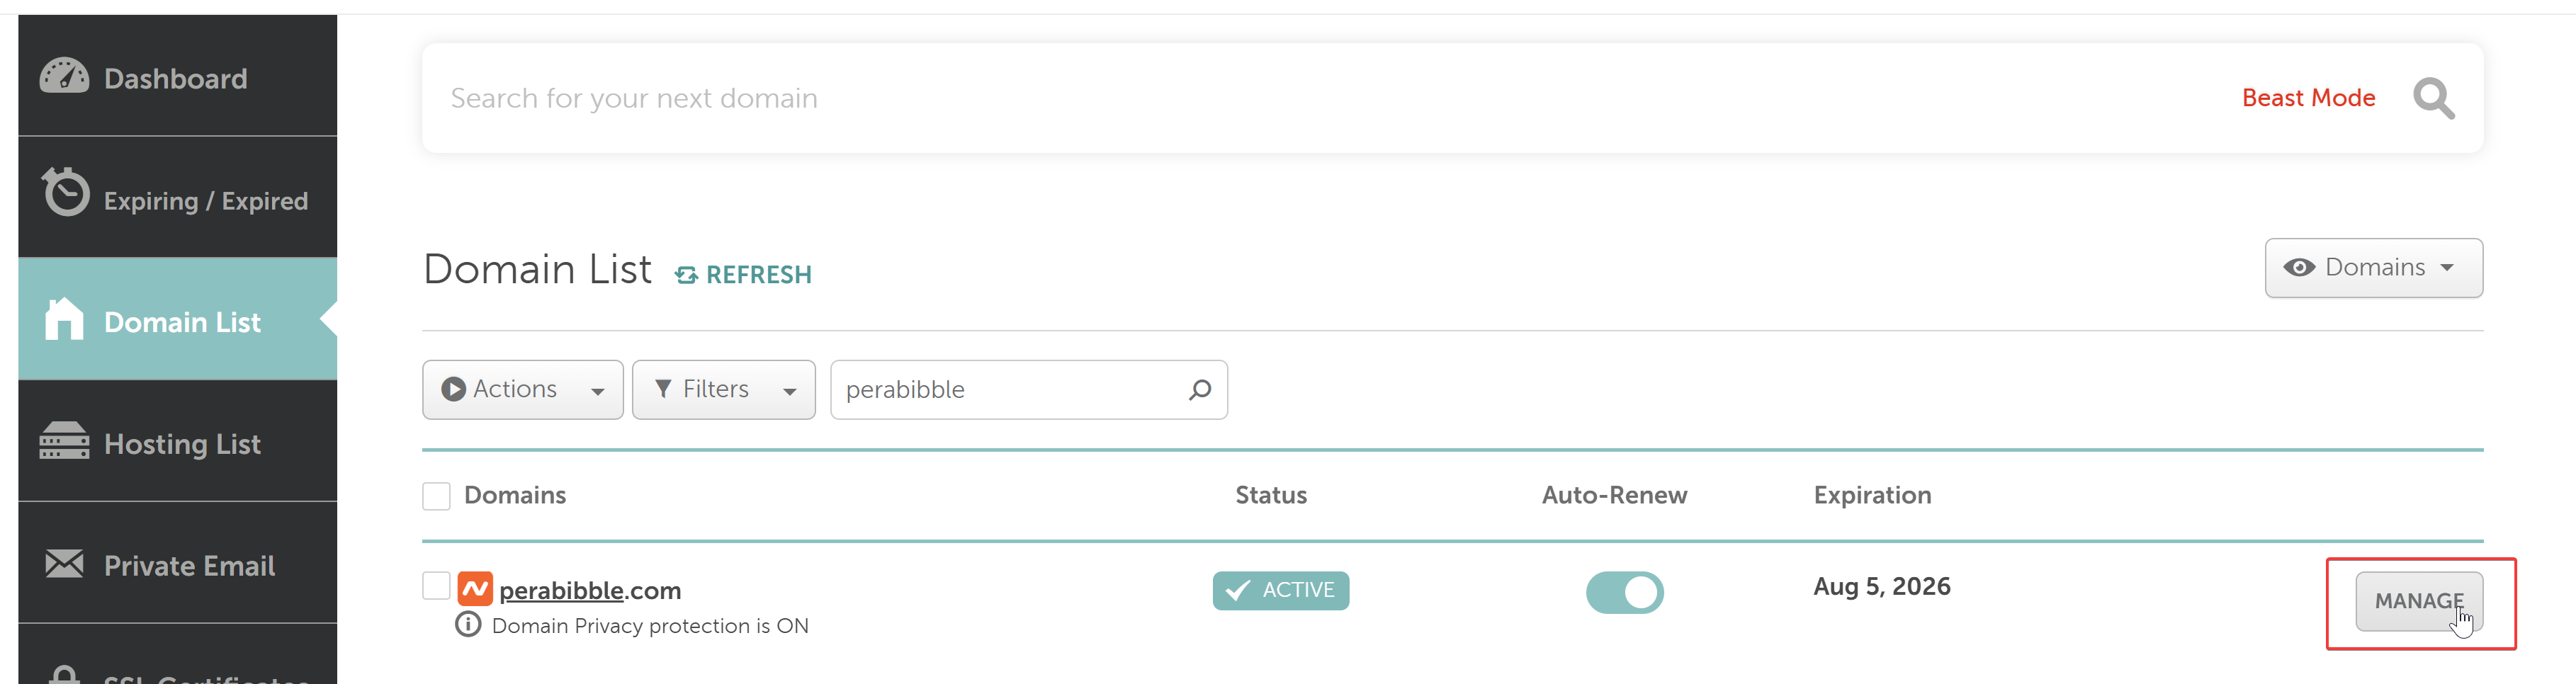
After you create your account, you should update the nameservers on your domain. Log in to Namecheap and click "Manage" next to your domain.
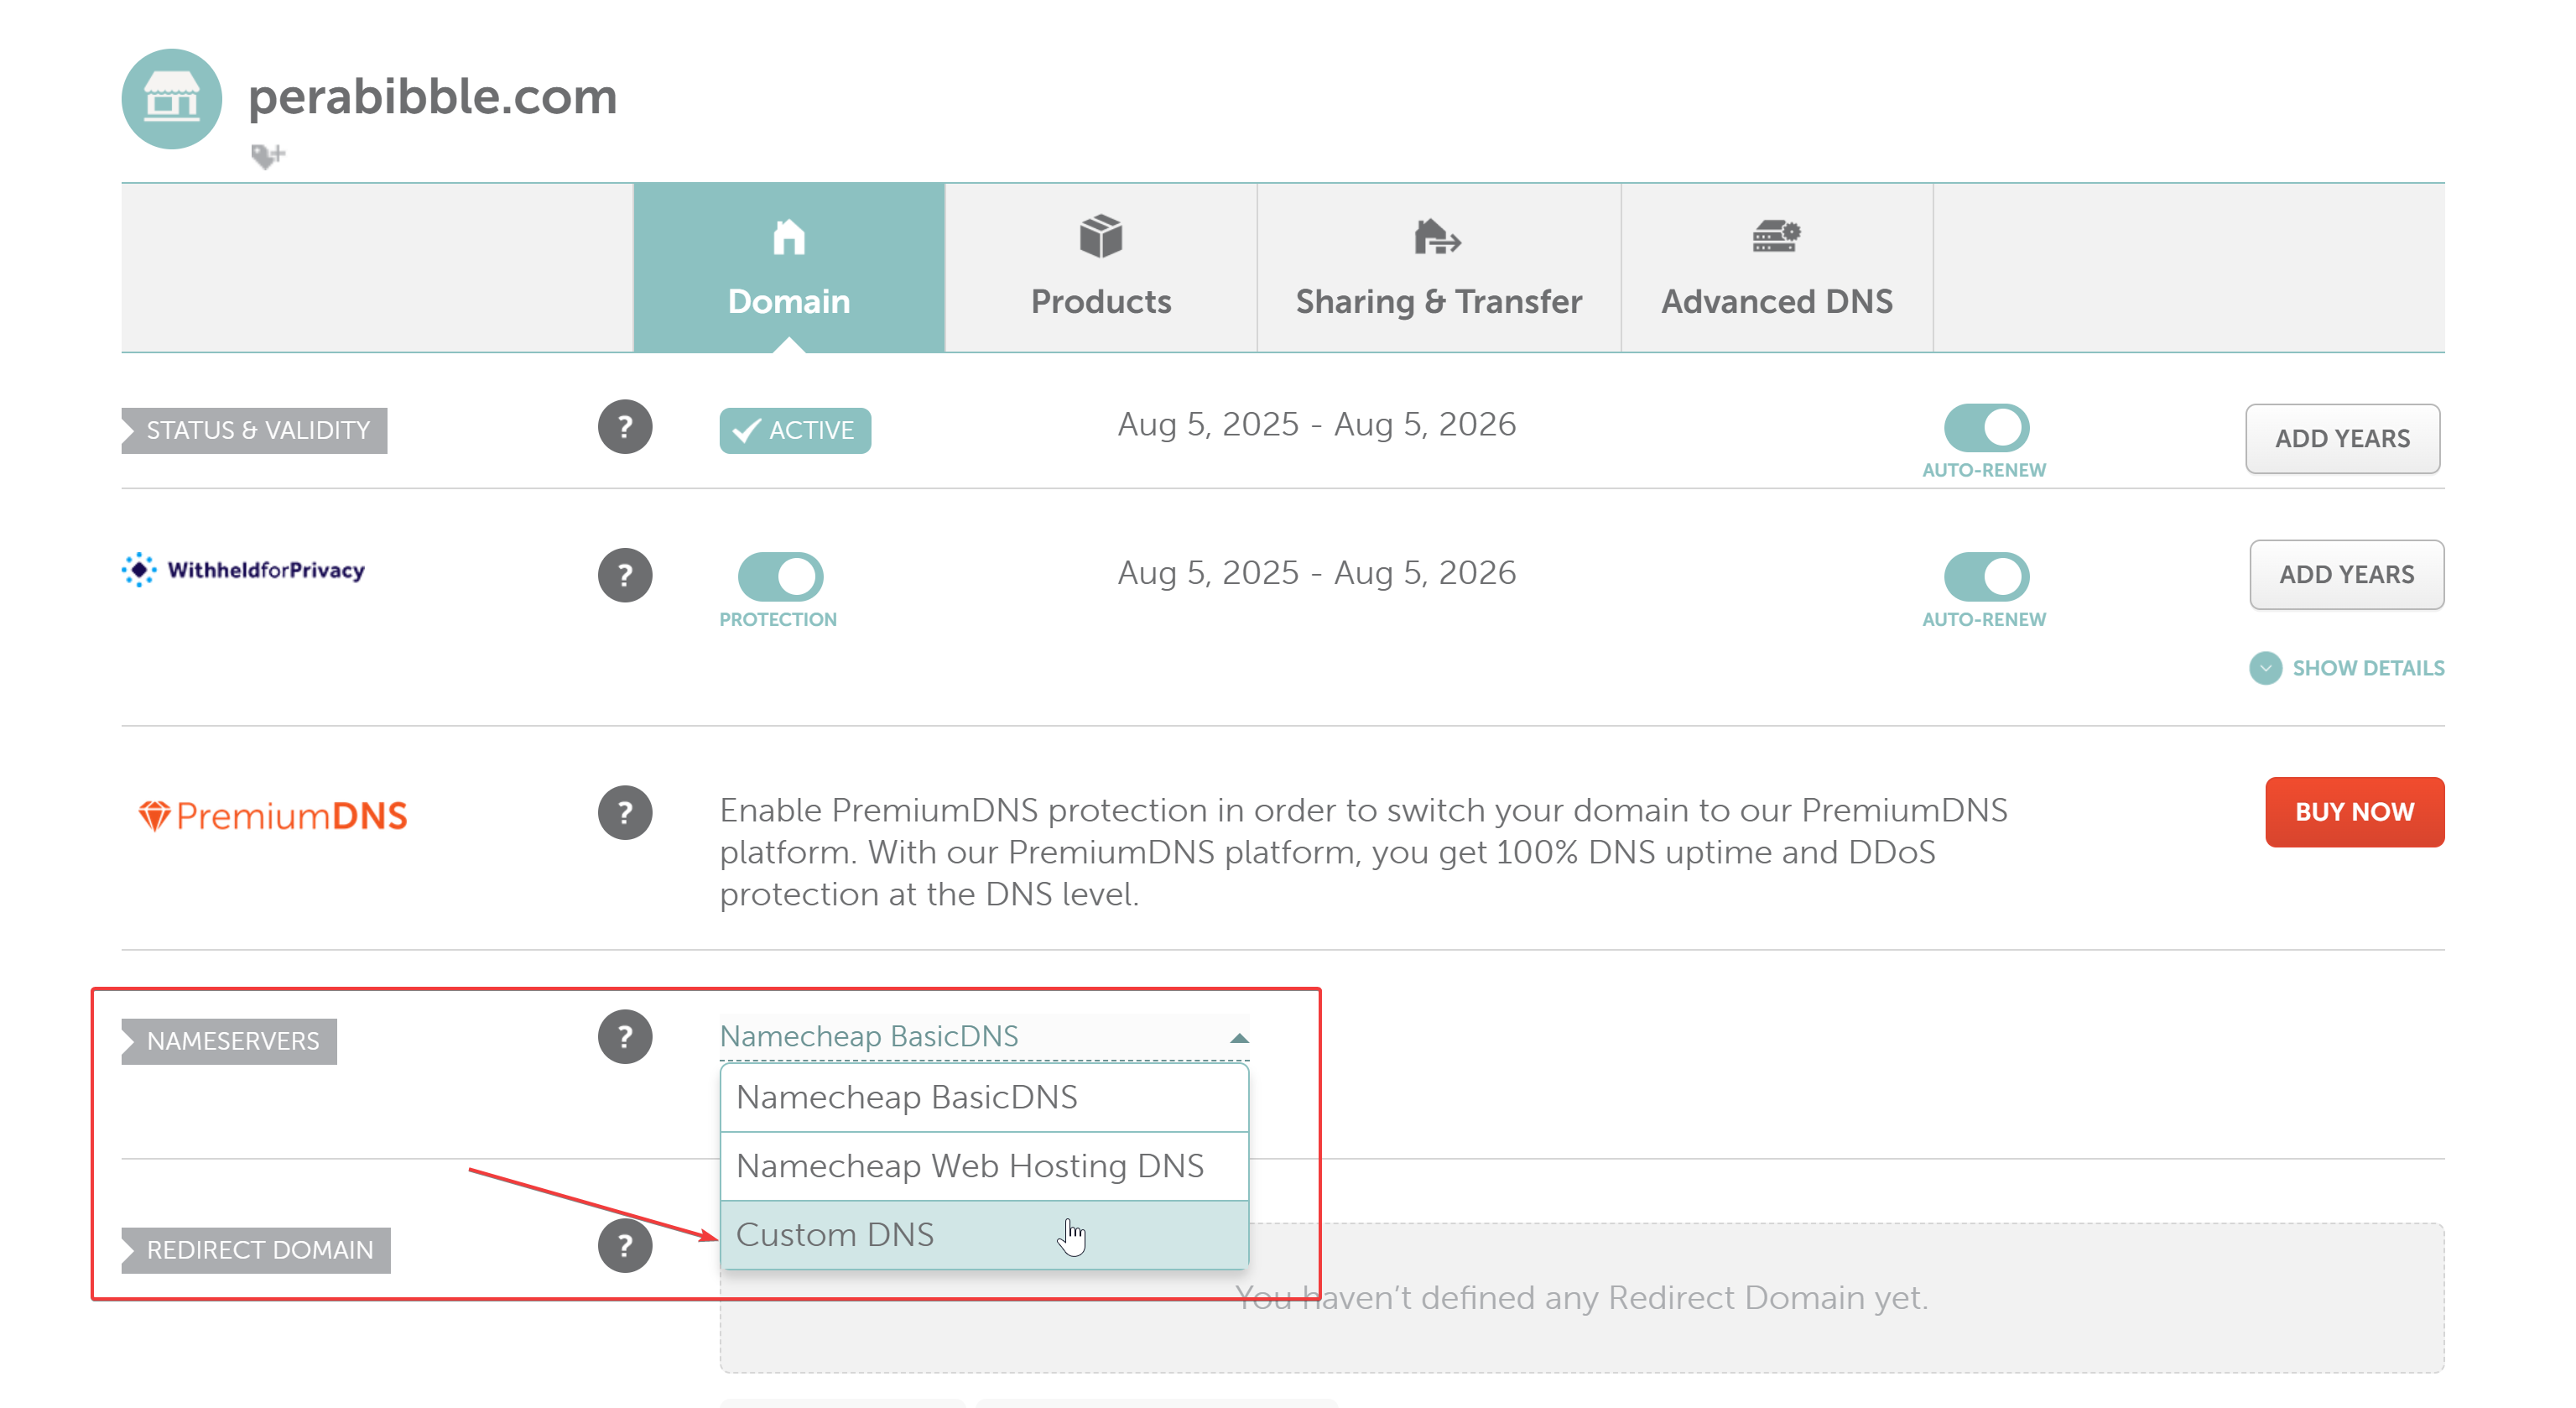
Under "Nameservers", click the dropdown and select "Custom DNS".
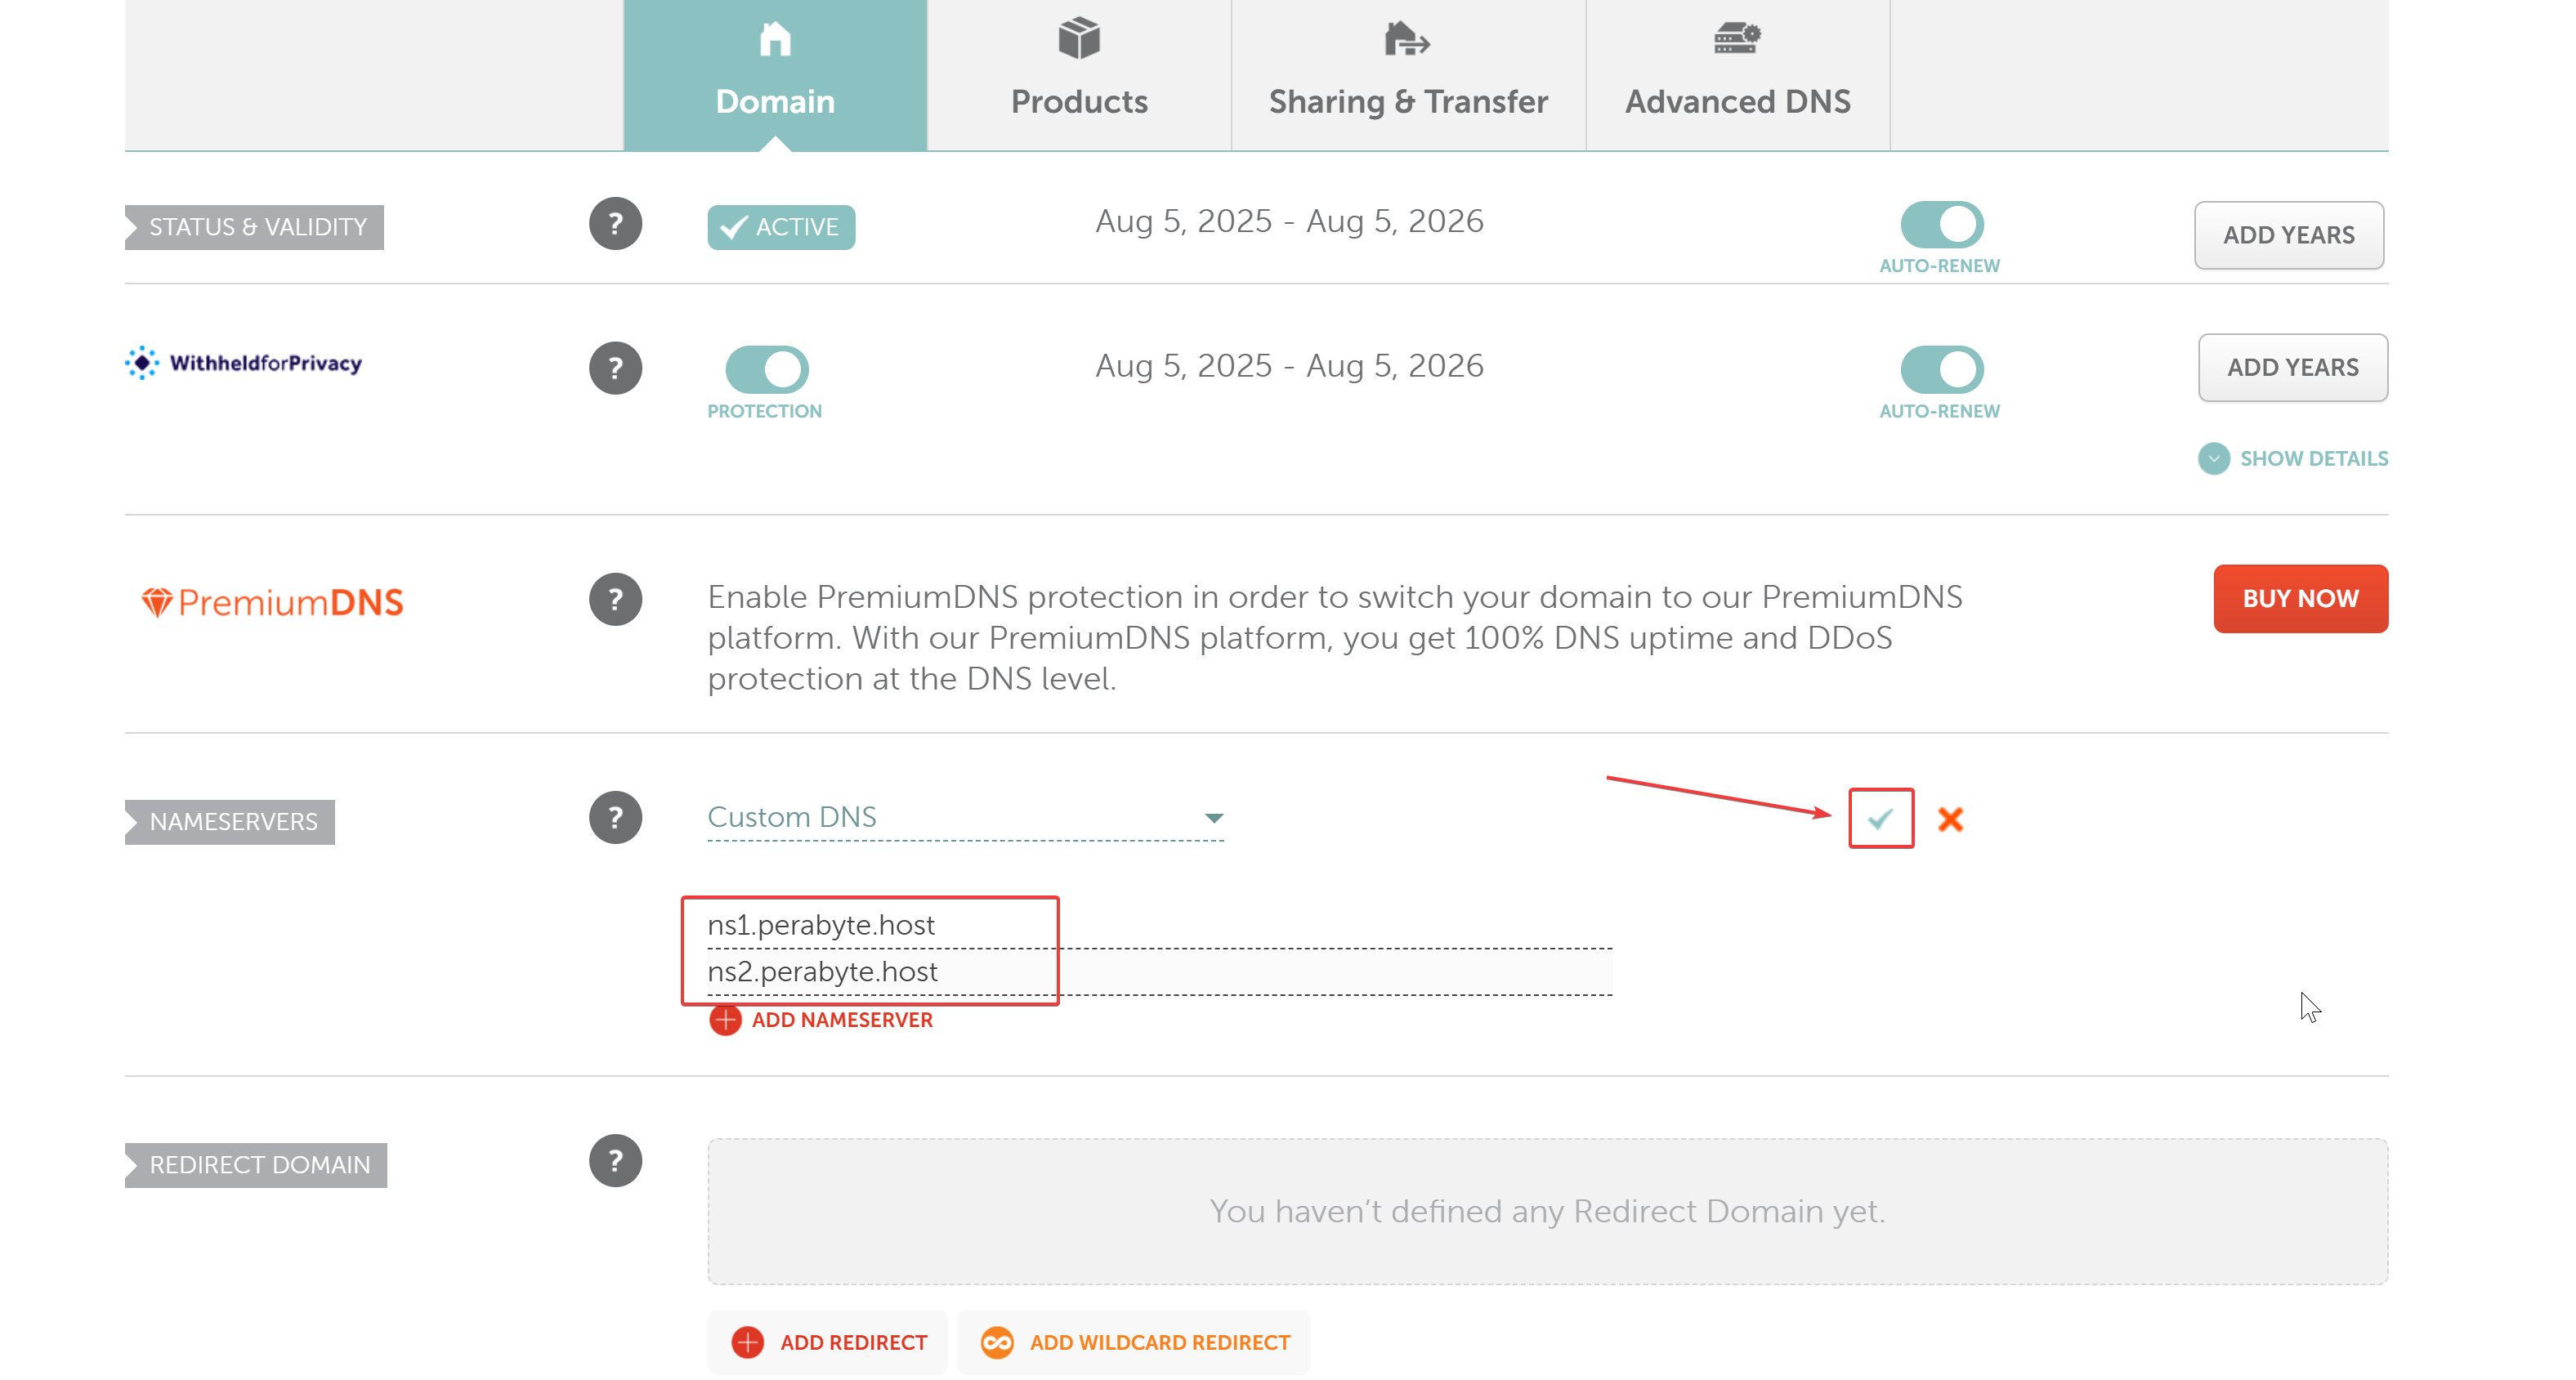
Enter in the two nameserver values ns1.perabyte.host and ns2.perabyte.host. Click the green checkmark to save.
This may take a minute to save. Be patient and don't tab off the page!
Next, you will need to wait for your account to be activated. This is to prevent abuse/spam, as well as perform a manual part of the initial configuration. I check recent orders very regularly during daytime hours CST, so as long as you order within CST daytime hours, it shouldn't be more than a few hours before I see it.
Control Panel Login Setup
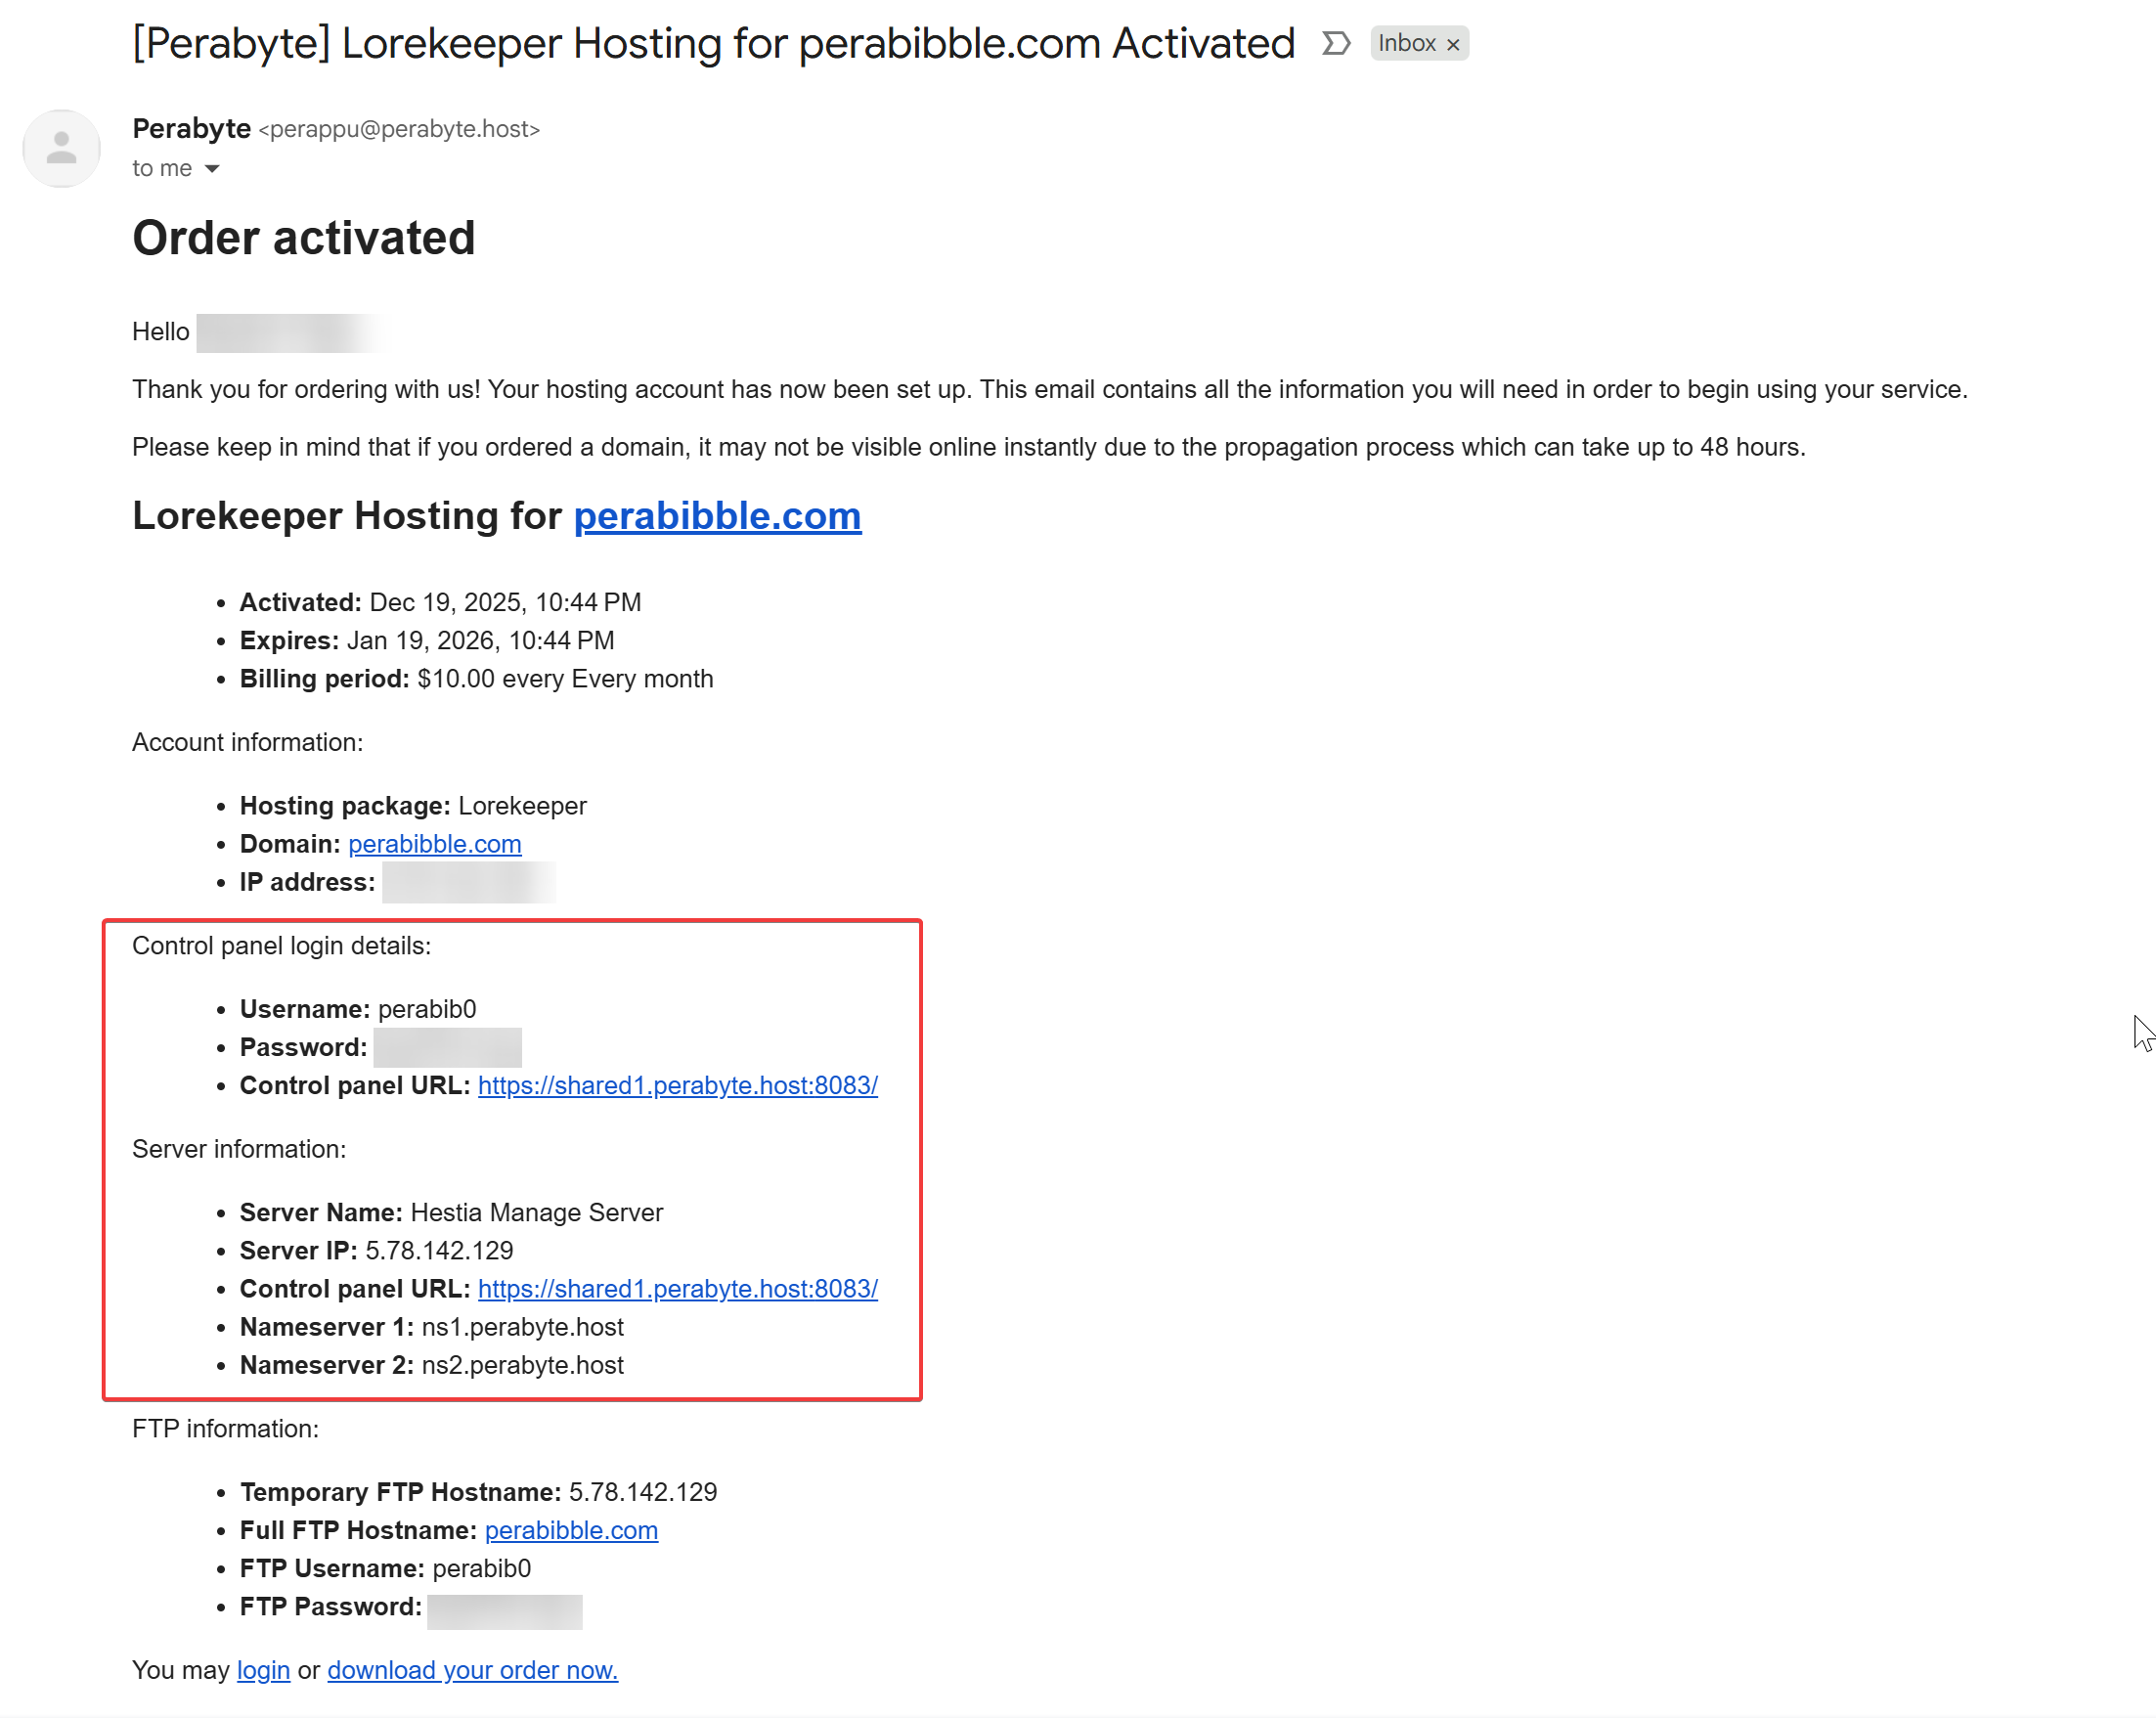
After activation, you will have automatically received an email with your server login details. If you didn't receive this email, check your spam. It will be sent from perappu@perabyte.host. Save the details in the Control panel login details section. These will be extremely important!
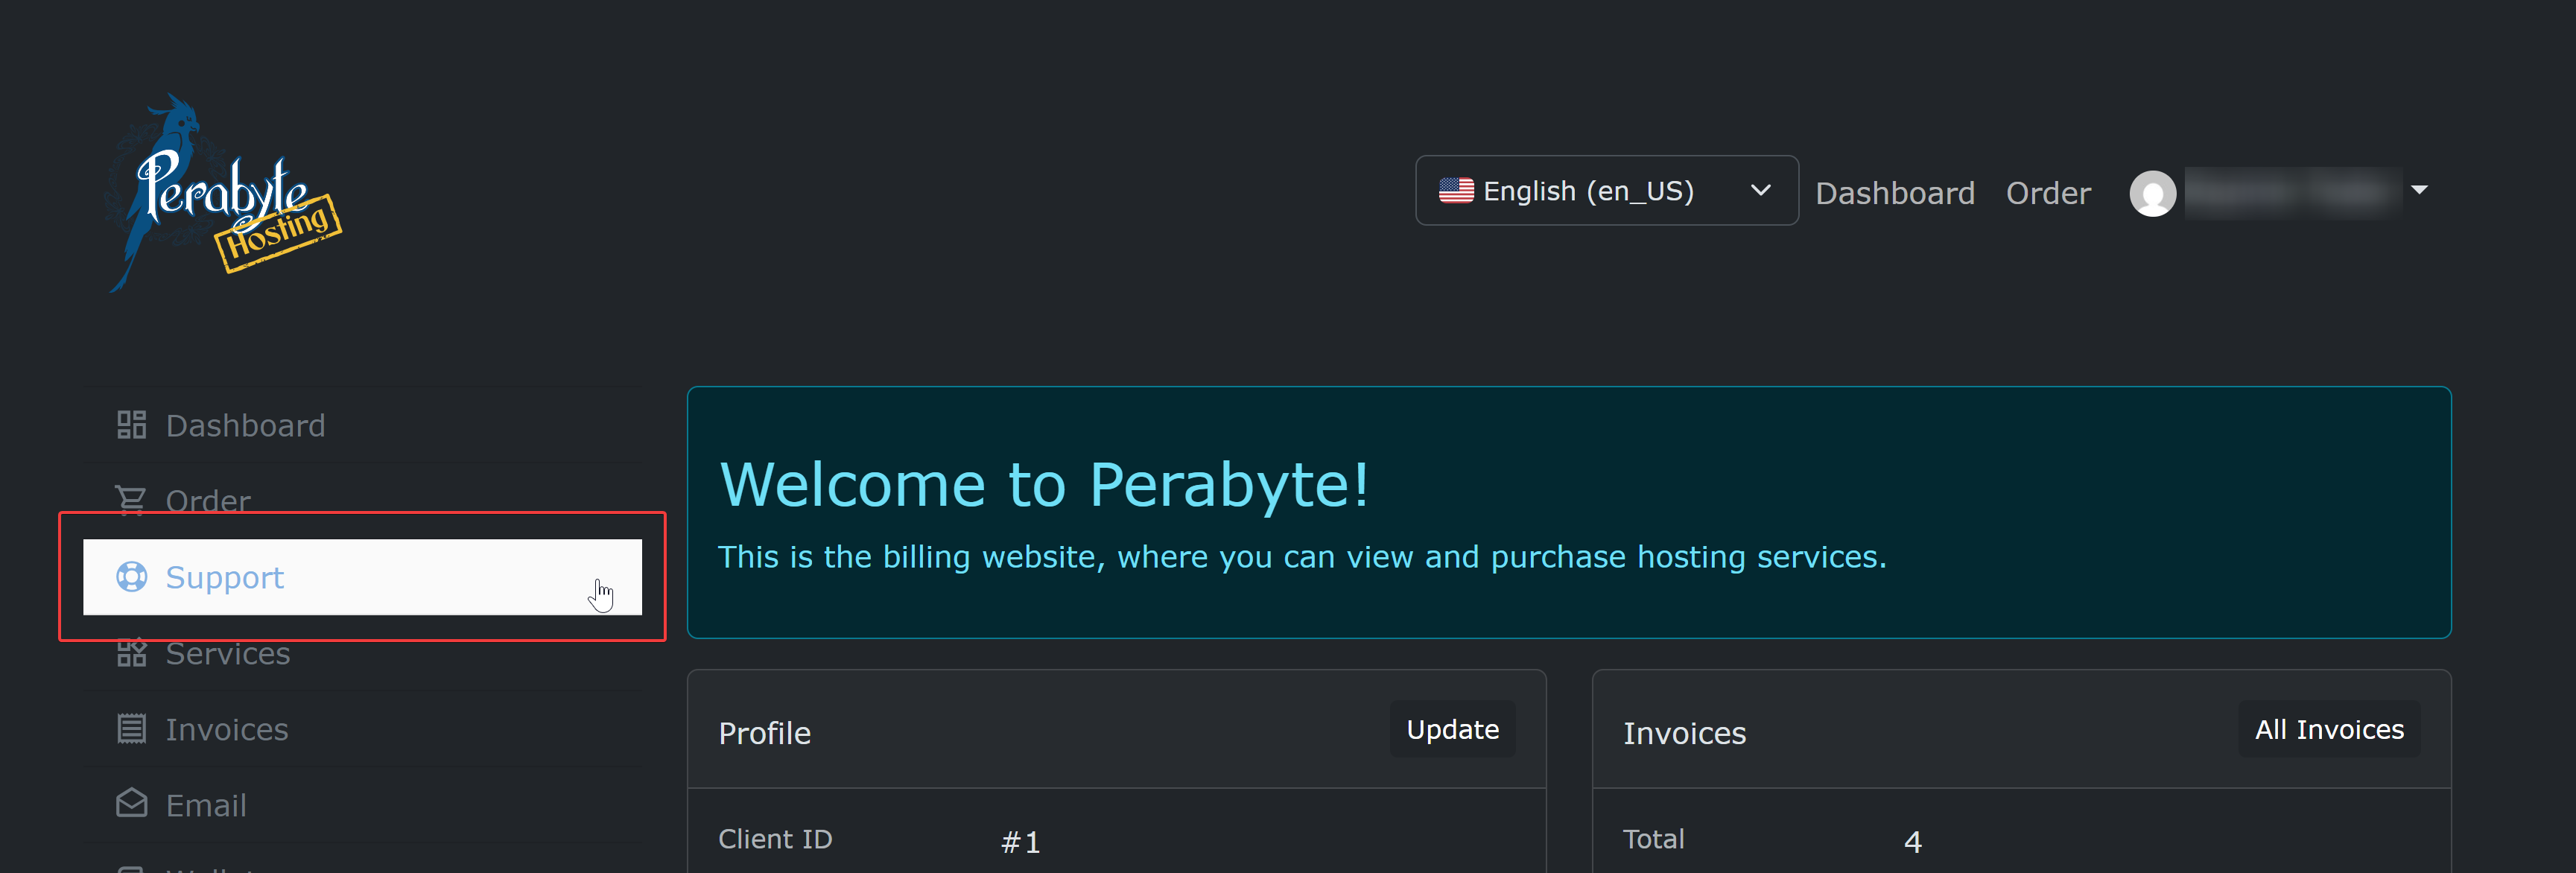
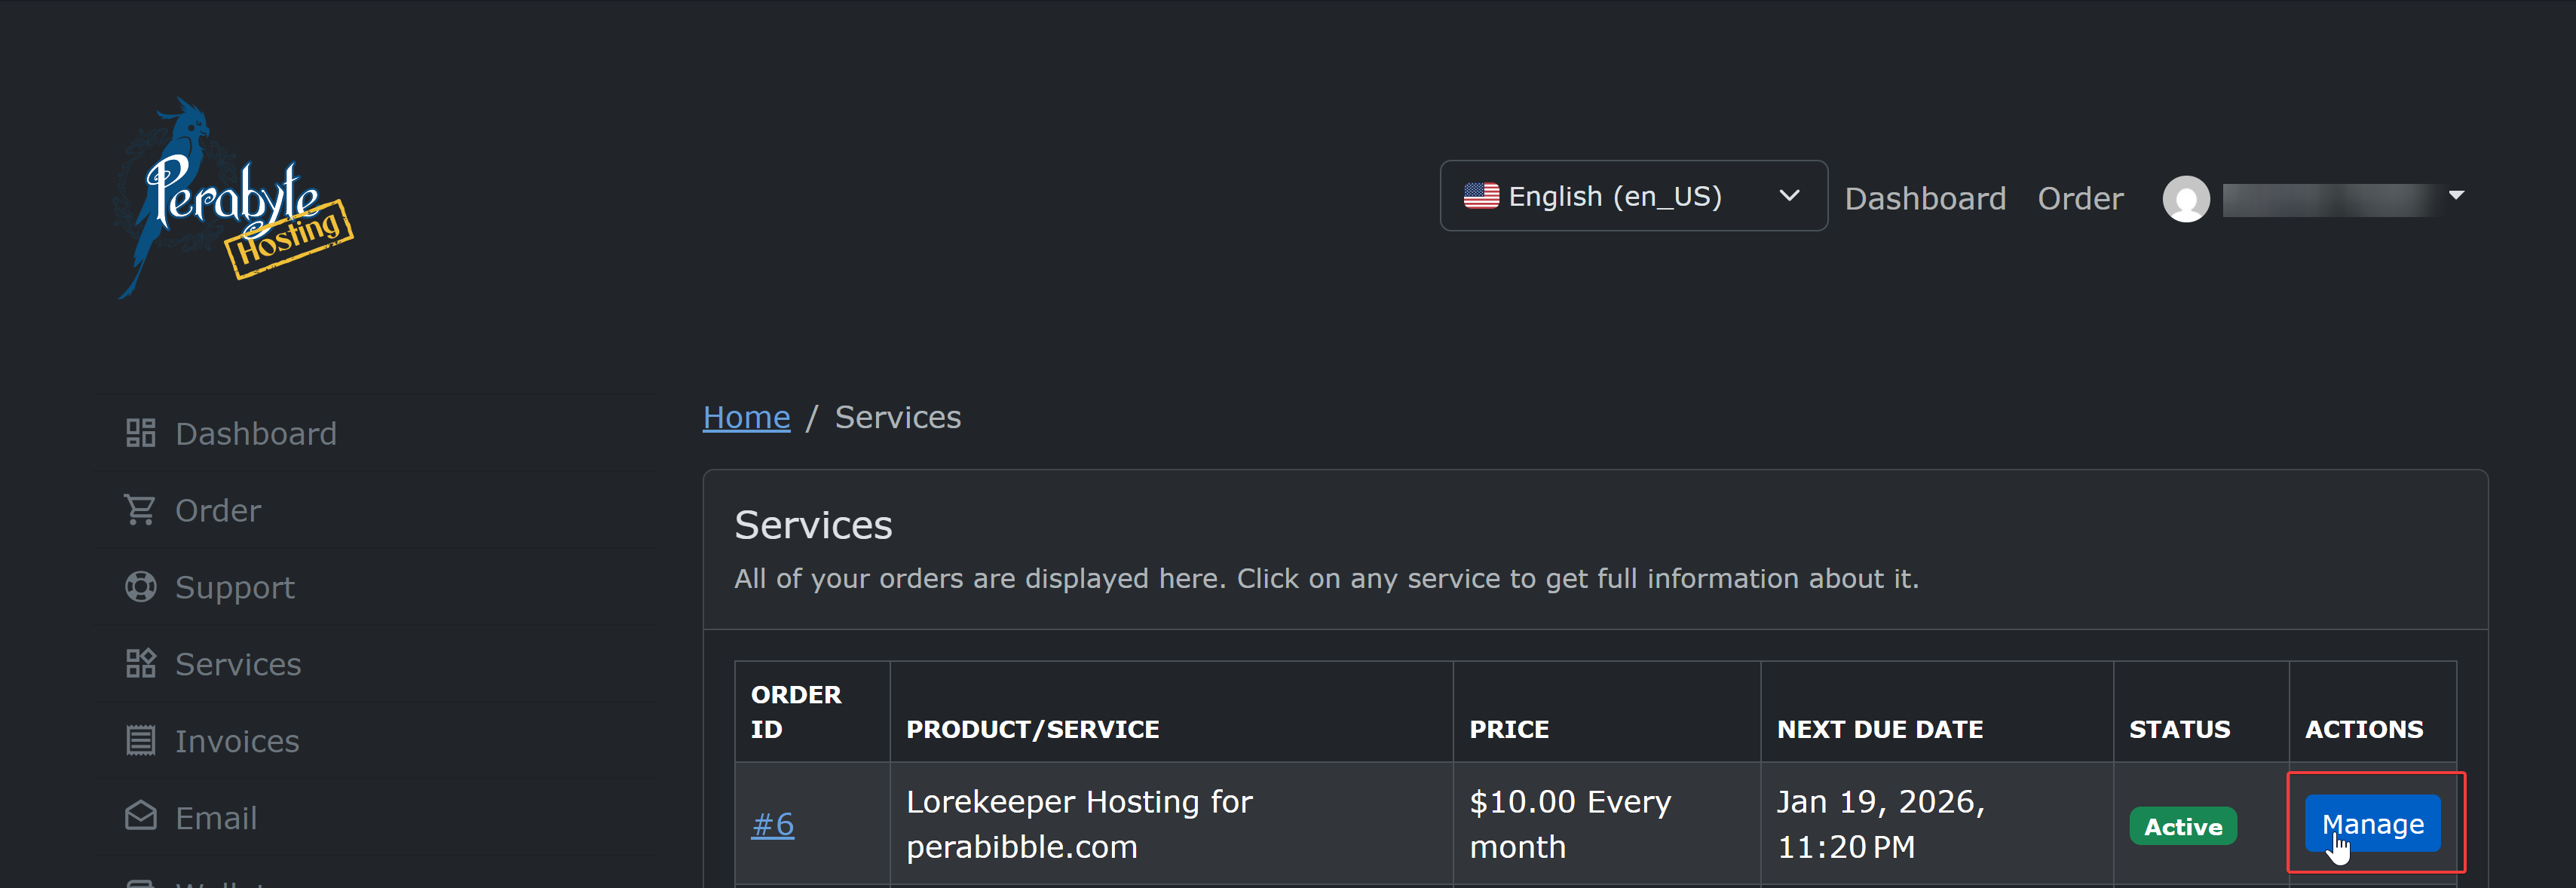
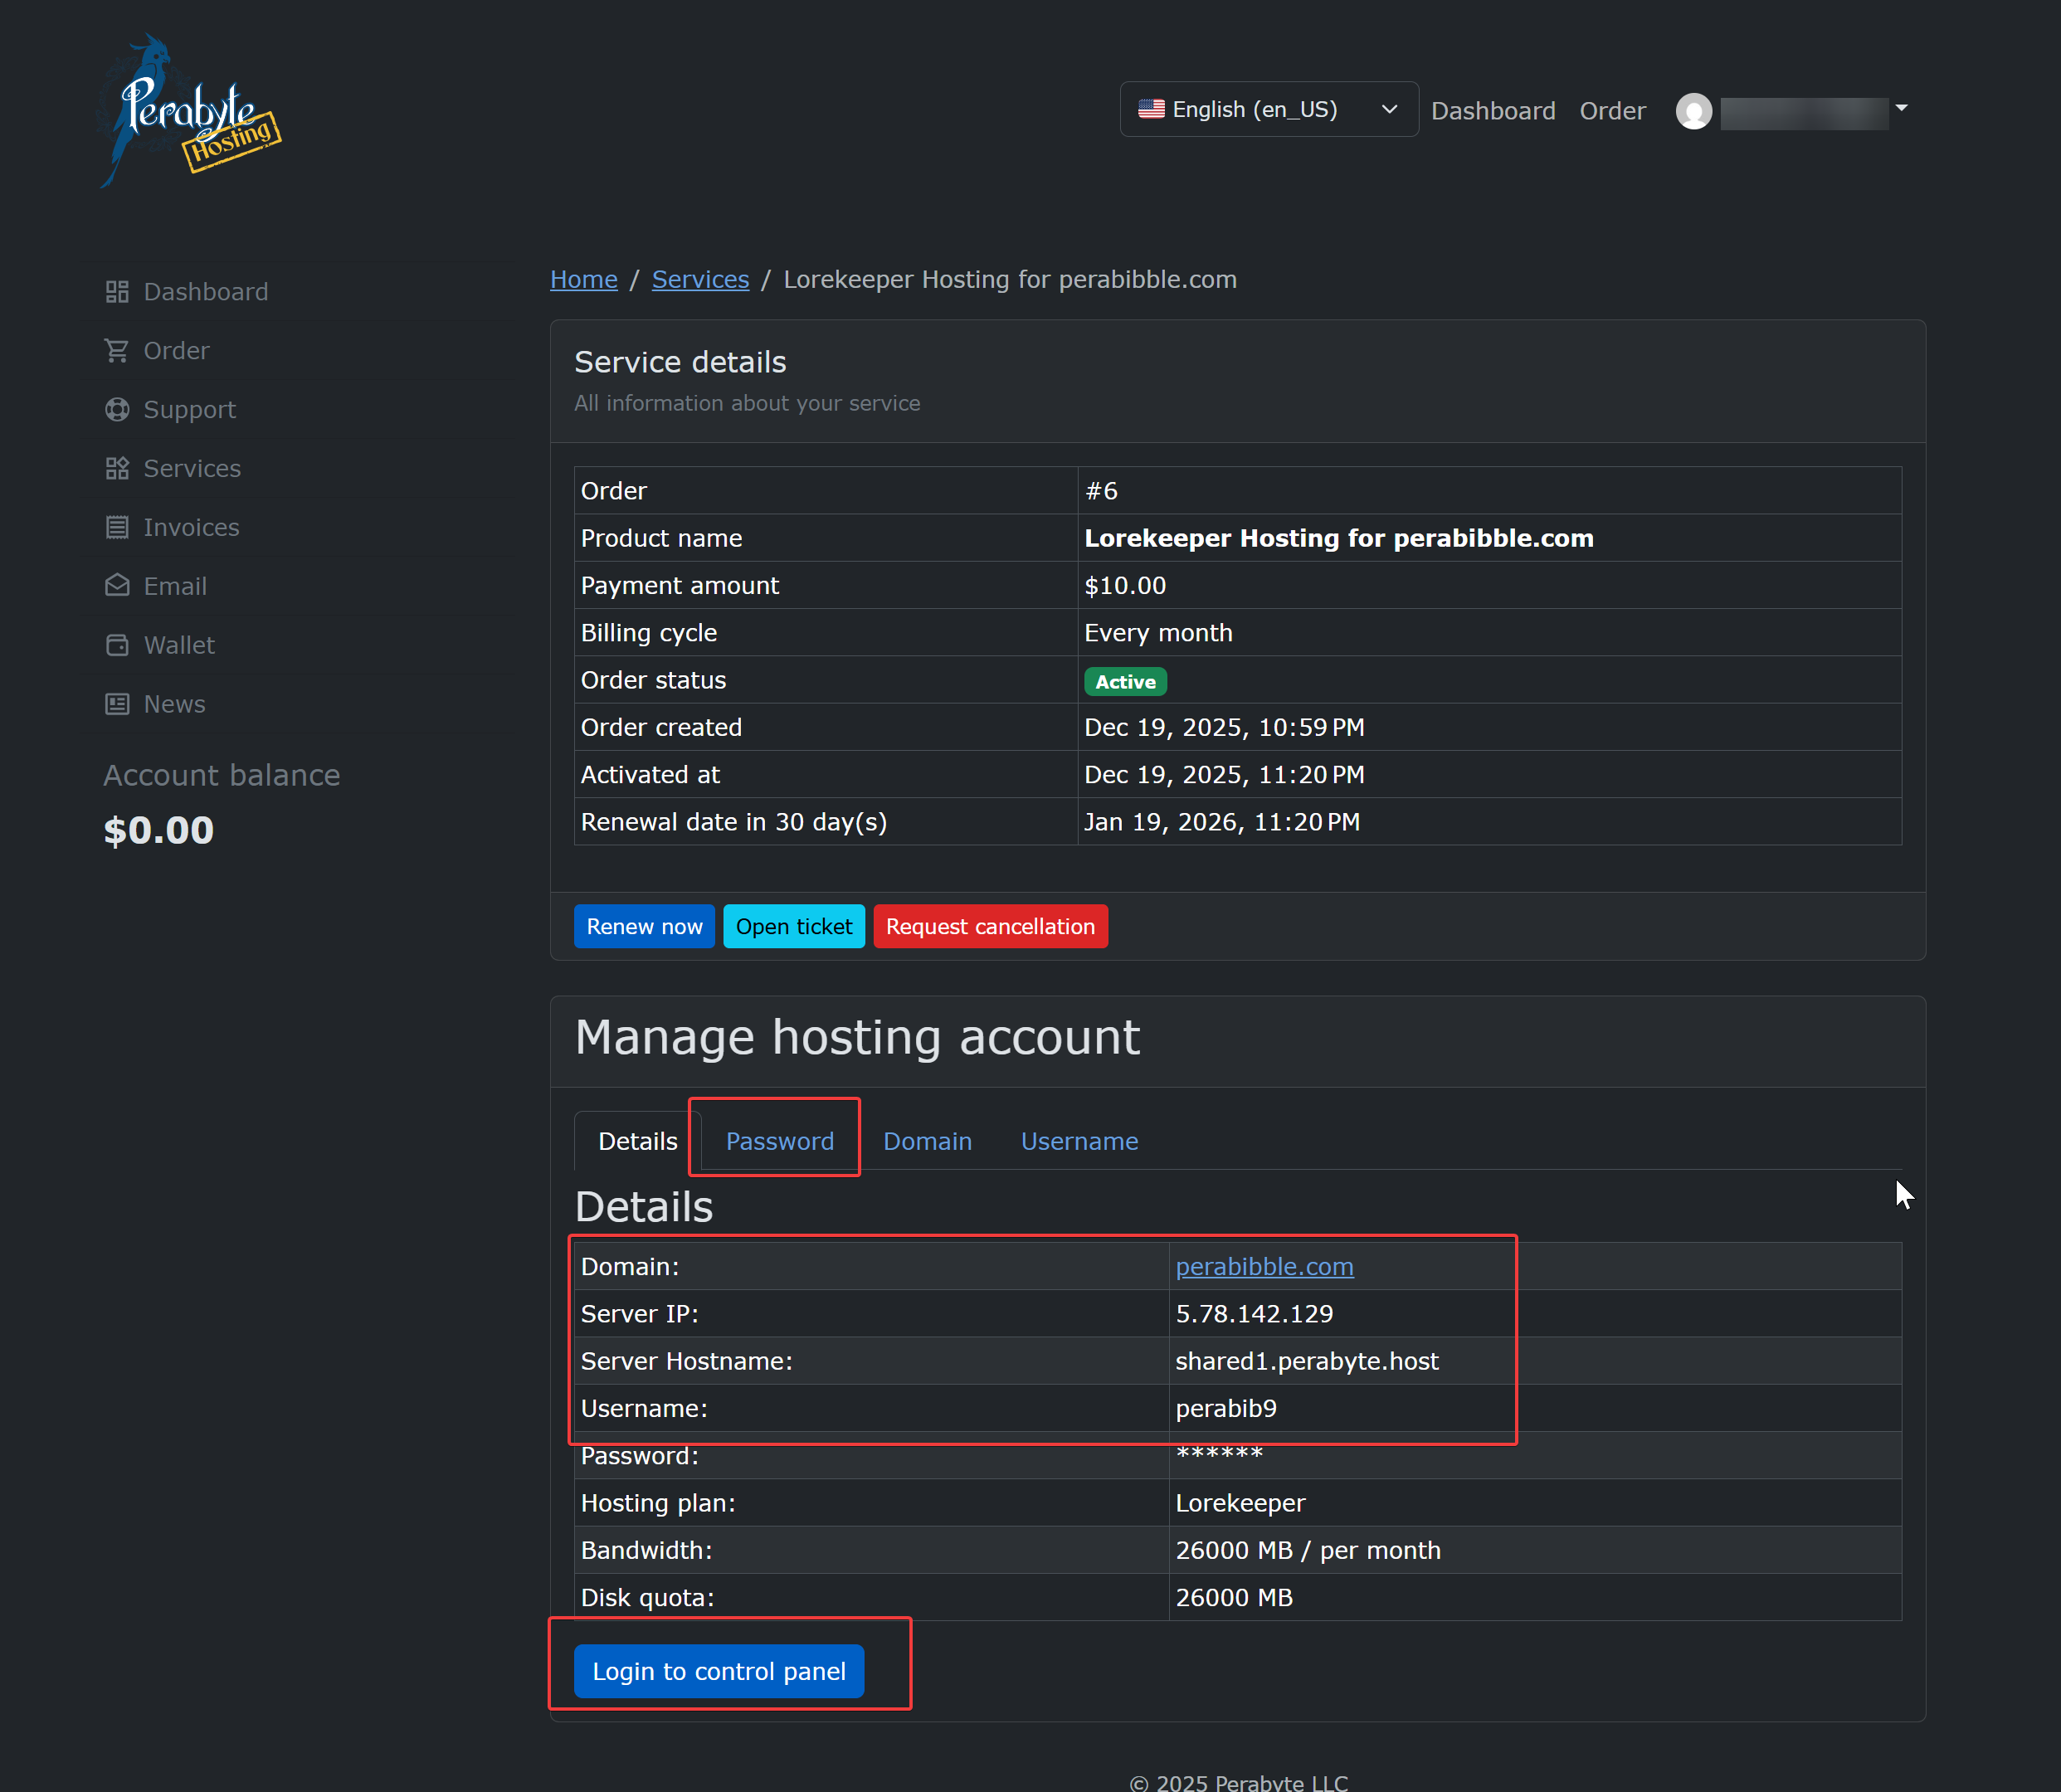
If the email failed to arrive at all, that's OK! Log into billing.perabyte.host and click on "Services" then click "Manage" next to your hosting. Scroll down and you will find a place where you can reset your password, as well as view your assigned username and a link to the control panel.
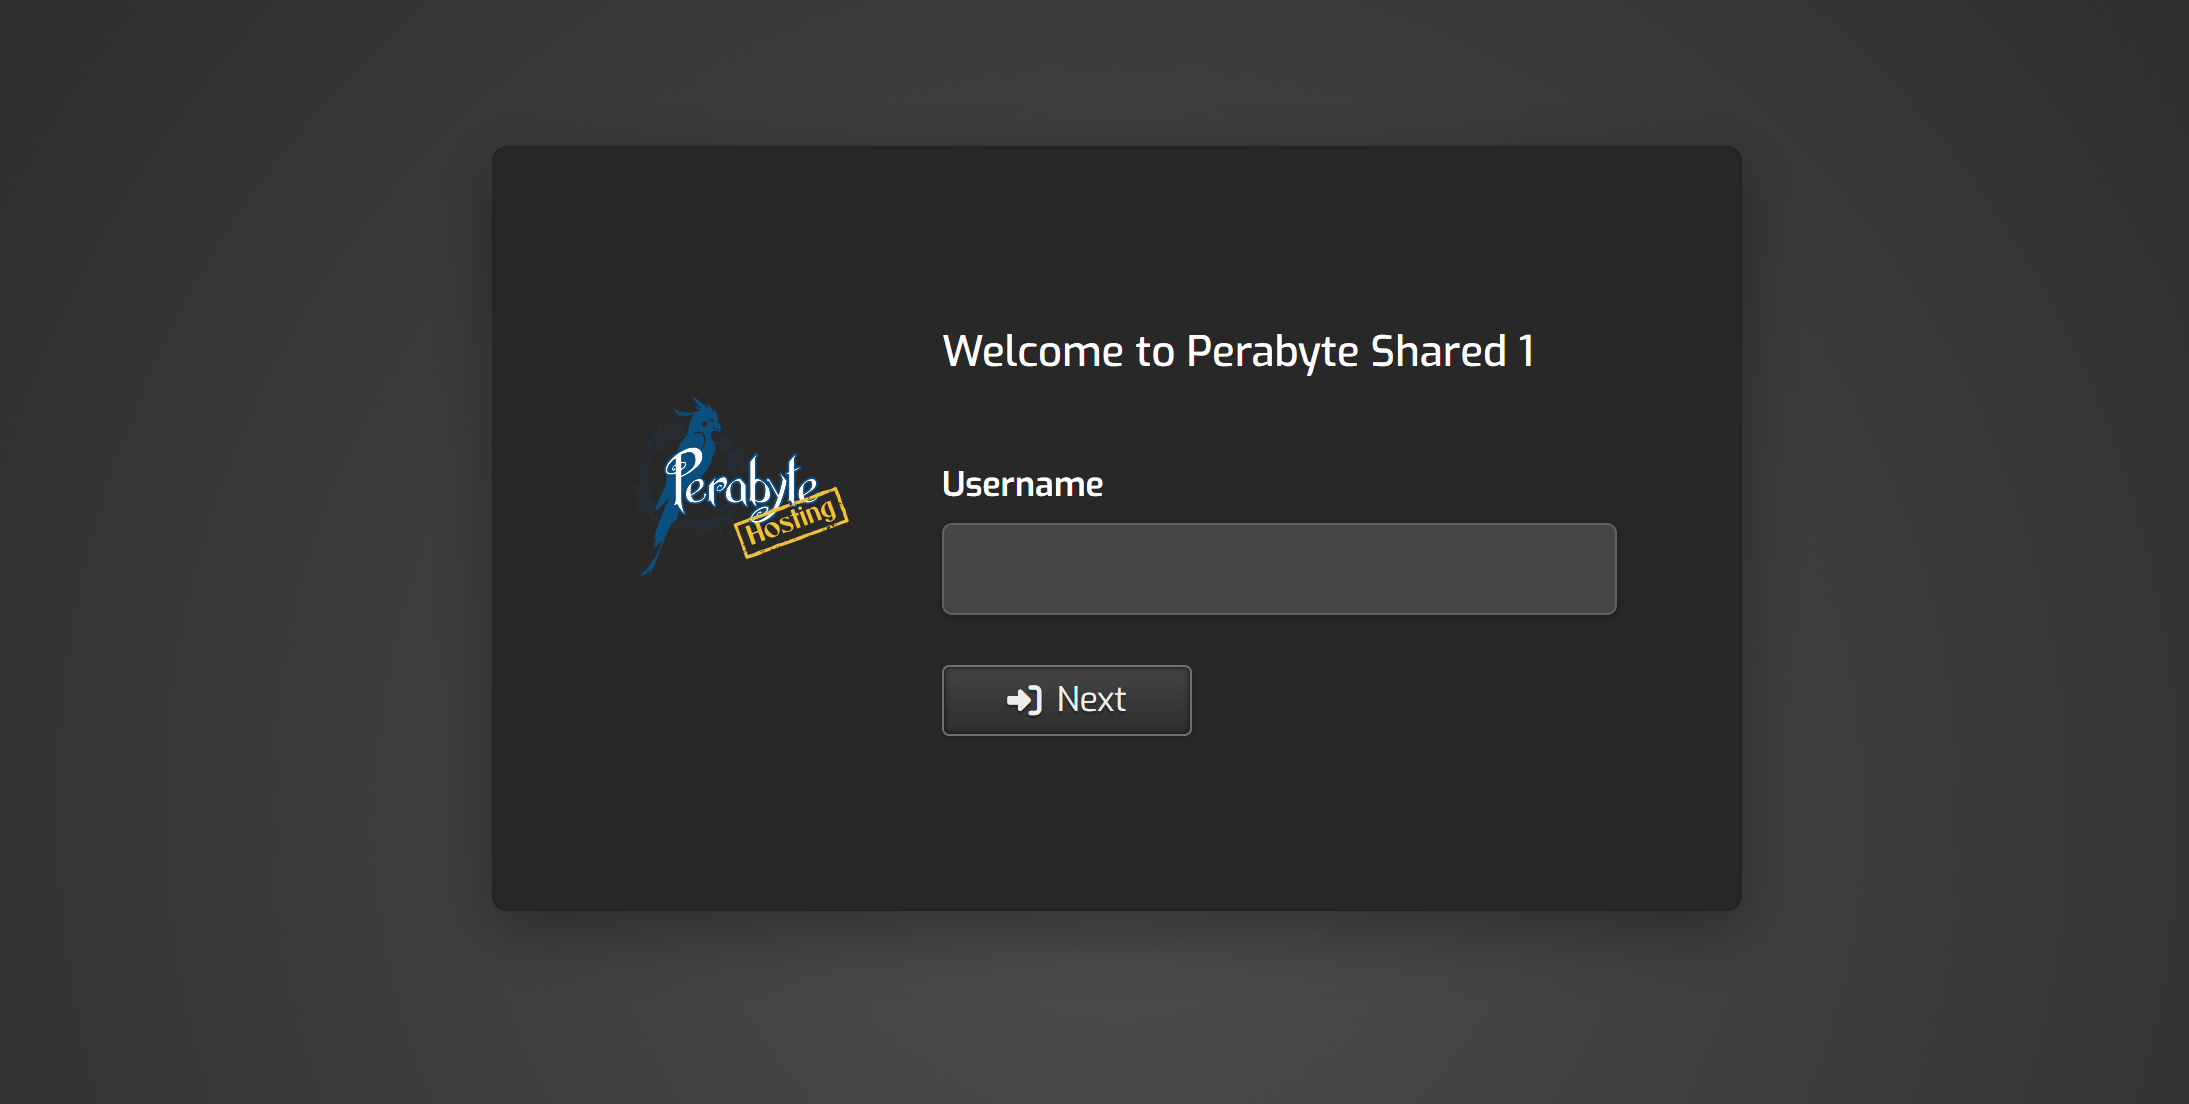
Go to the website listed as your "Control Panel URL". In my case, that's shared1.perabyte.host. You should be presented with this screen. Enter the username and password provided in the email.
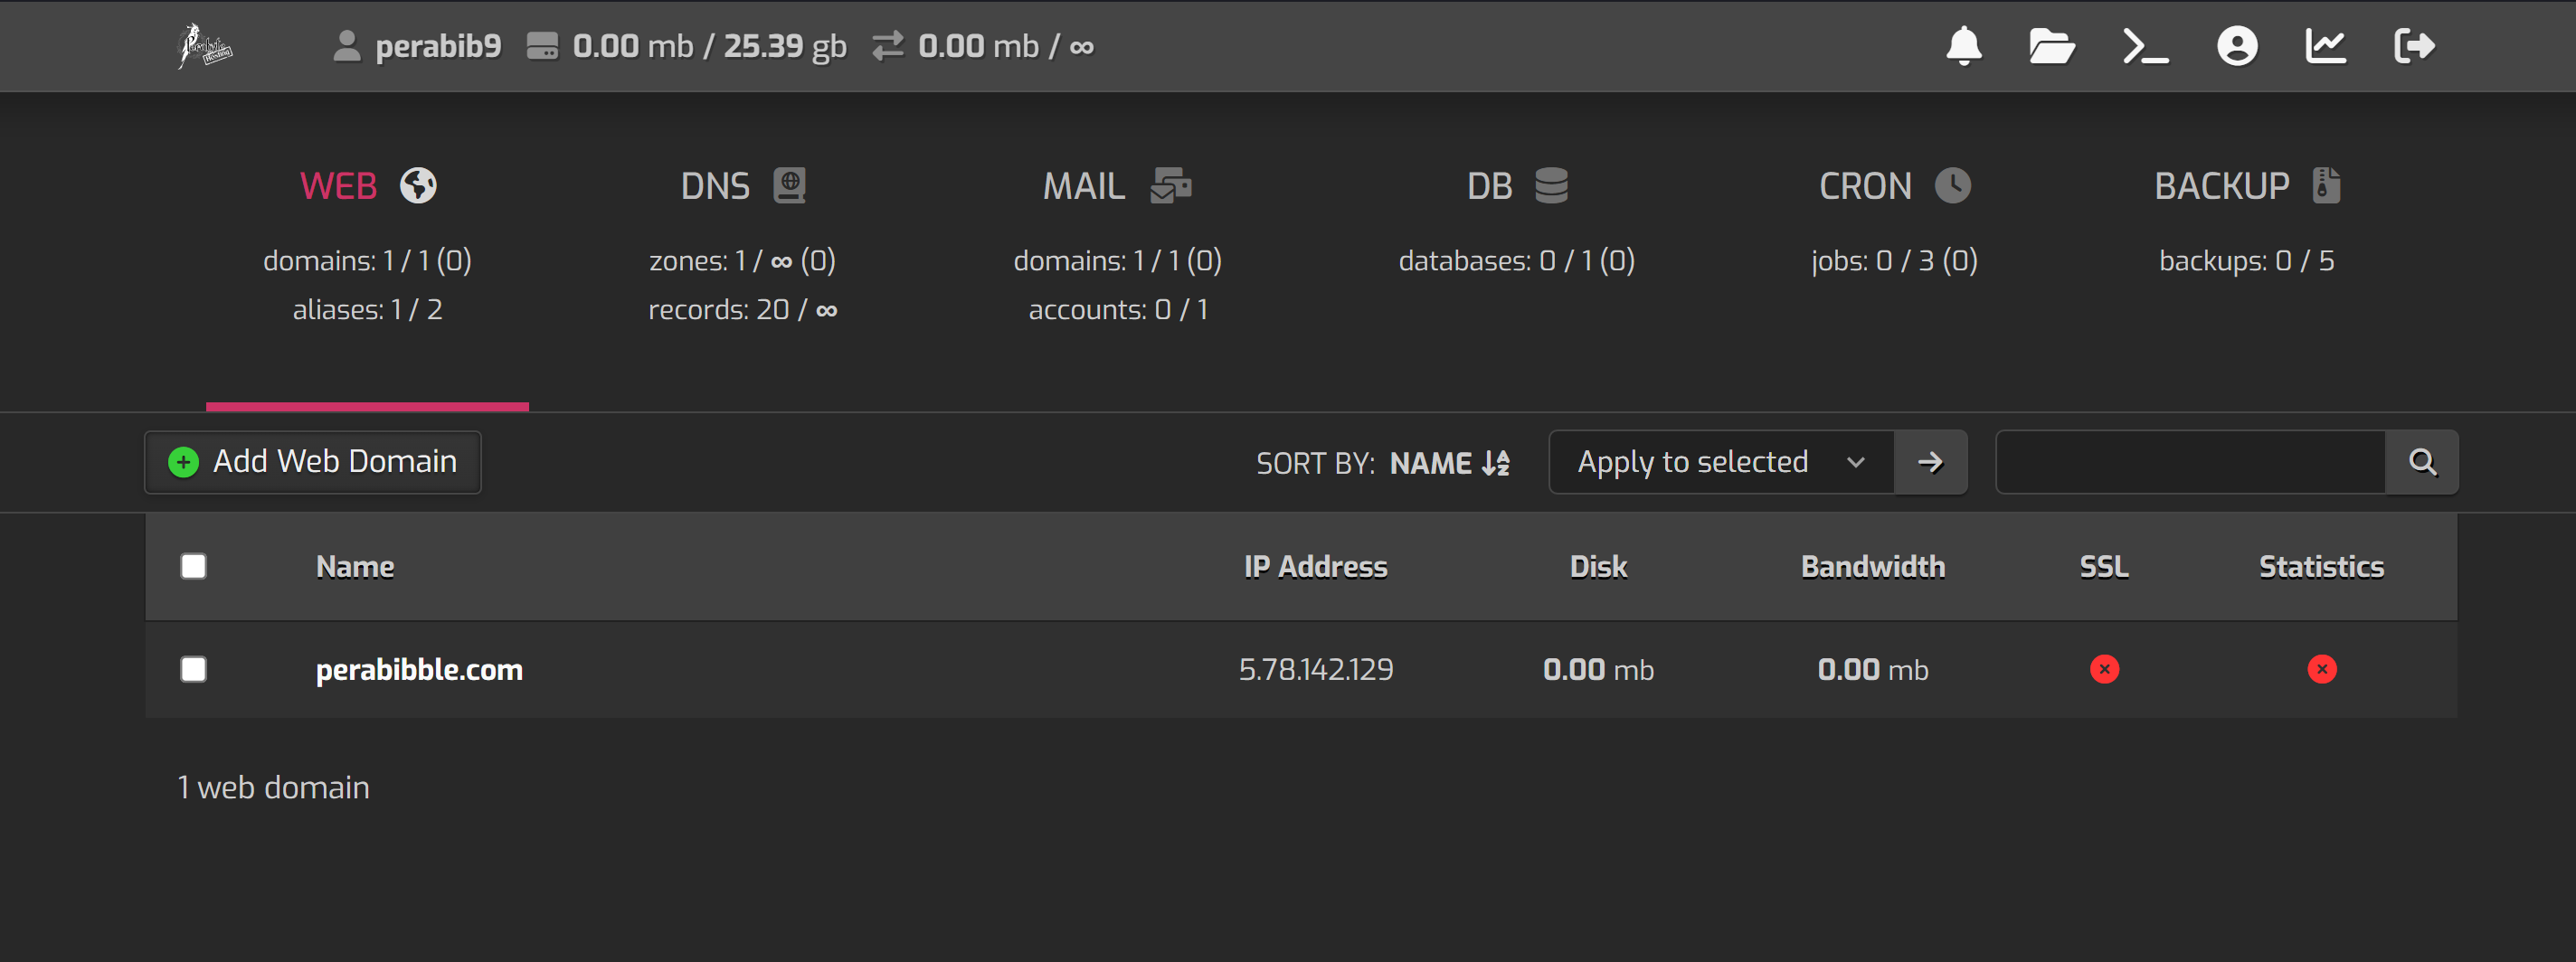
After you log in, you will be presented with the control panel.
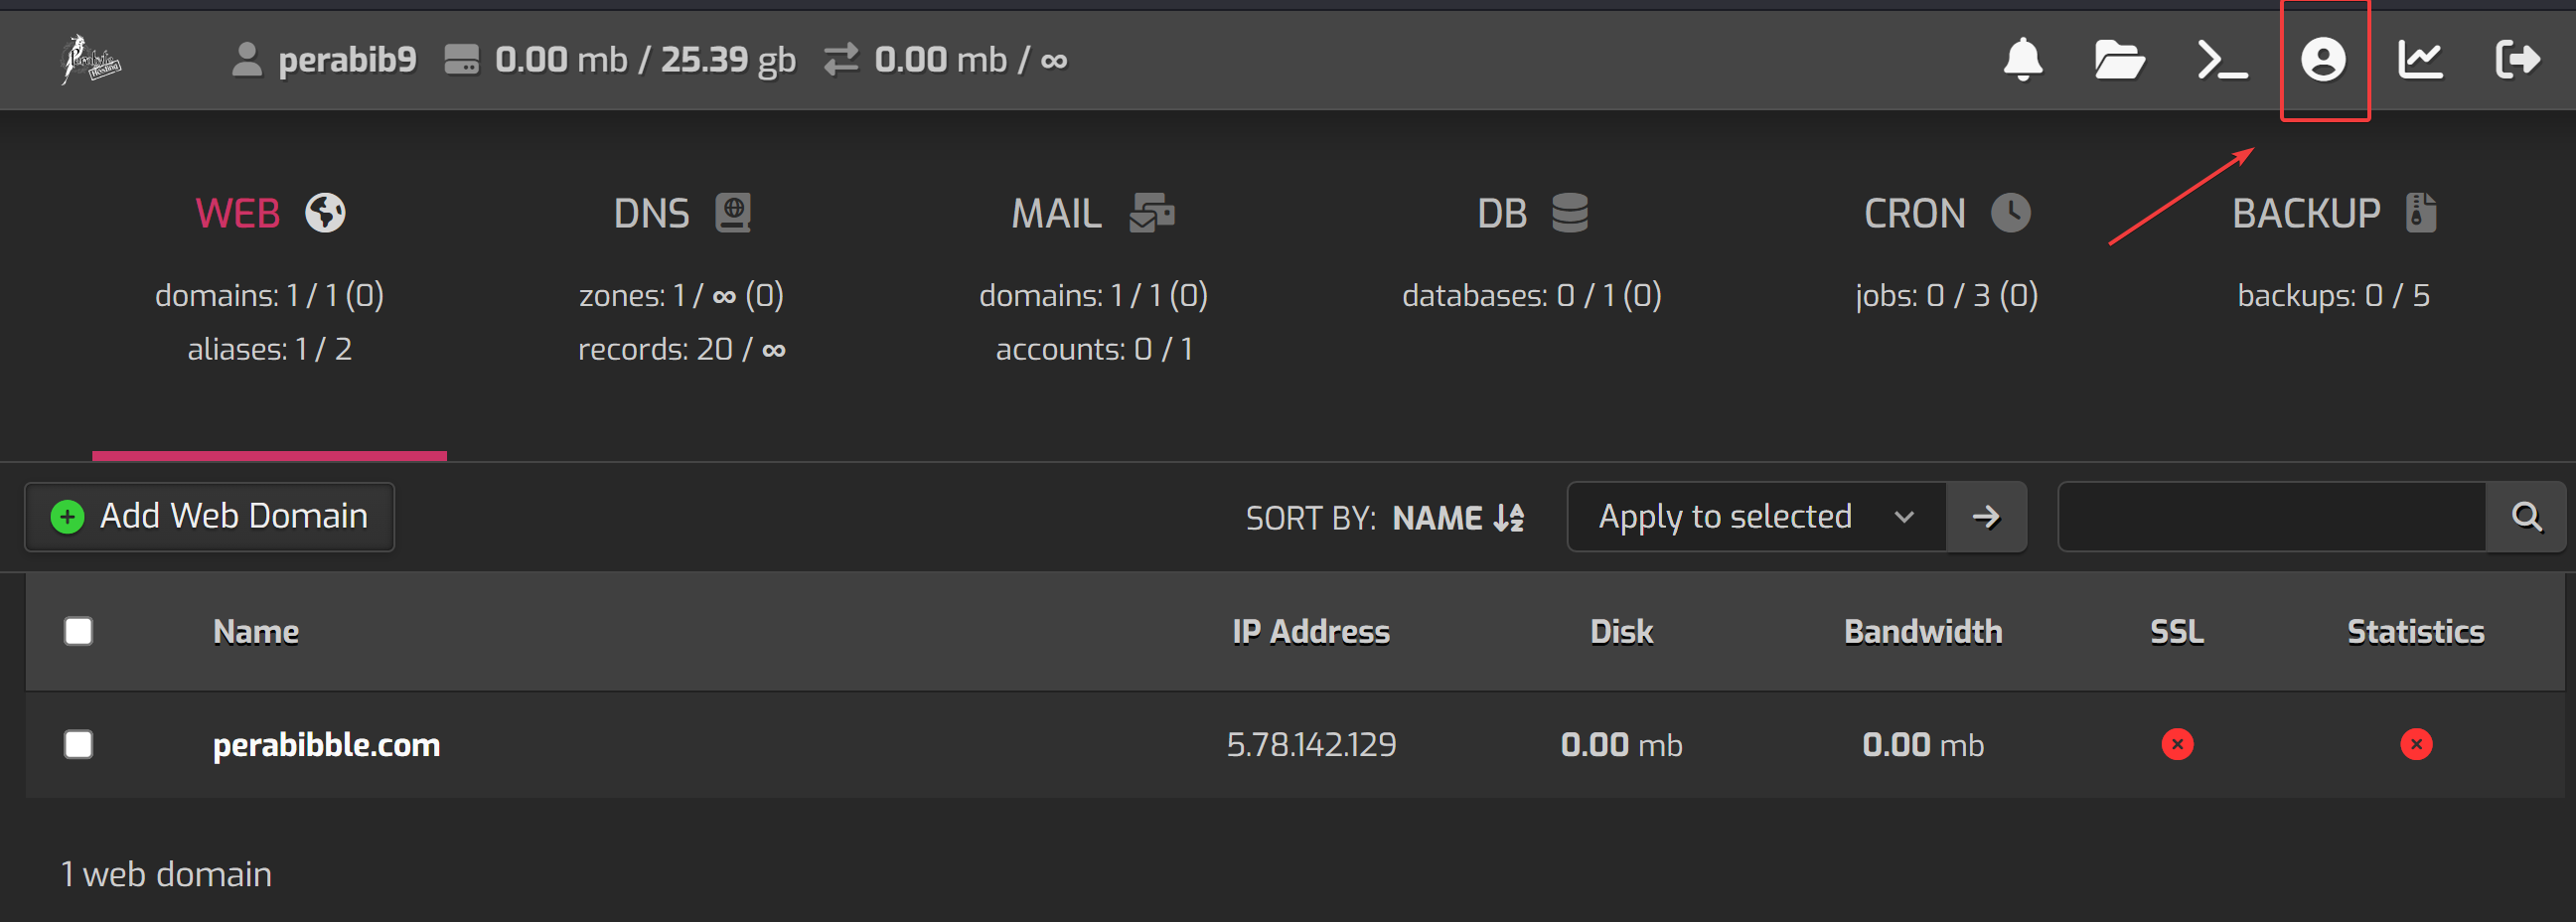
The first thing we are going to do is put in our public SSH key. This will allow us to log into the website via PuTTY or another SSH client. Click the person icon at the top right.
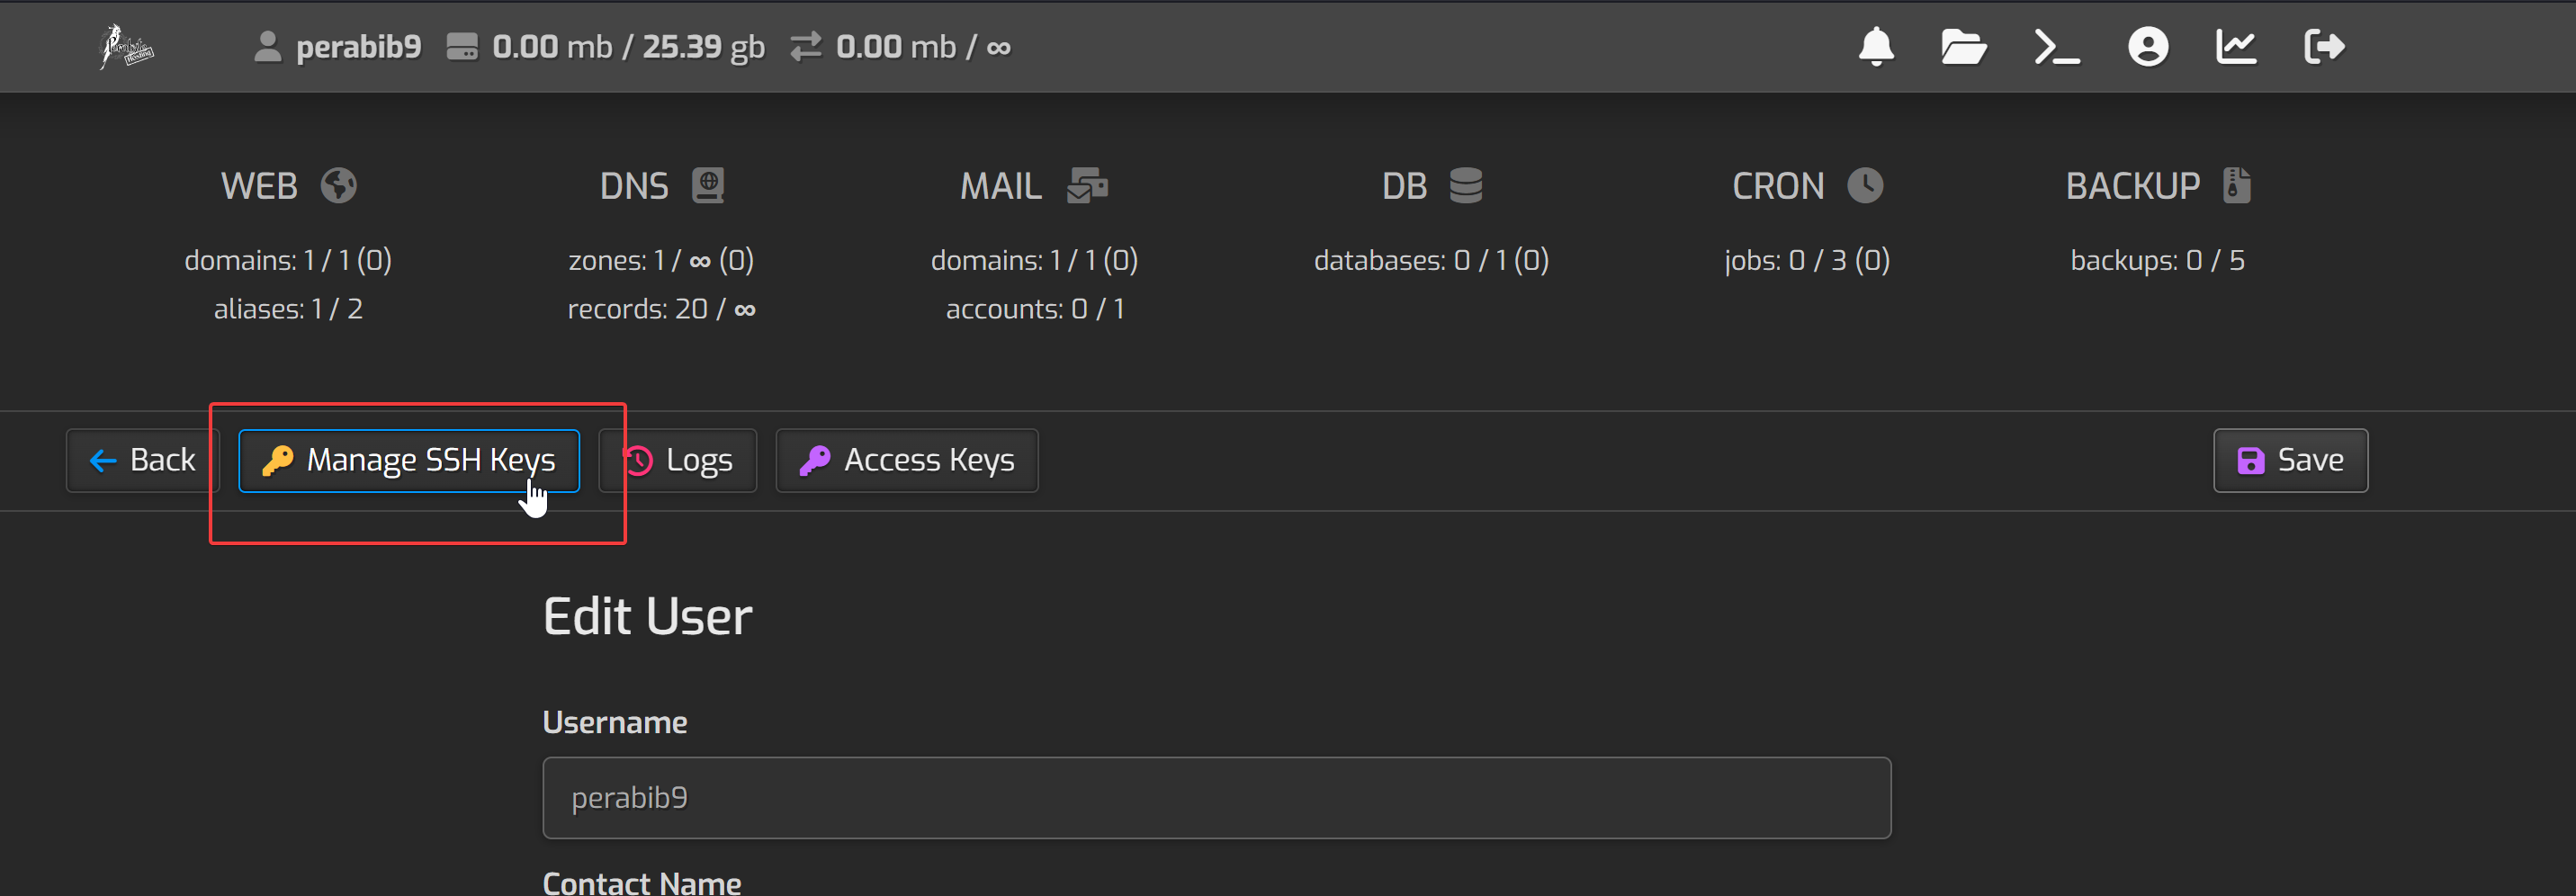
Then click "Manage SSH Keys".
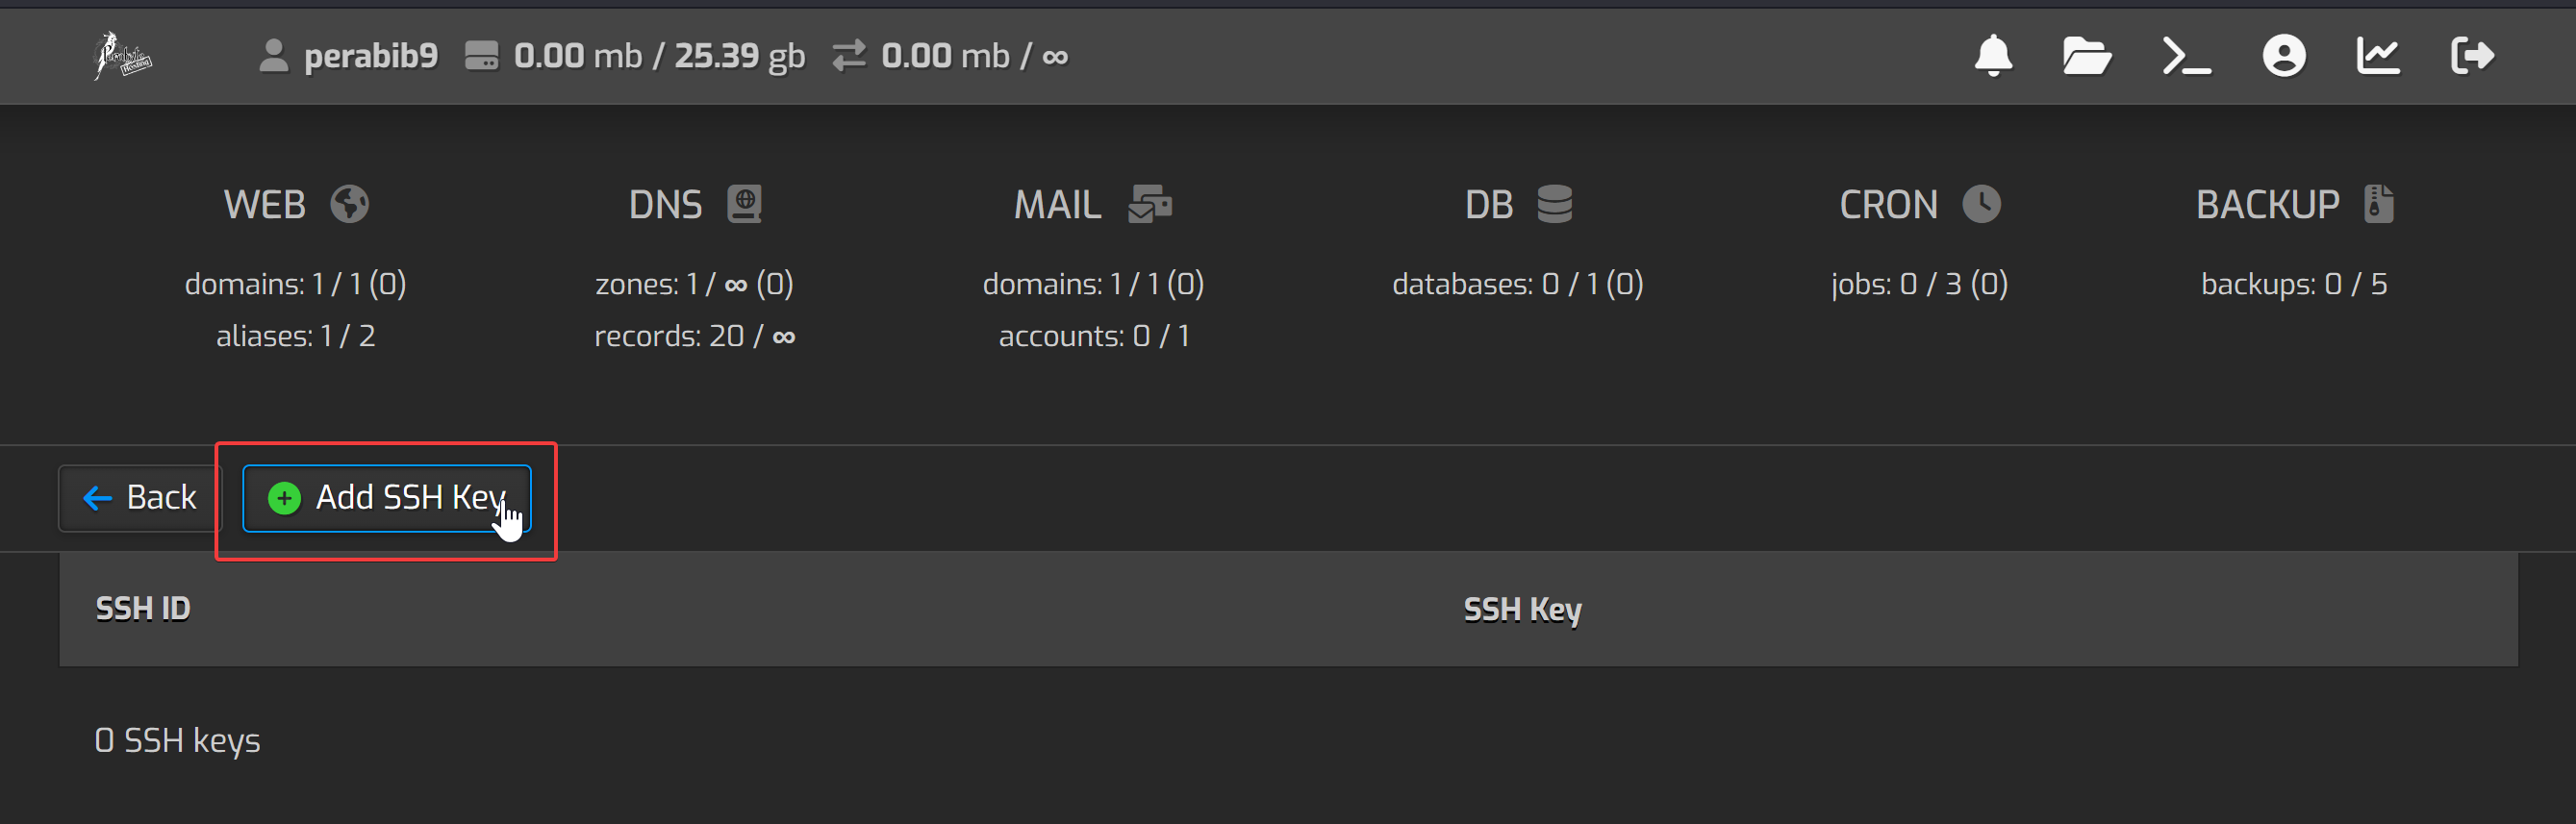
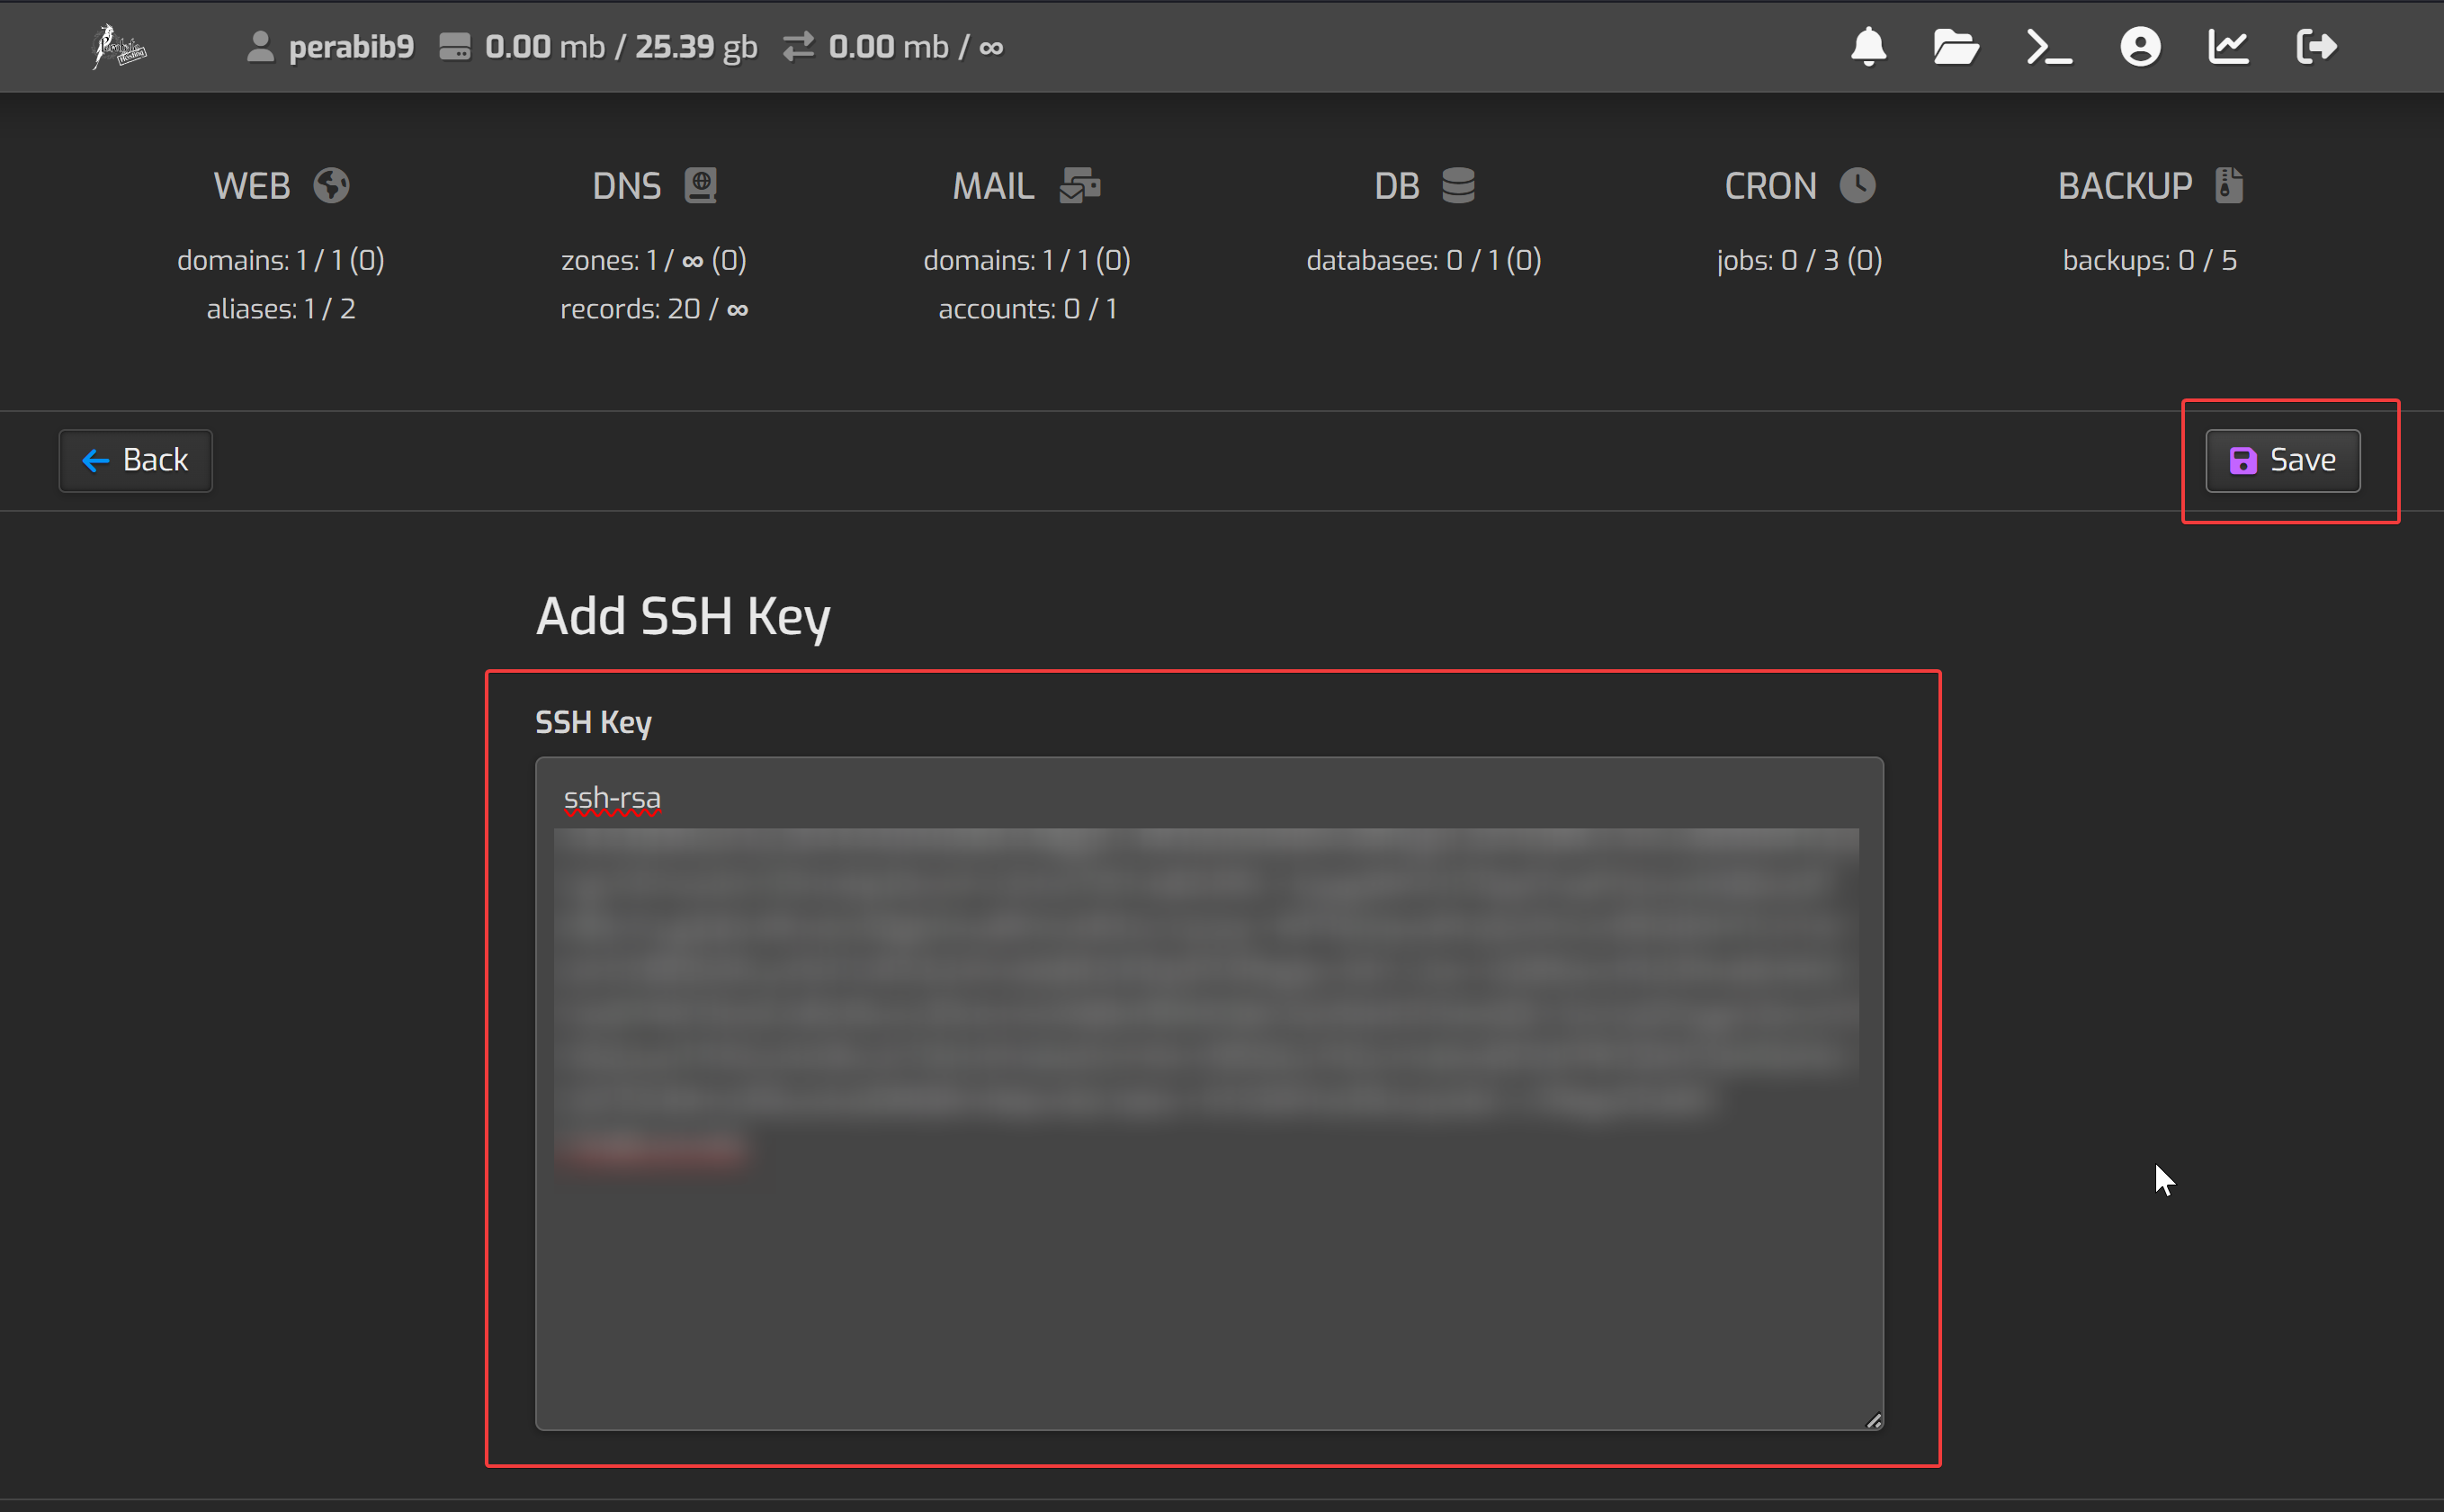
Click "Add SSH Key".
Here you will add your public OpenSSH key and click "Save".
If you're unsure what is meant by public OpenSSH key, it's the public key that begins with ssh-rsa, ecdsa-sha2, or similar.
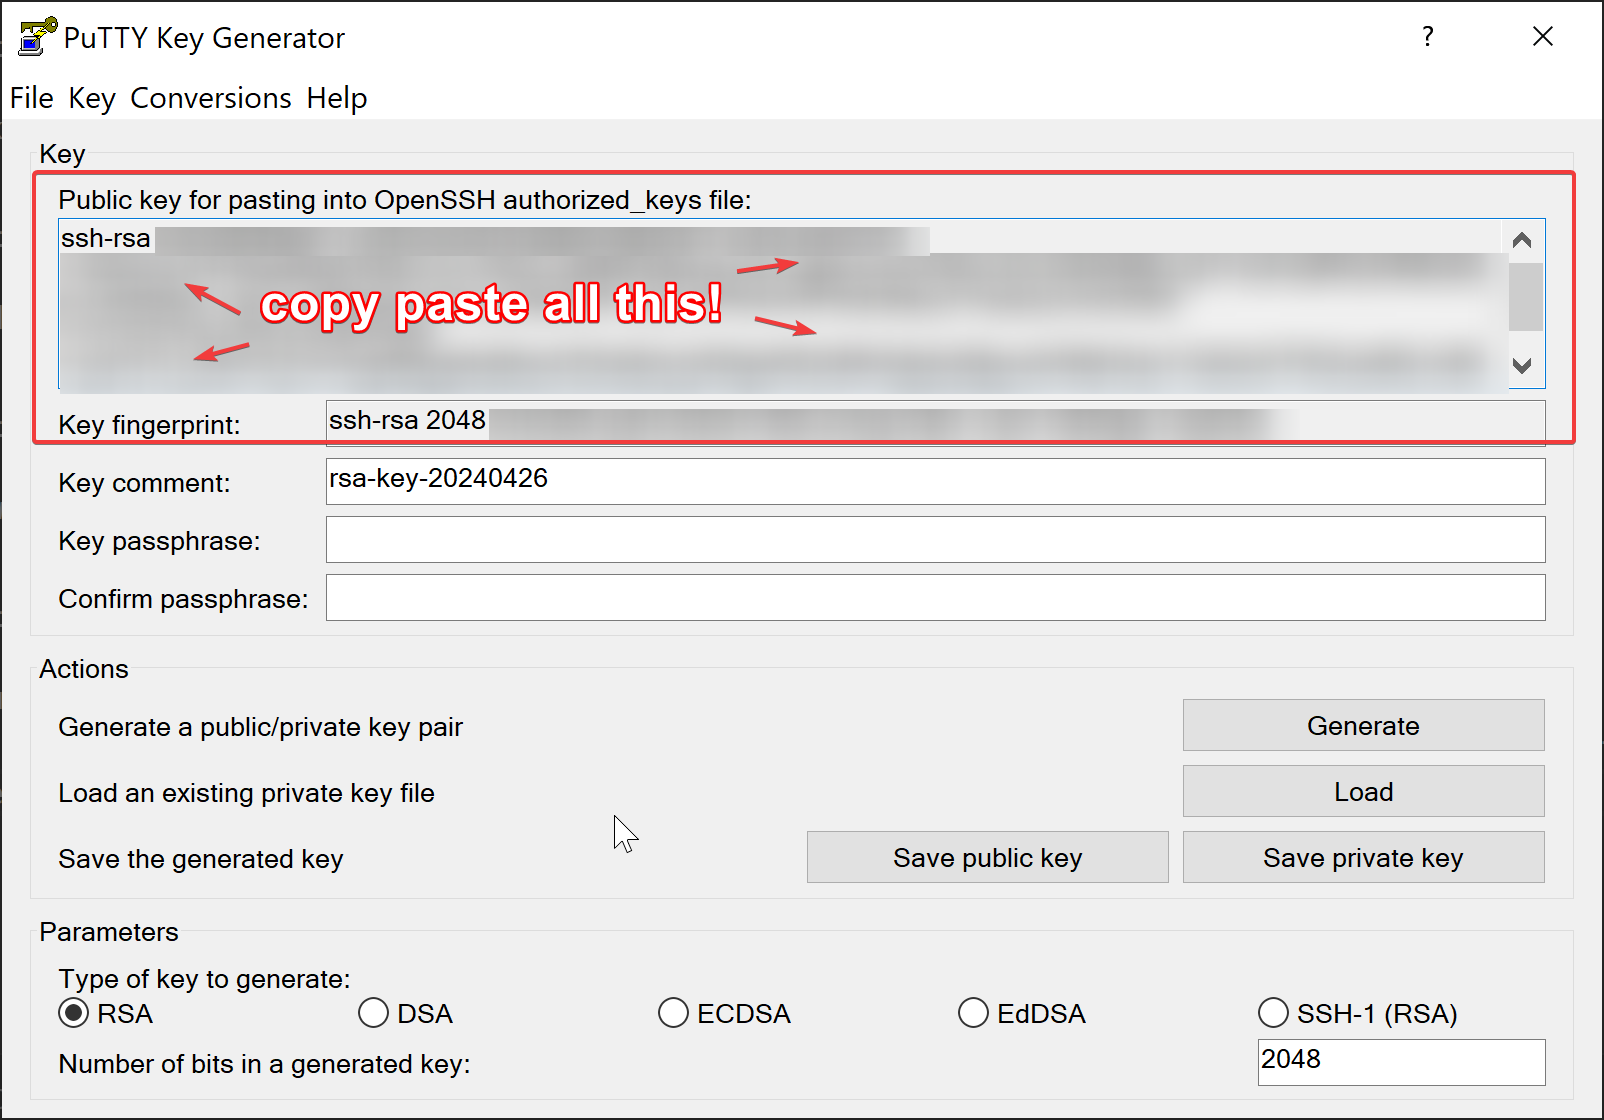
On Windows, you can find it by opening PuTTYgen and copying the text found in the "Public key for pasting into OpenSSH authorized_keys file" section.
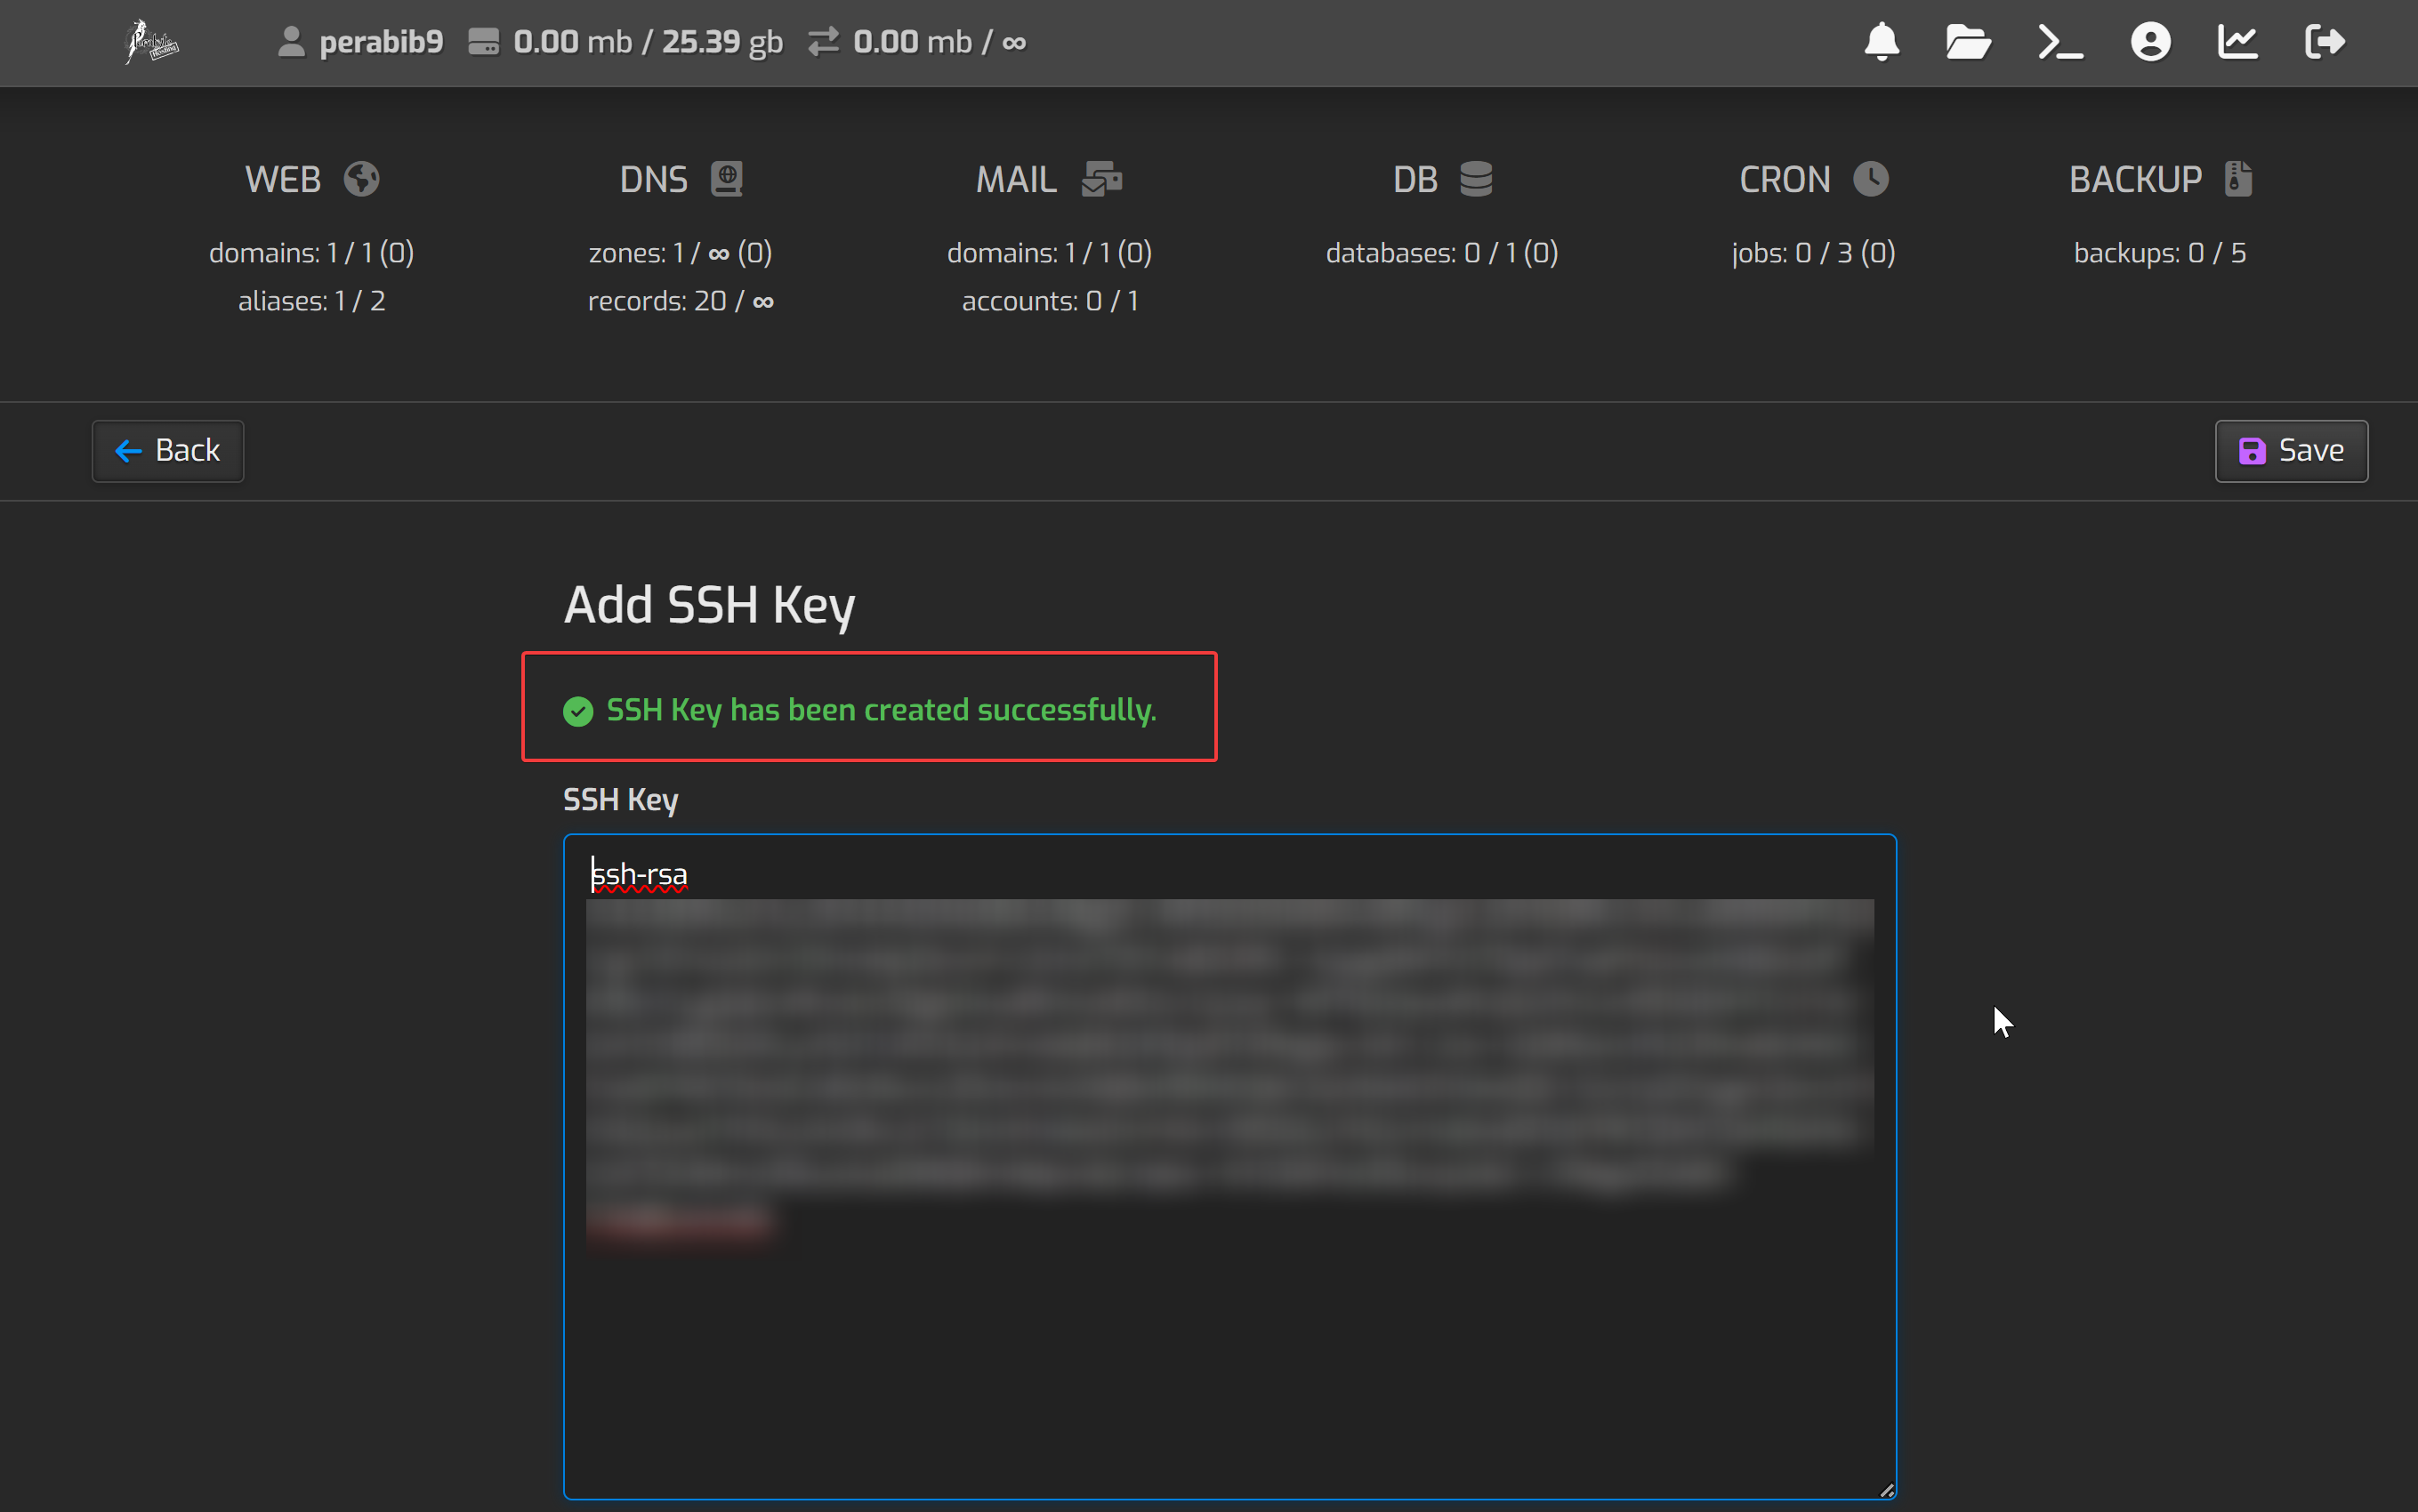
You should see a success message after it saves:
Creating the Database
Next, we are going to create a few things within the control panel.
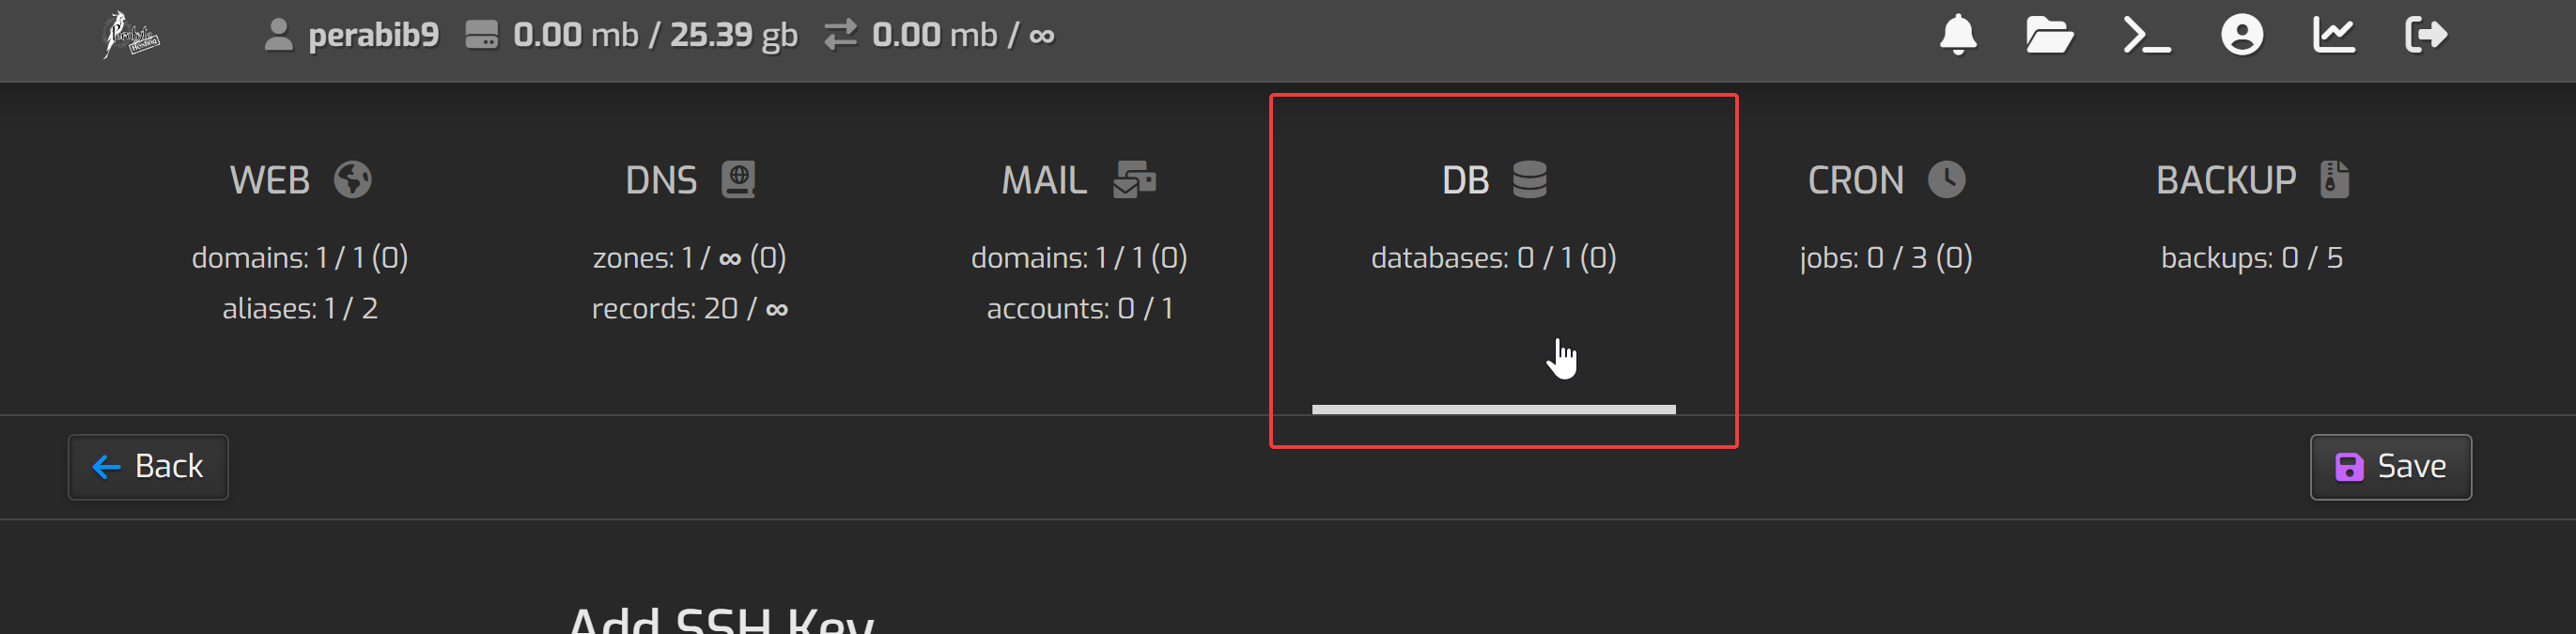
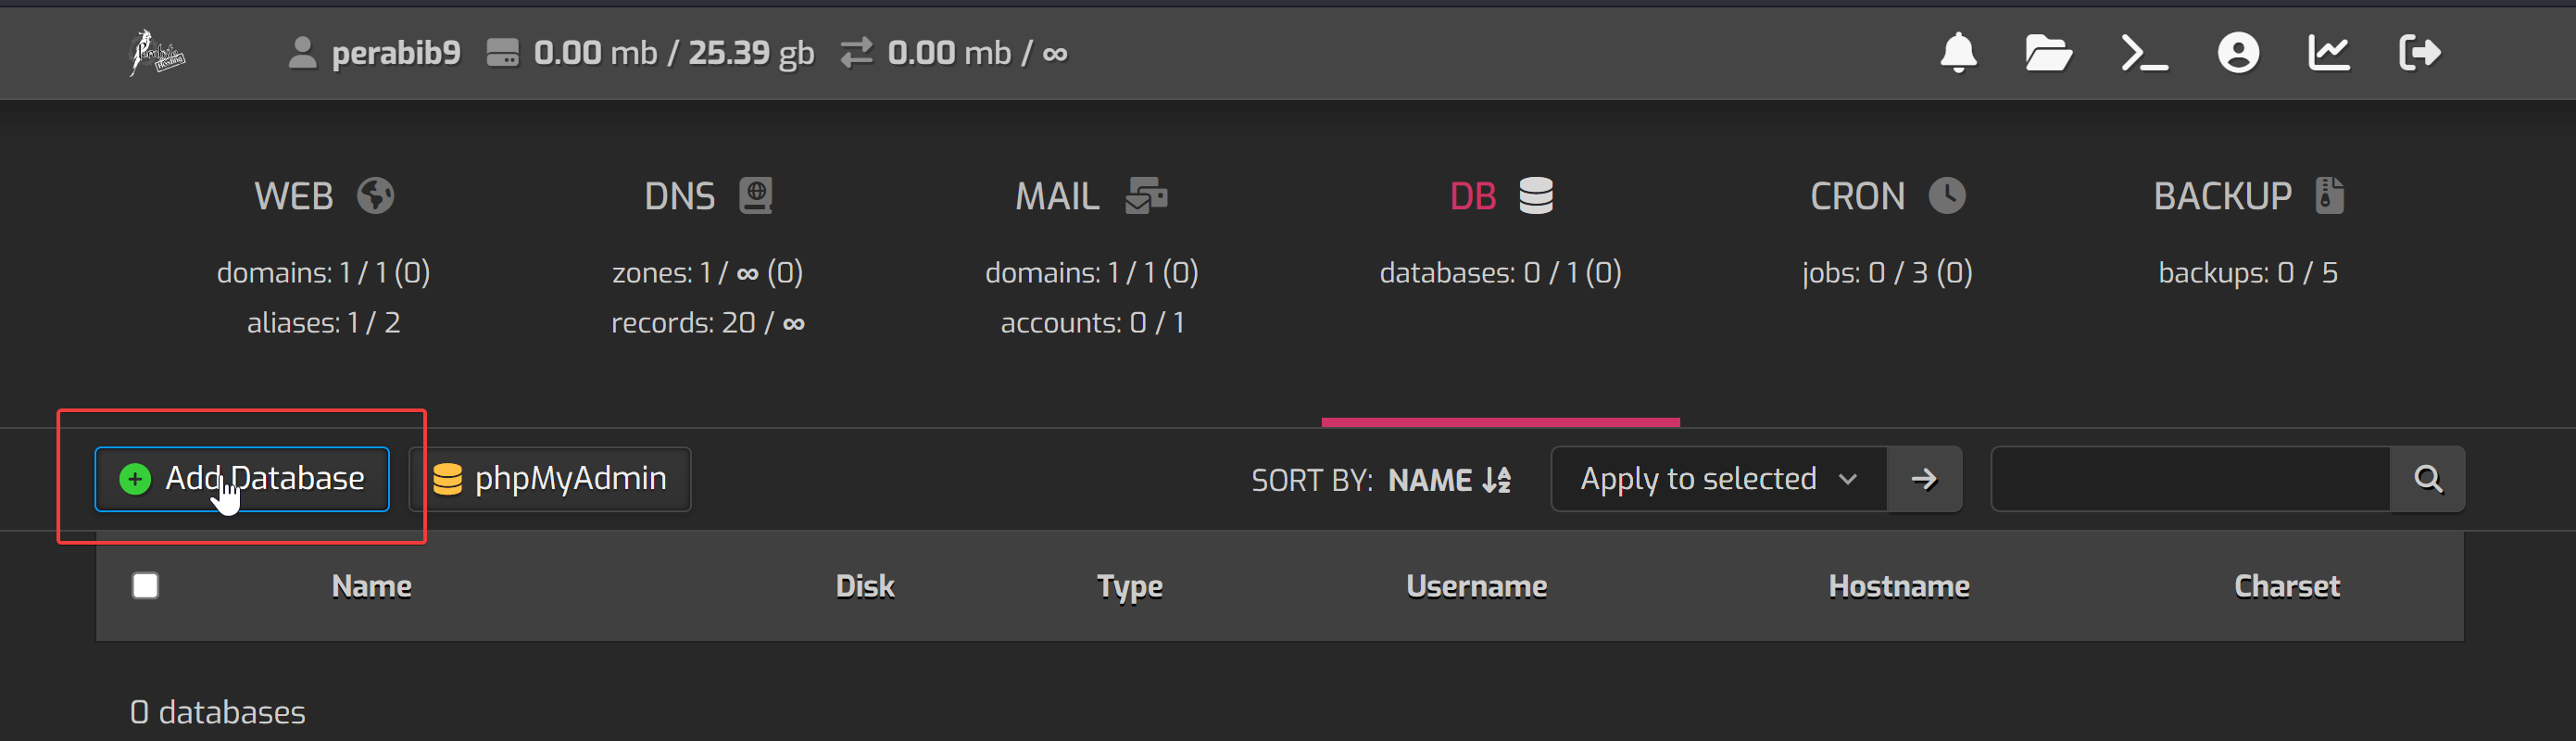
First, let's create the database. This is where all of the data for your site will be stored. From where you are, click the big "DB" button in the navigation.
Click "Add Database".
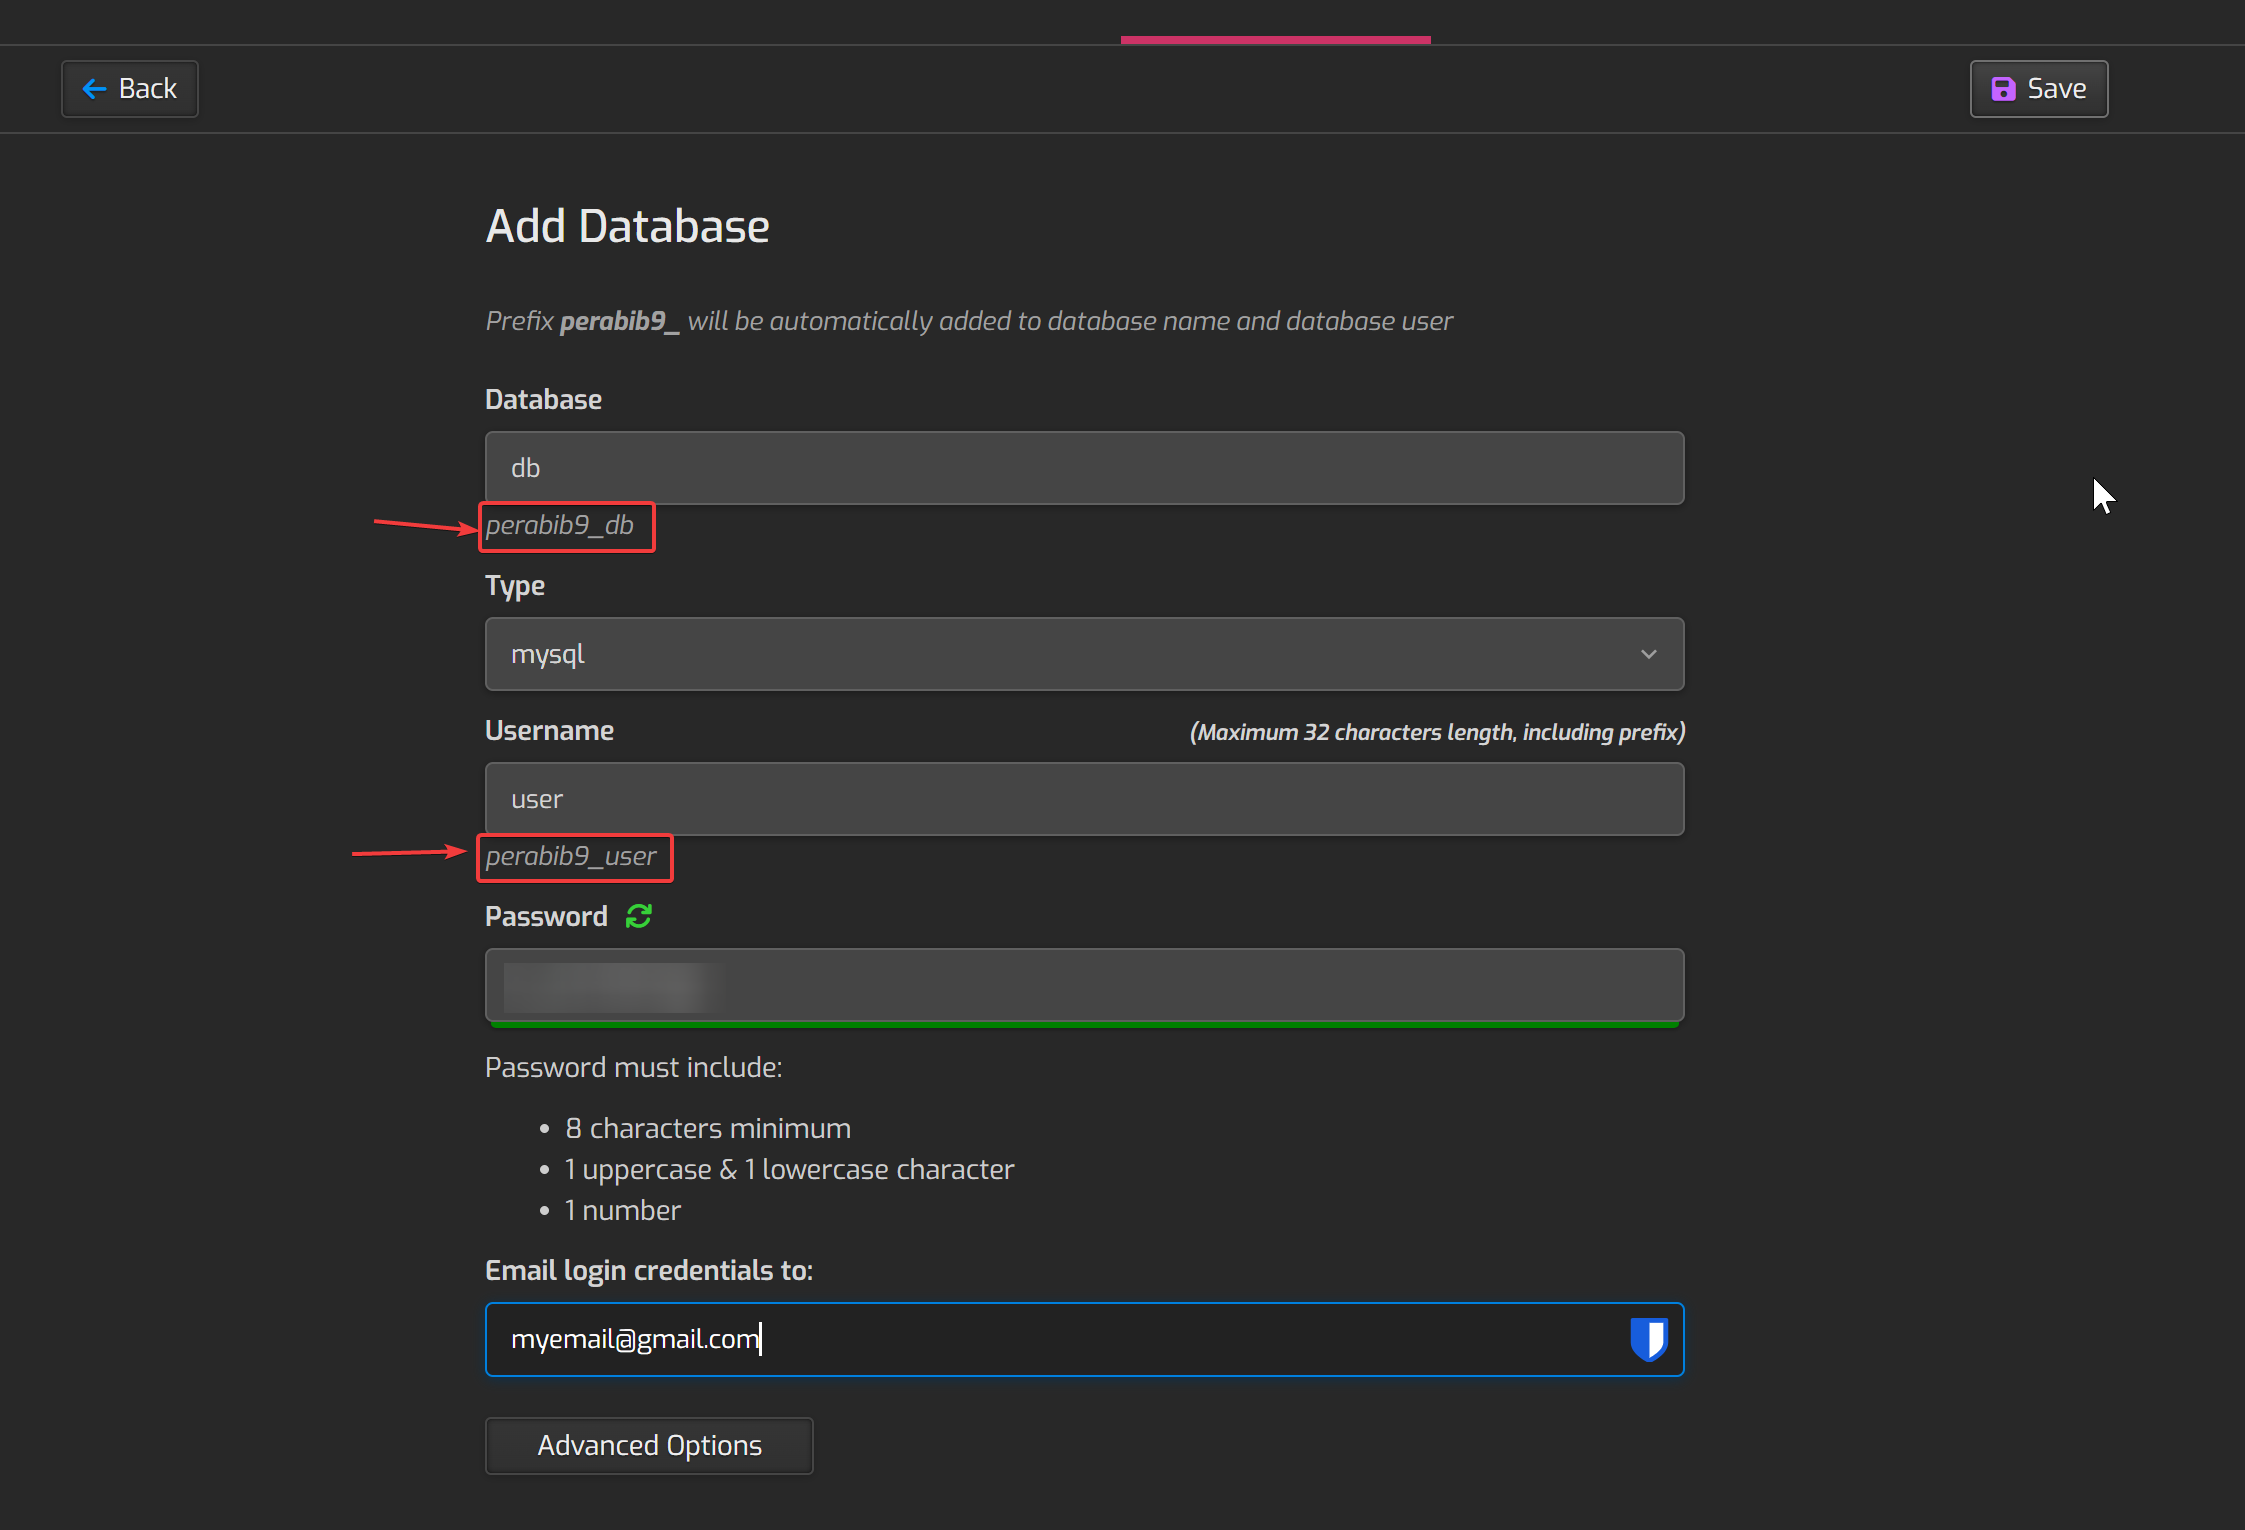
Enter in a name for the database, as well as a username and password for the database user. Make the password different from your control panel password. Then, save this database name, username, password somewhere safe. Enter in your email and the credentials will be automatically sent to you, but record them somewhere else as well.
Please note the actual database name and username will be automatically prefixed with your username.
I have entered db and user as the name and username, which means the actual database name is perabib9_db and a username of perabib9_user. These highlighted values in the picture below are the ones you want to save.
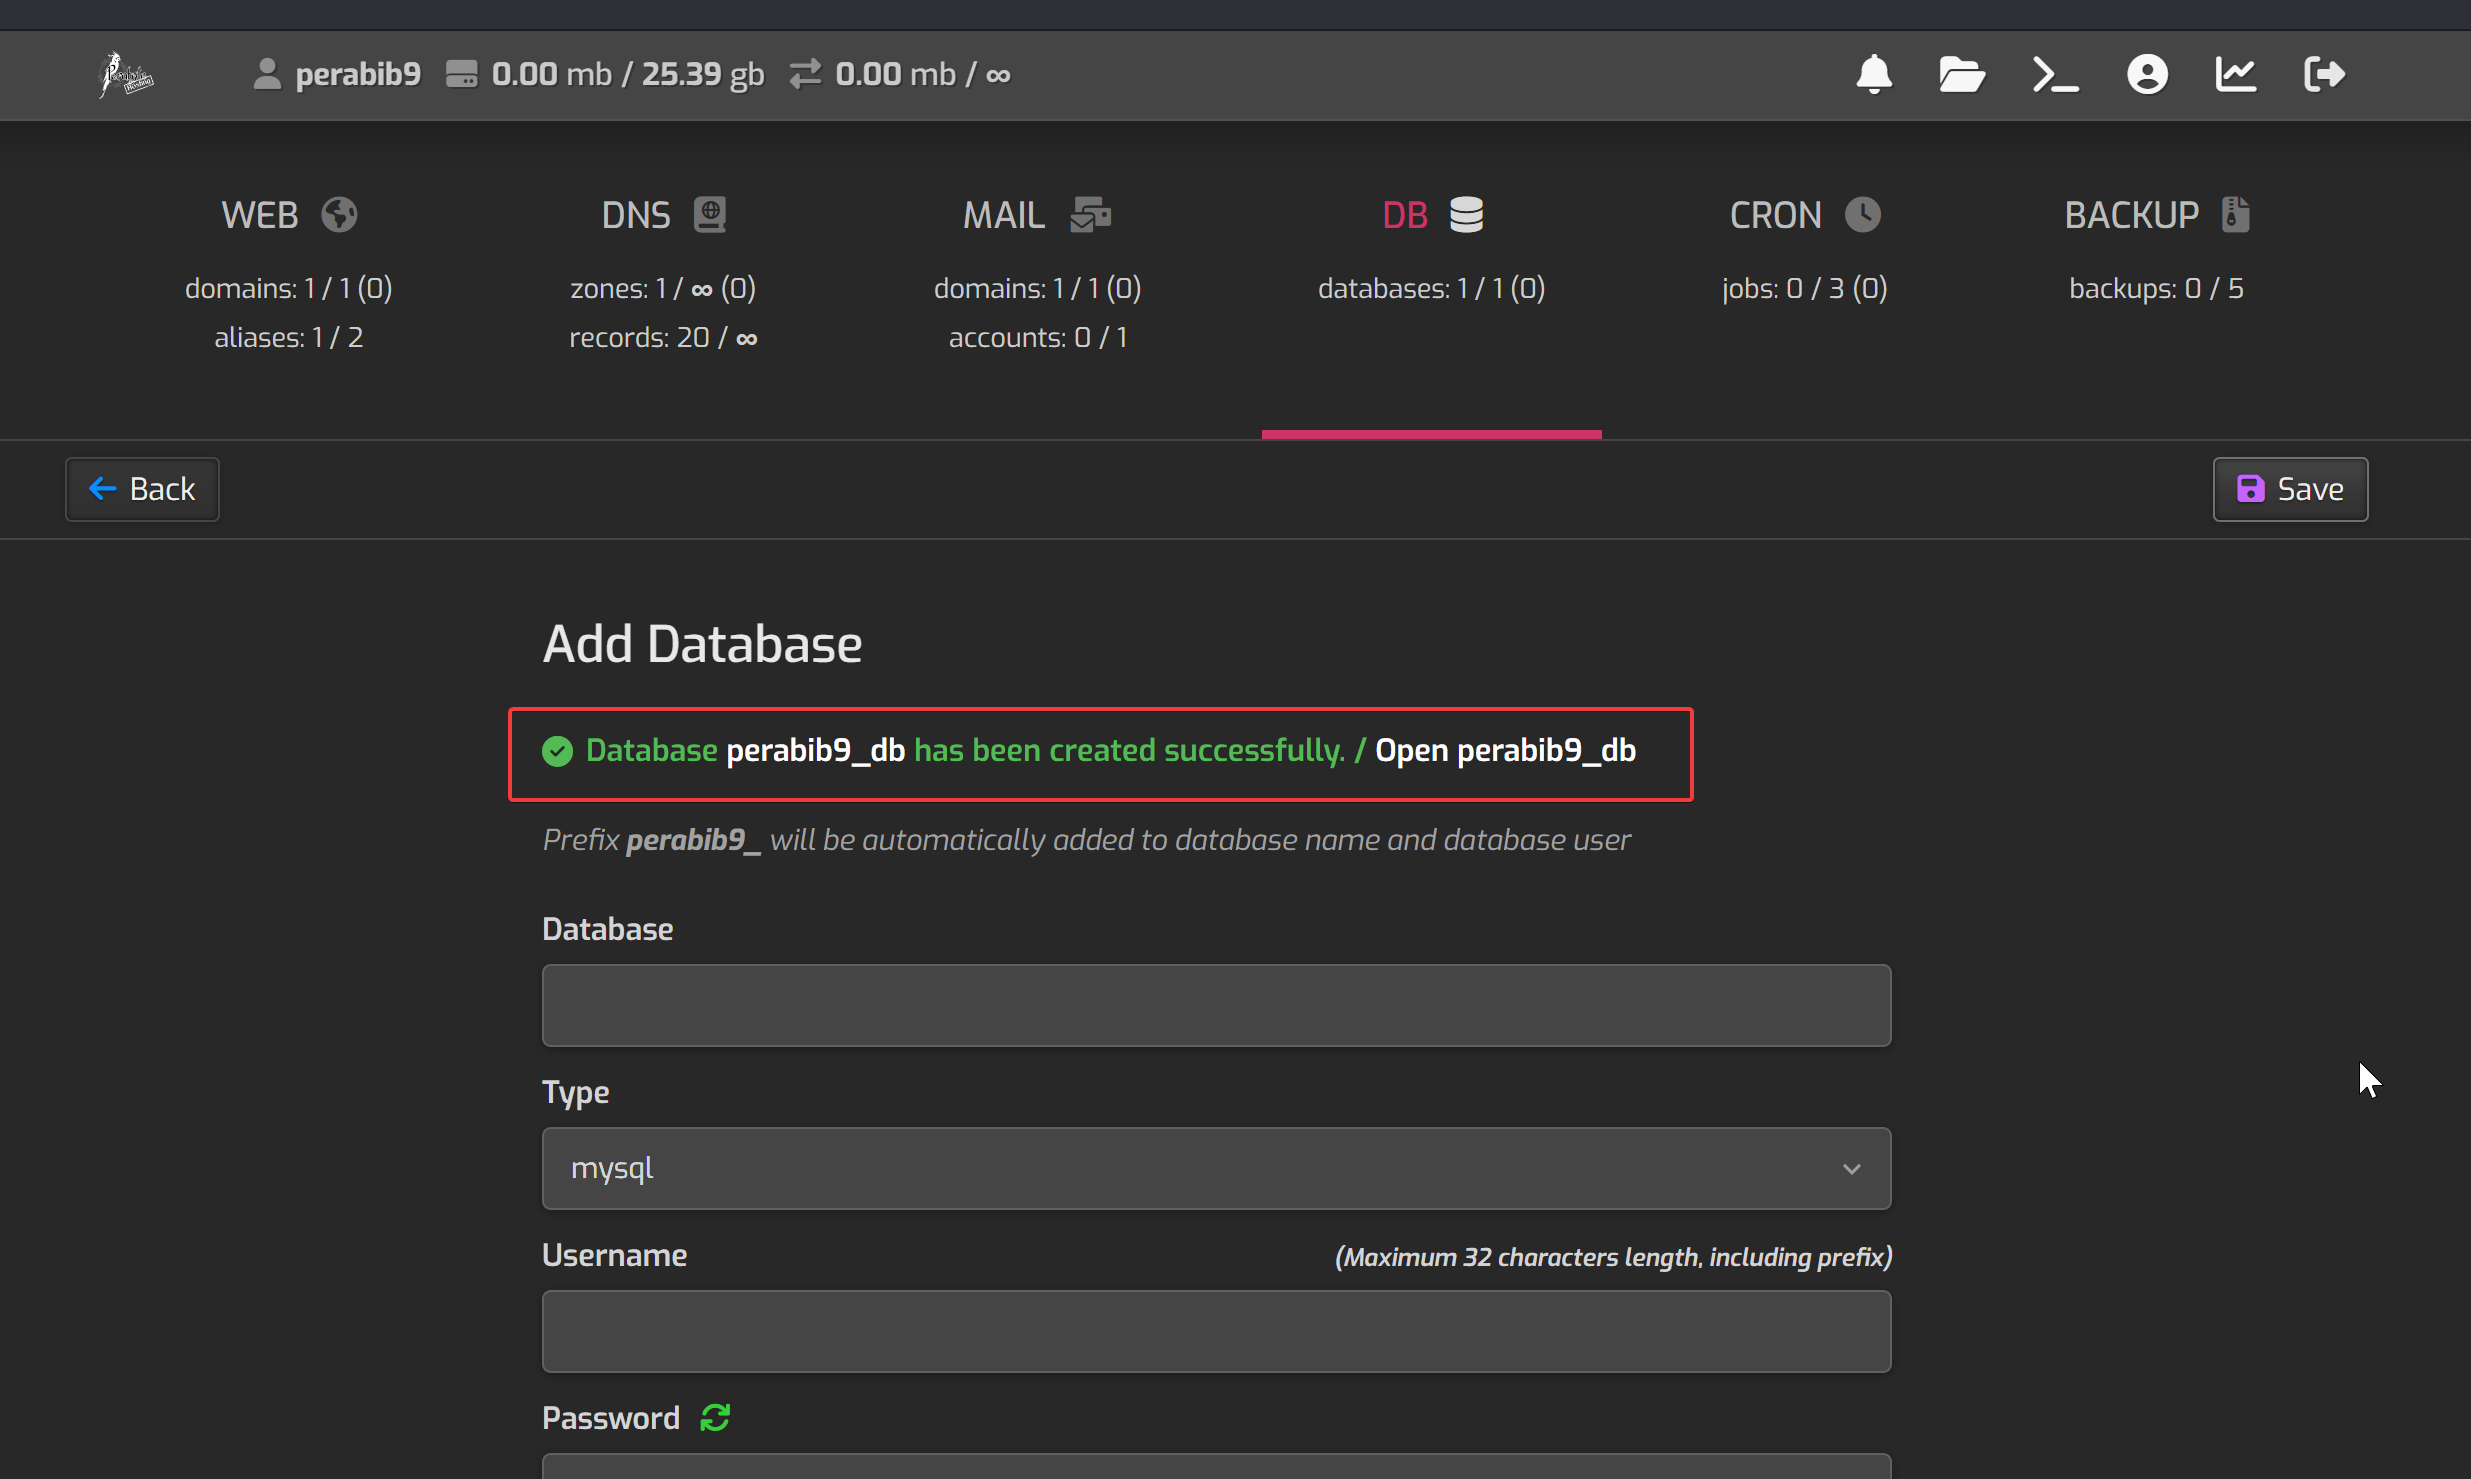
Click "Save". You should see a success message after a brief wait:
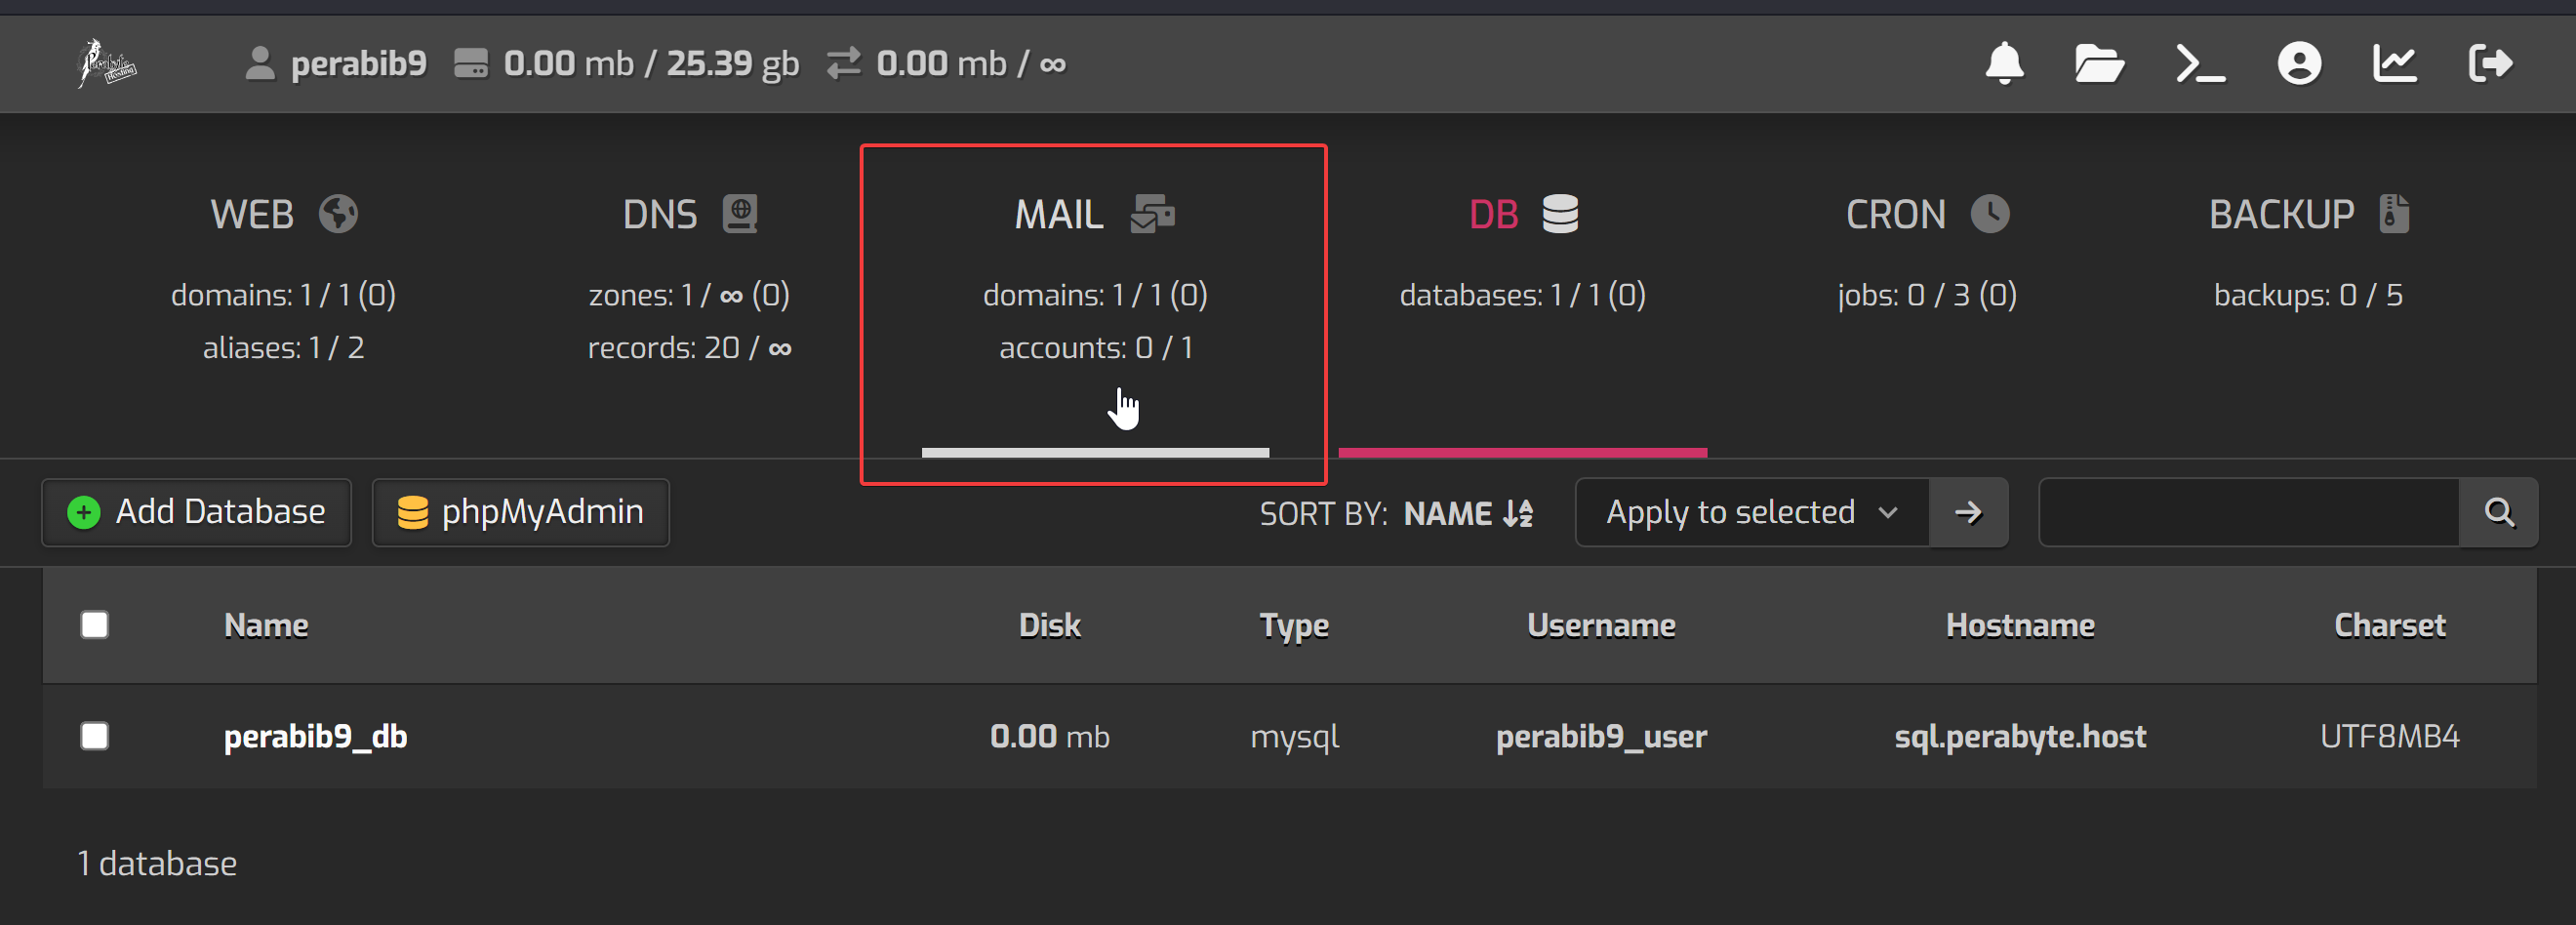
Creating the Email Account
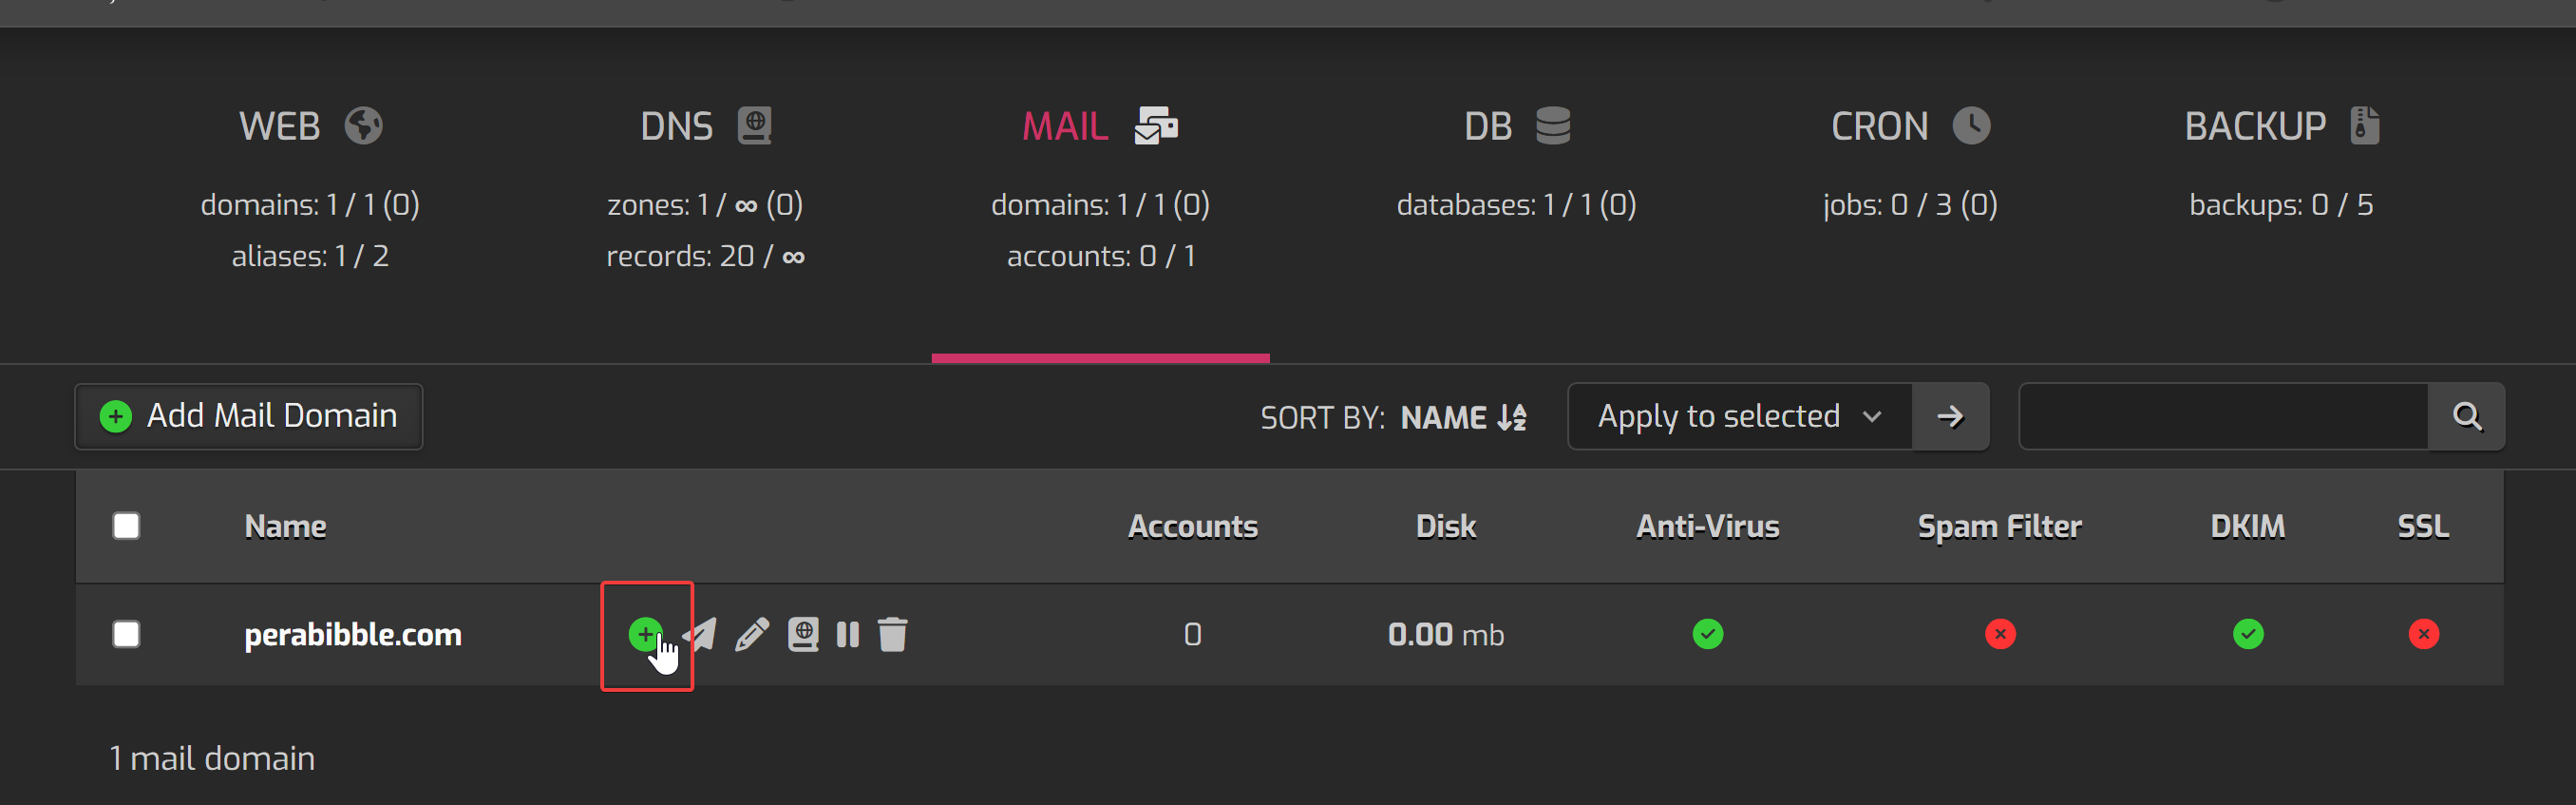
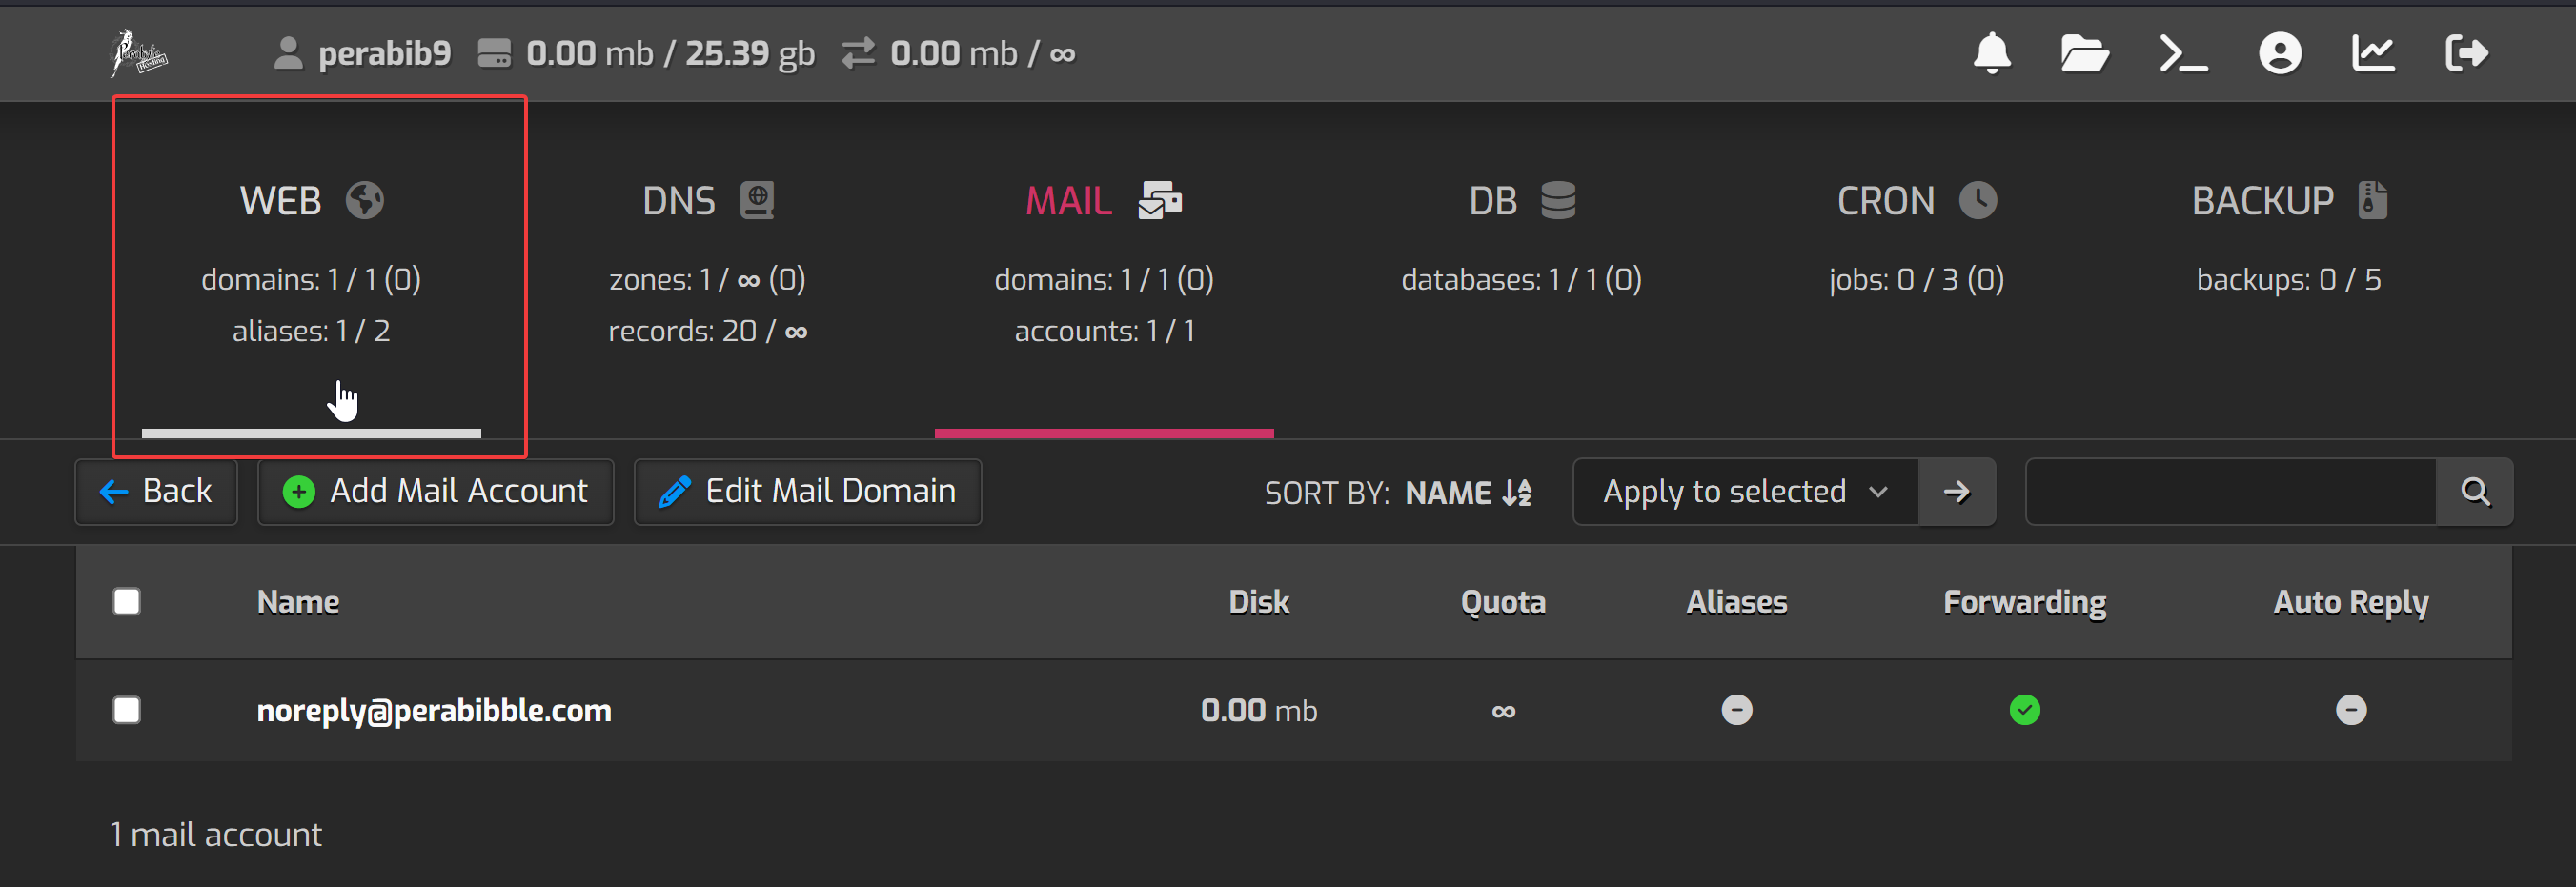
Next, we are going to create the email account. Click on the "Mail" button in the navigation.
You will already see a mail domain created for you. Hover over it, and select the small + icon to "Add Mail Account".
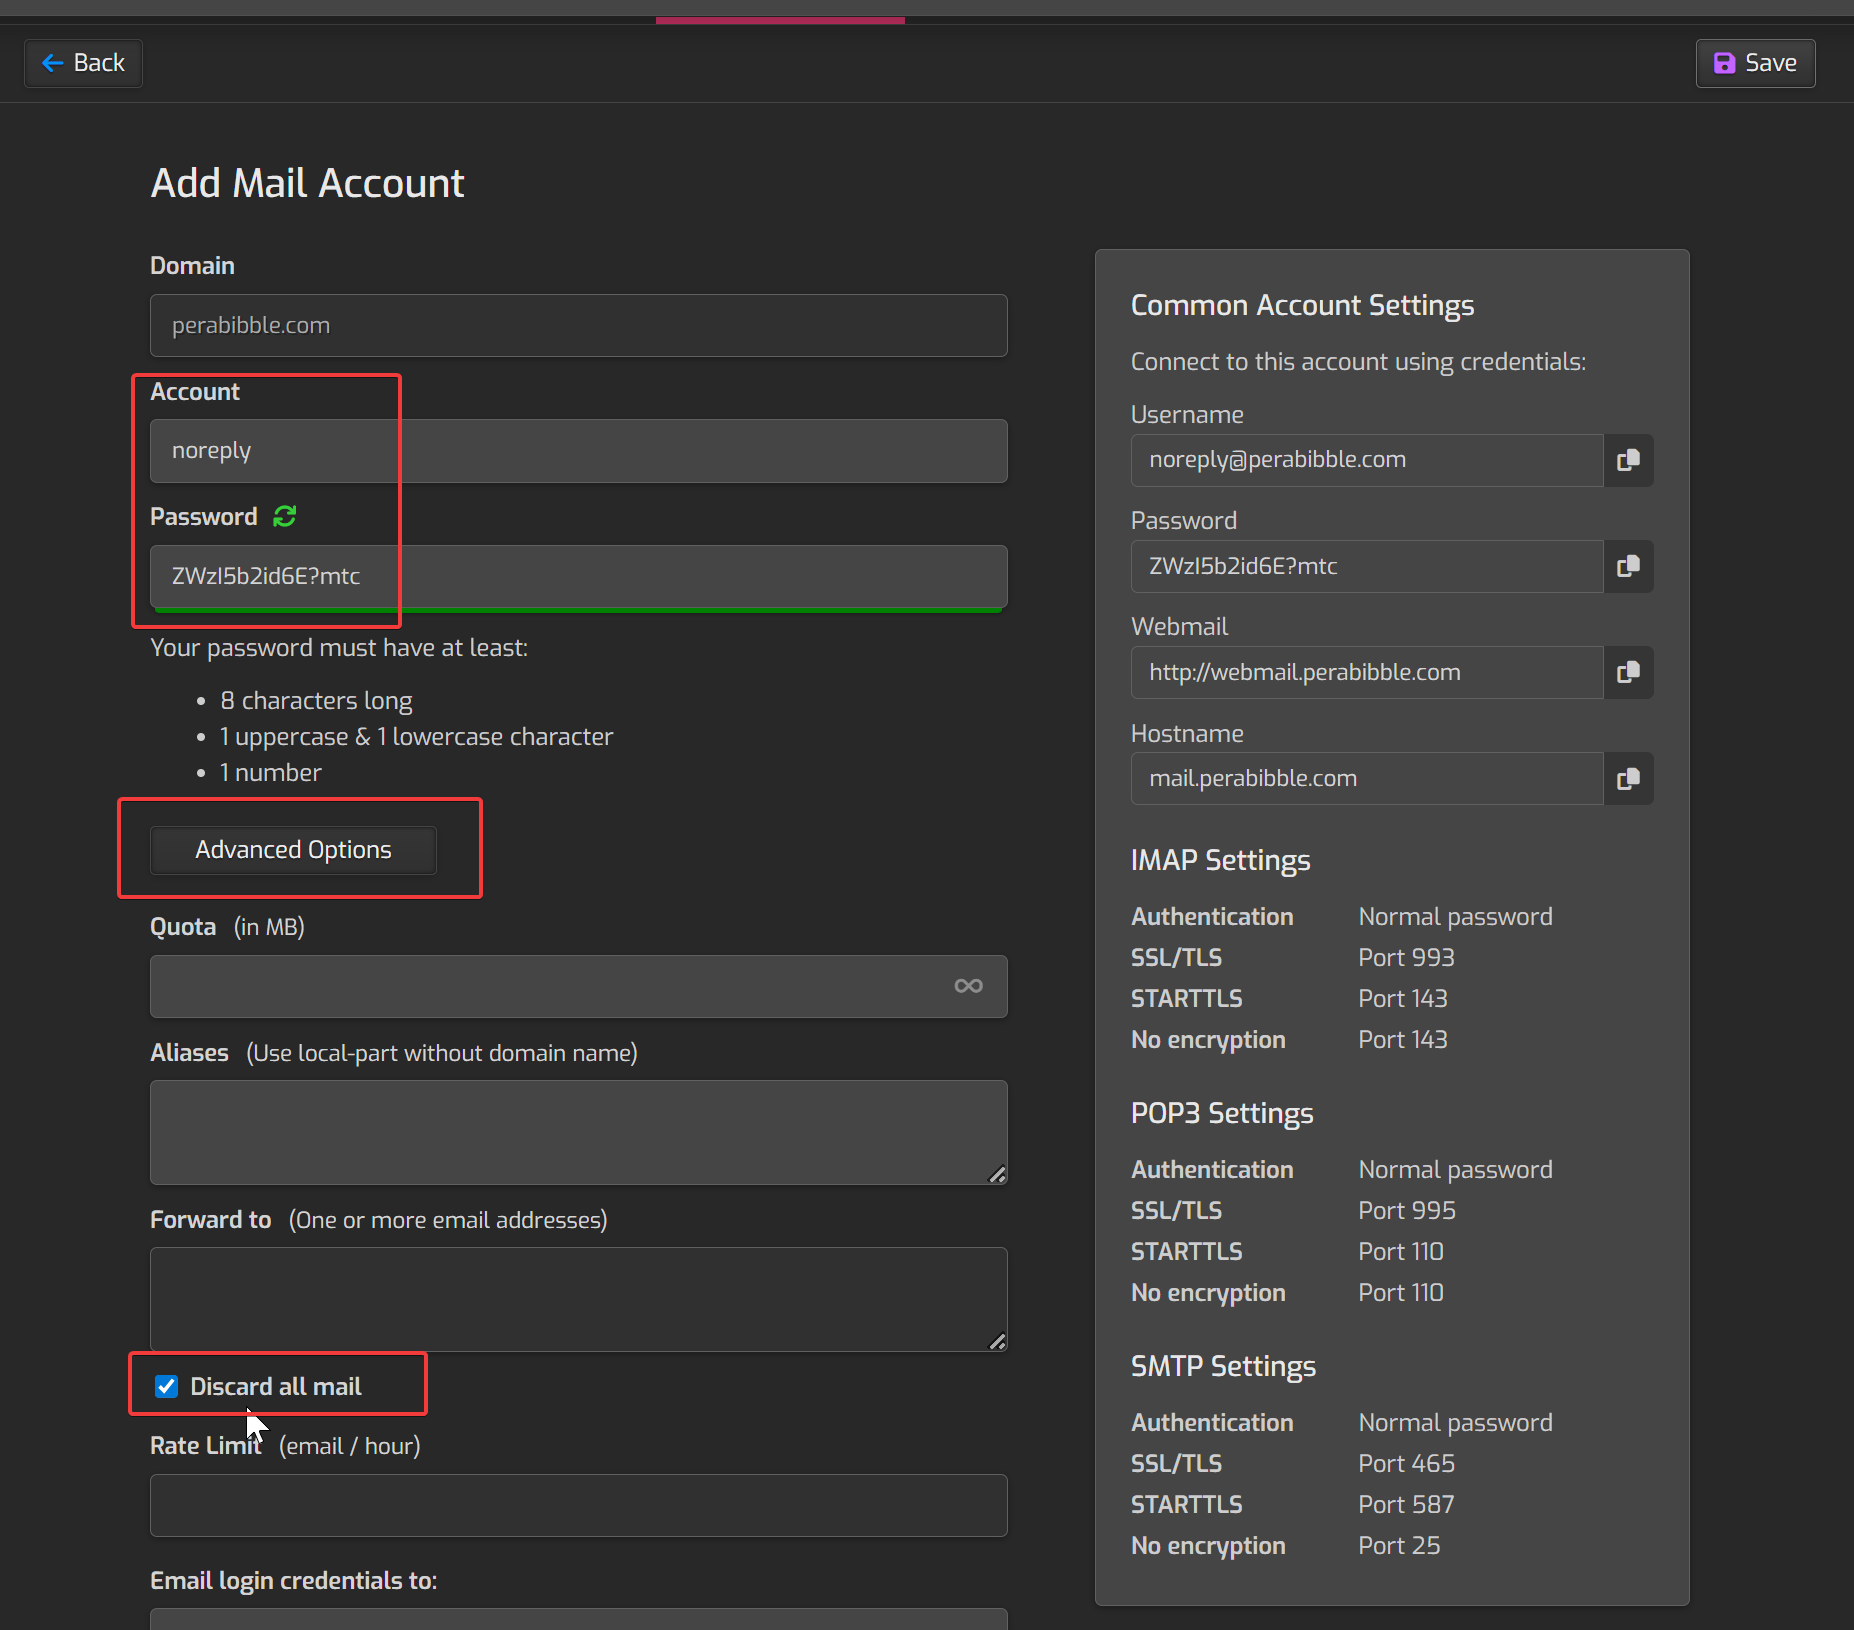
You will create another login here. I like to make the username "noreply" as it indicates to users that the email inbox will not be checked.
Before we click save, we are going to check the advanced options. Check "Discard all mail". Leave everything else as-is.
You can again put in your email to have the credentials sent to you, but you should still save these to a safe place.
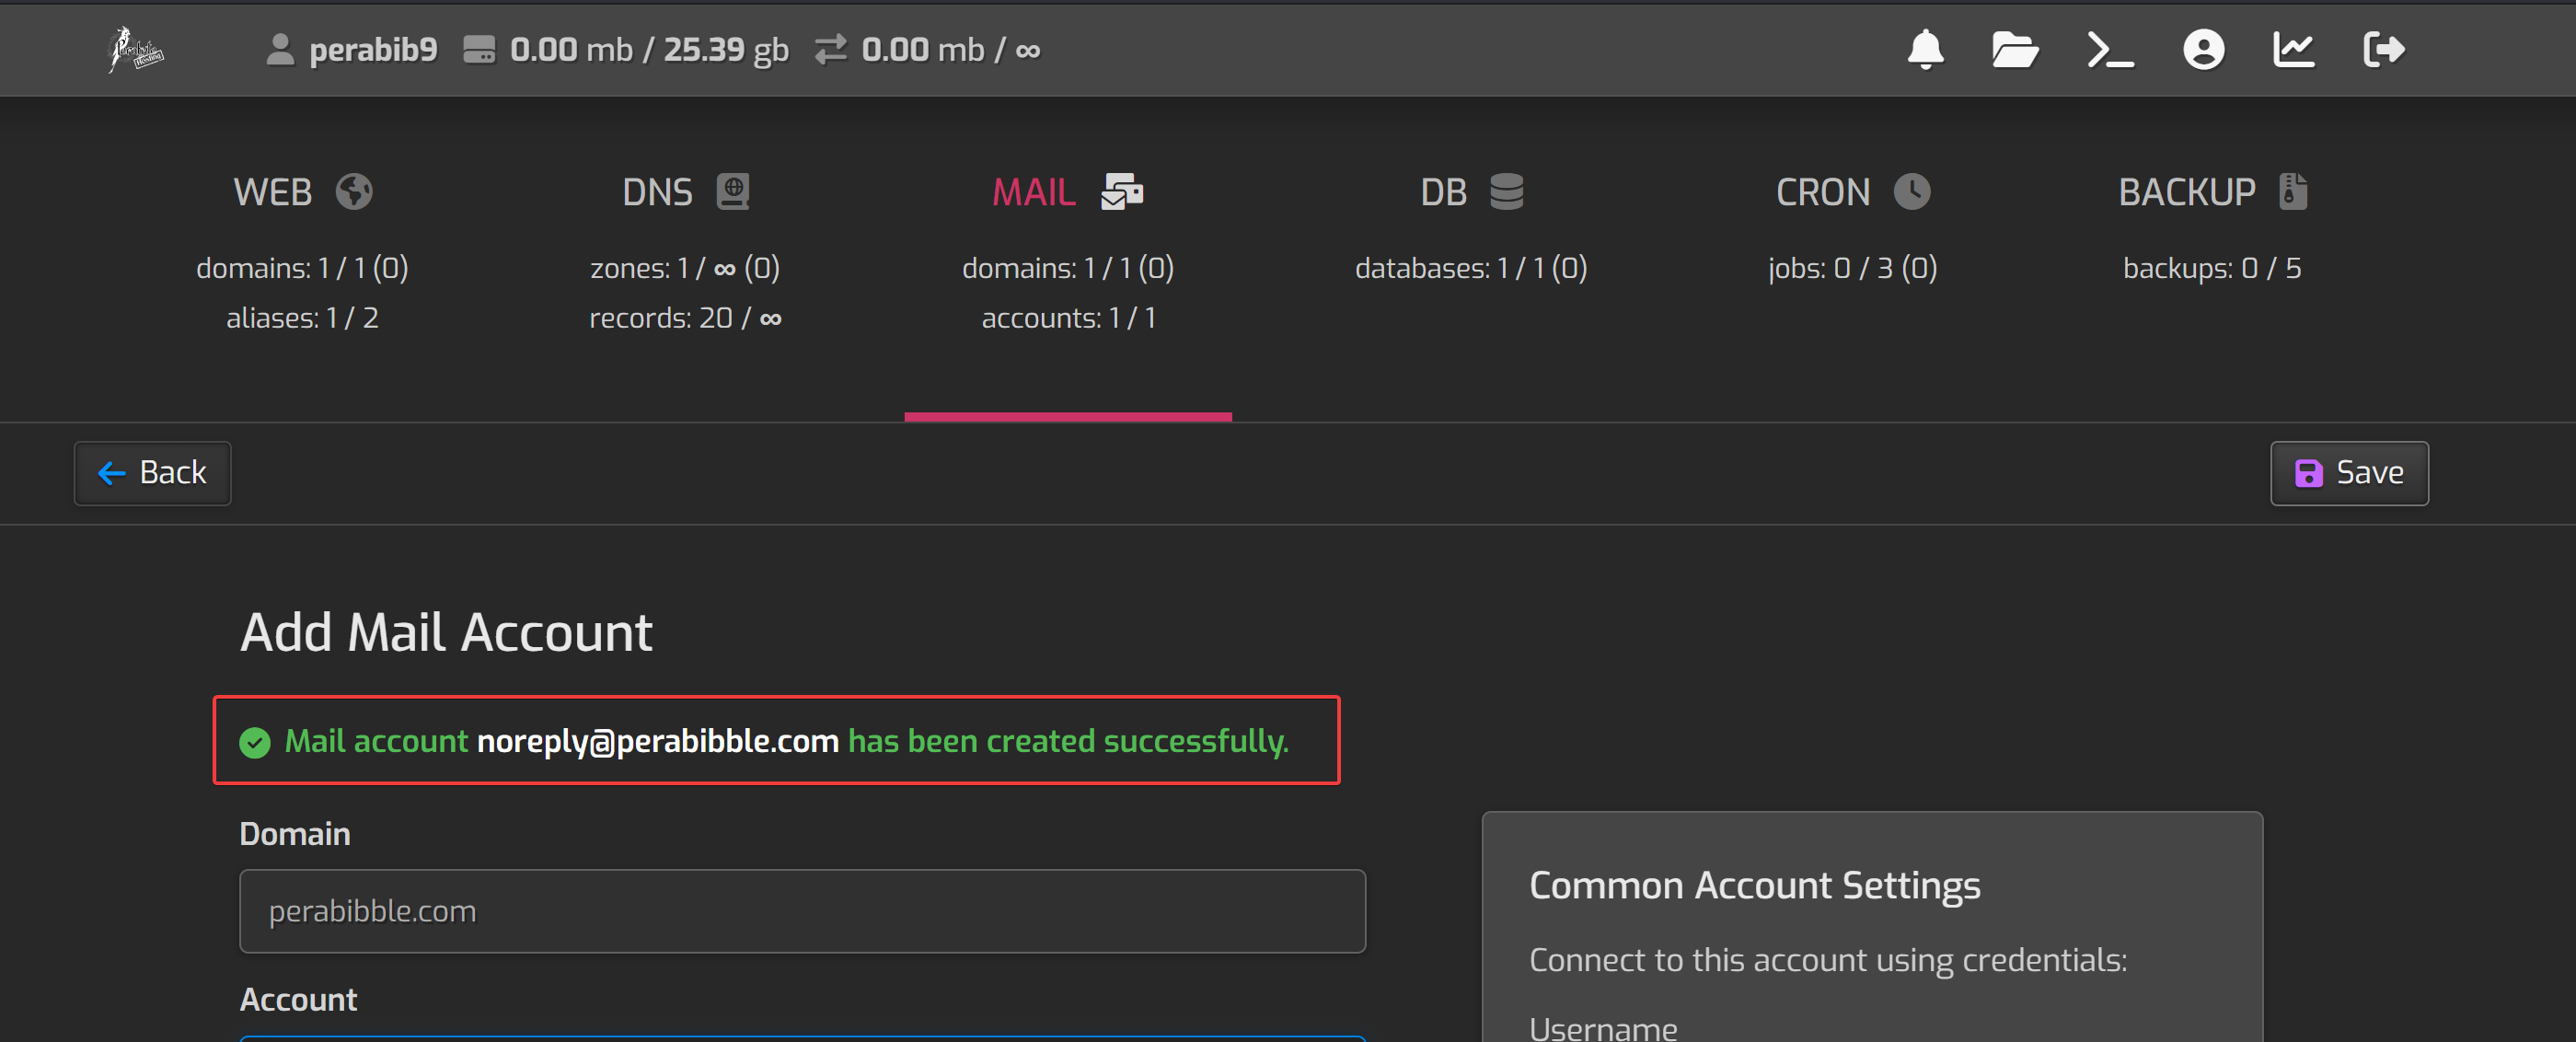
Click "Save" and you should see a success message:
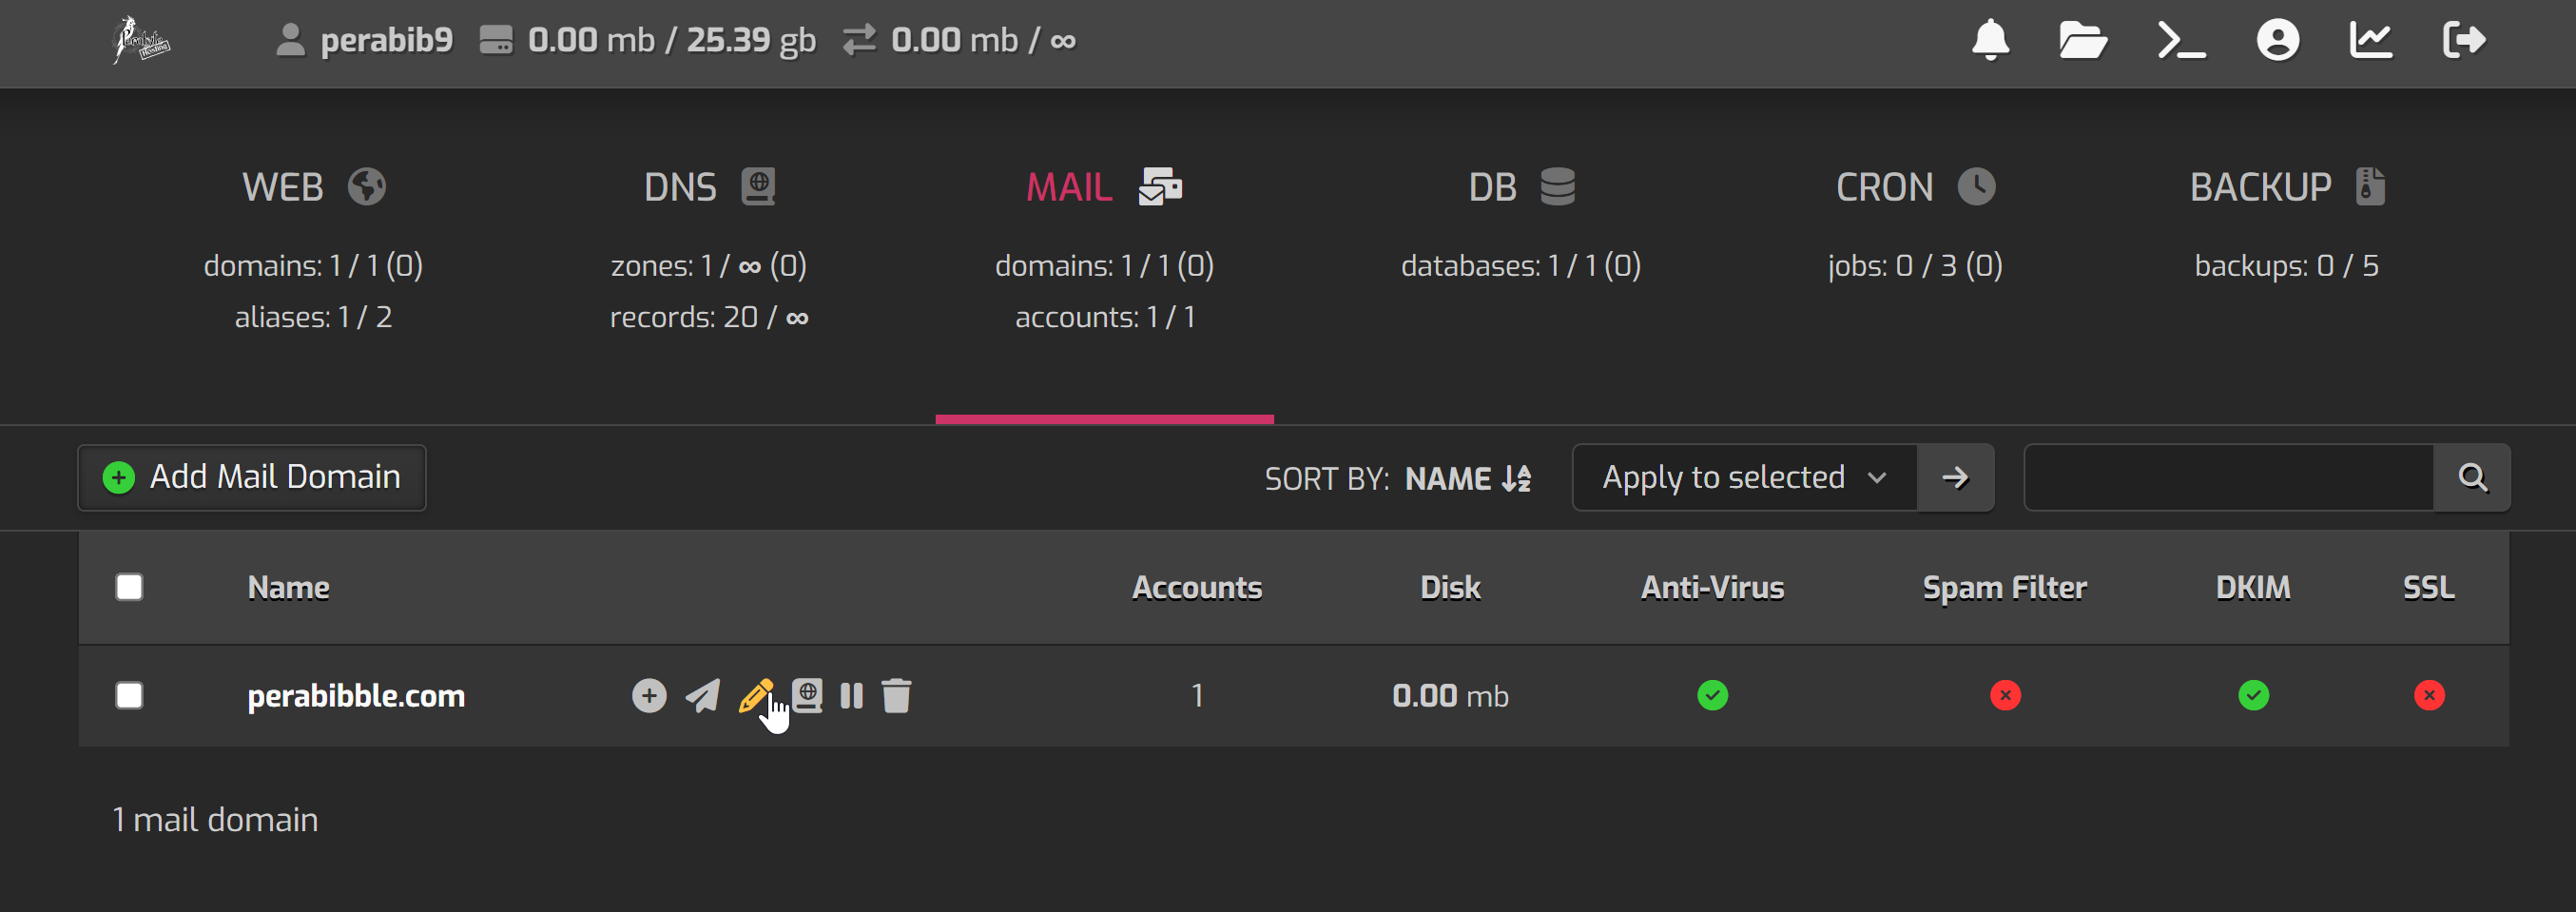
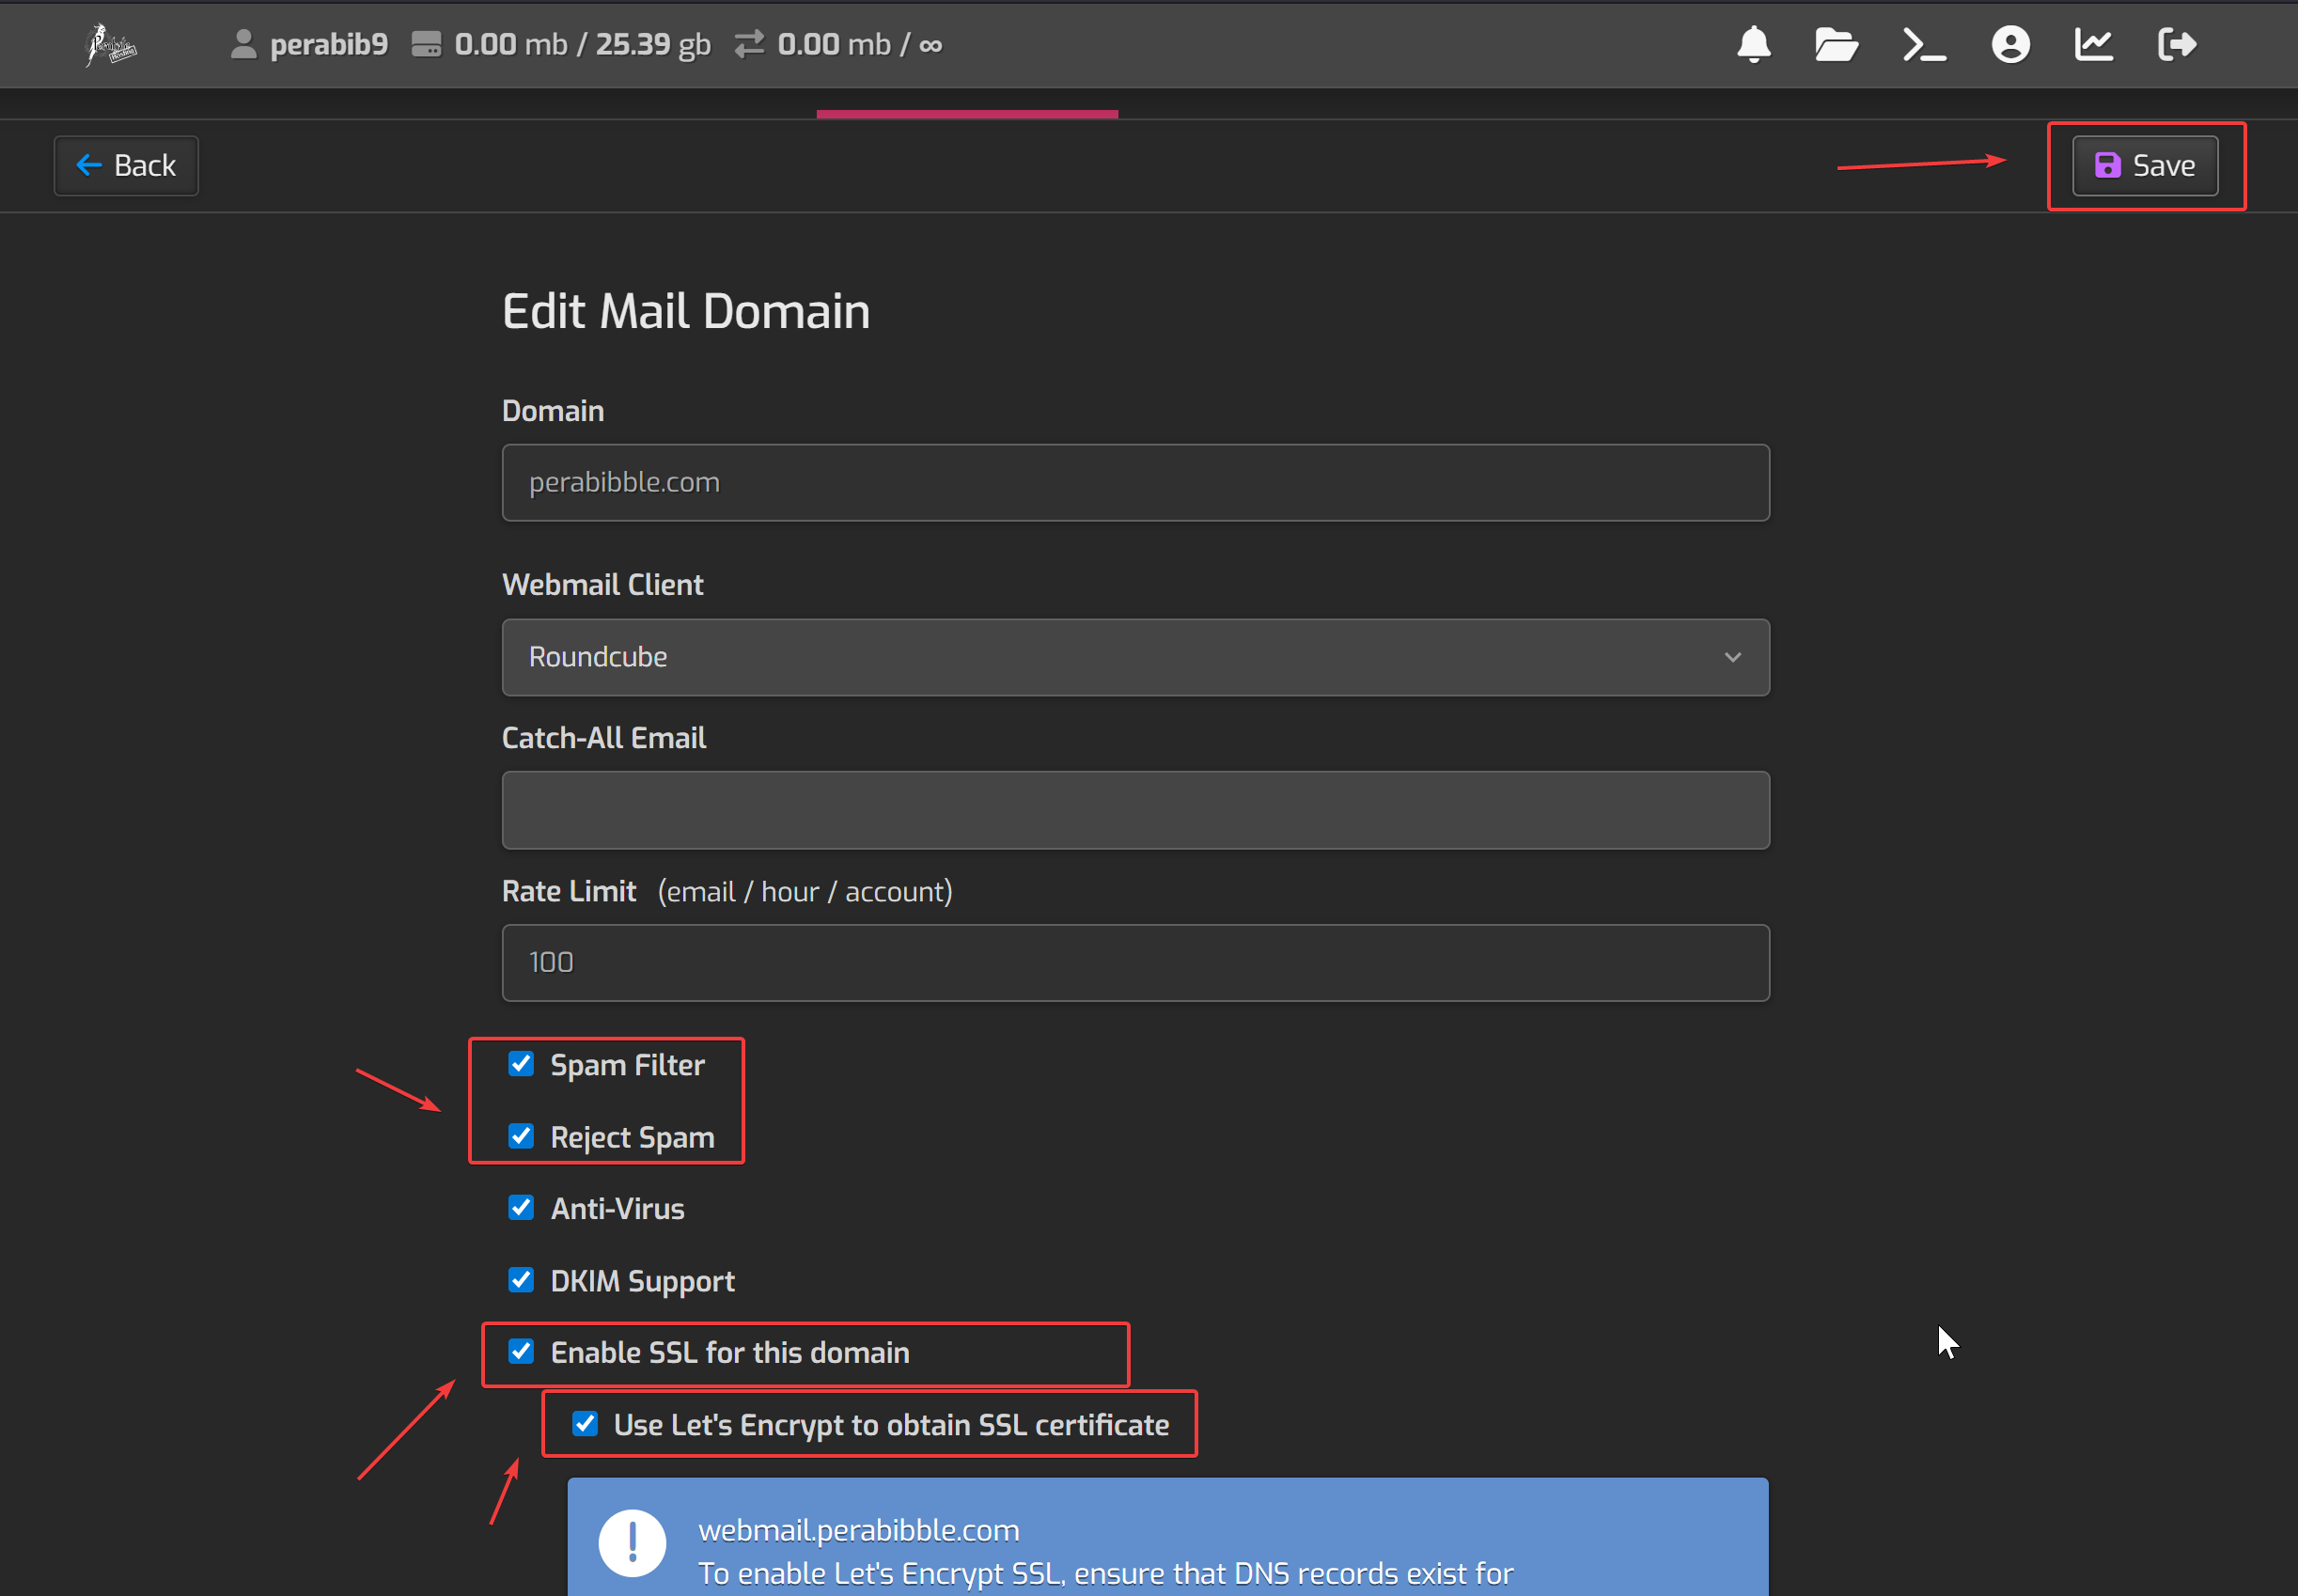
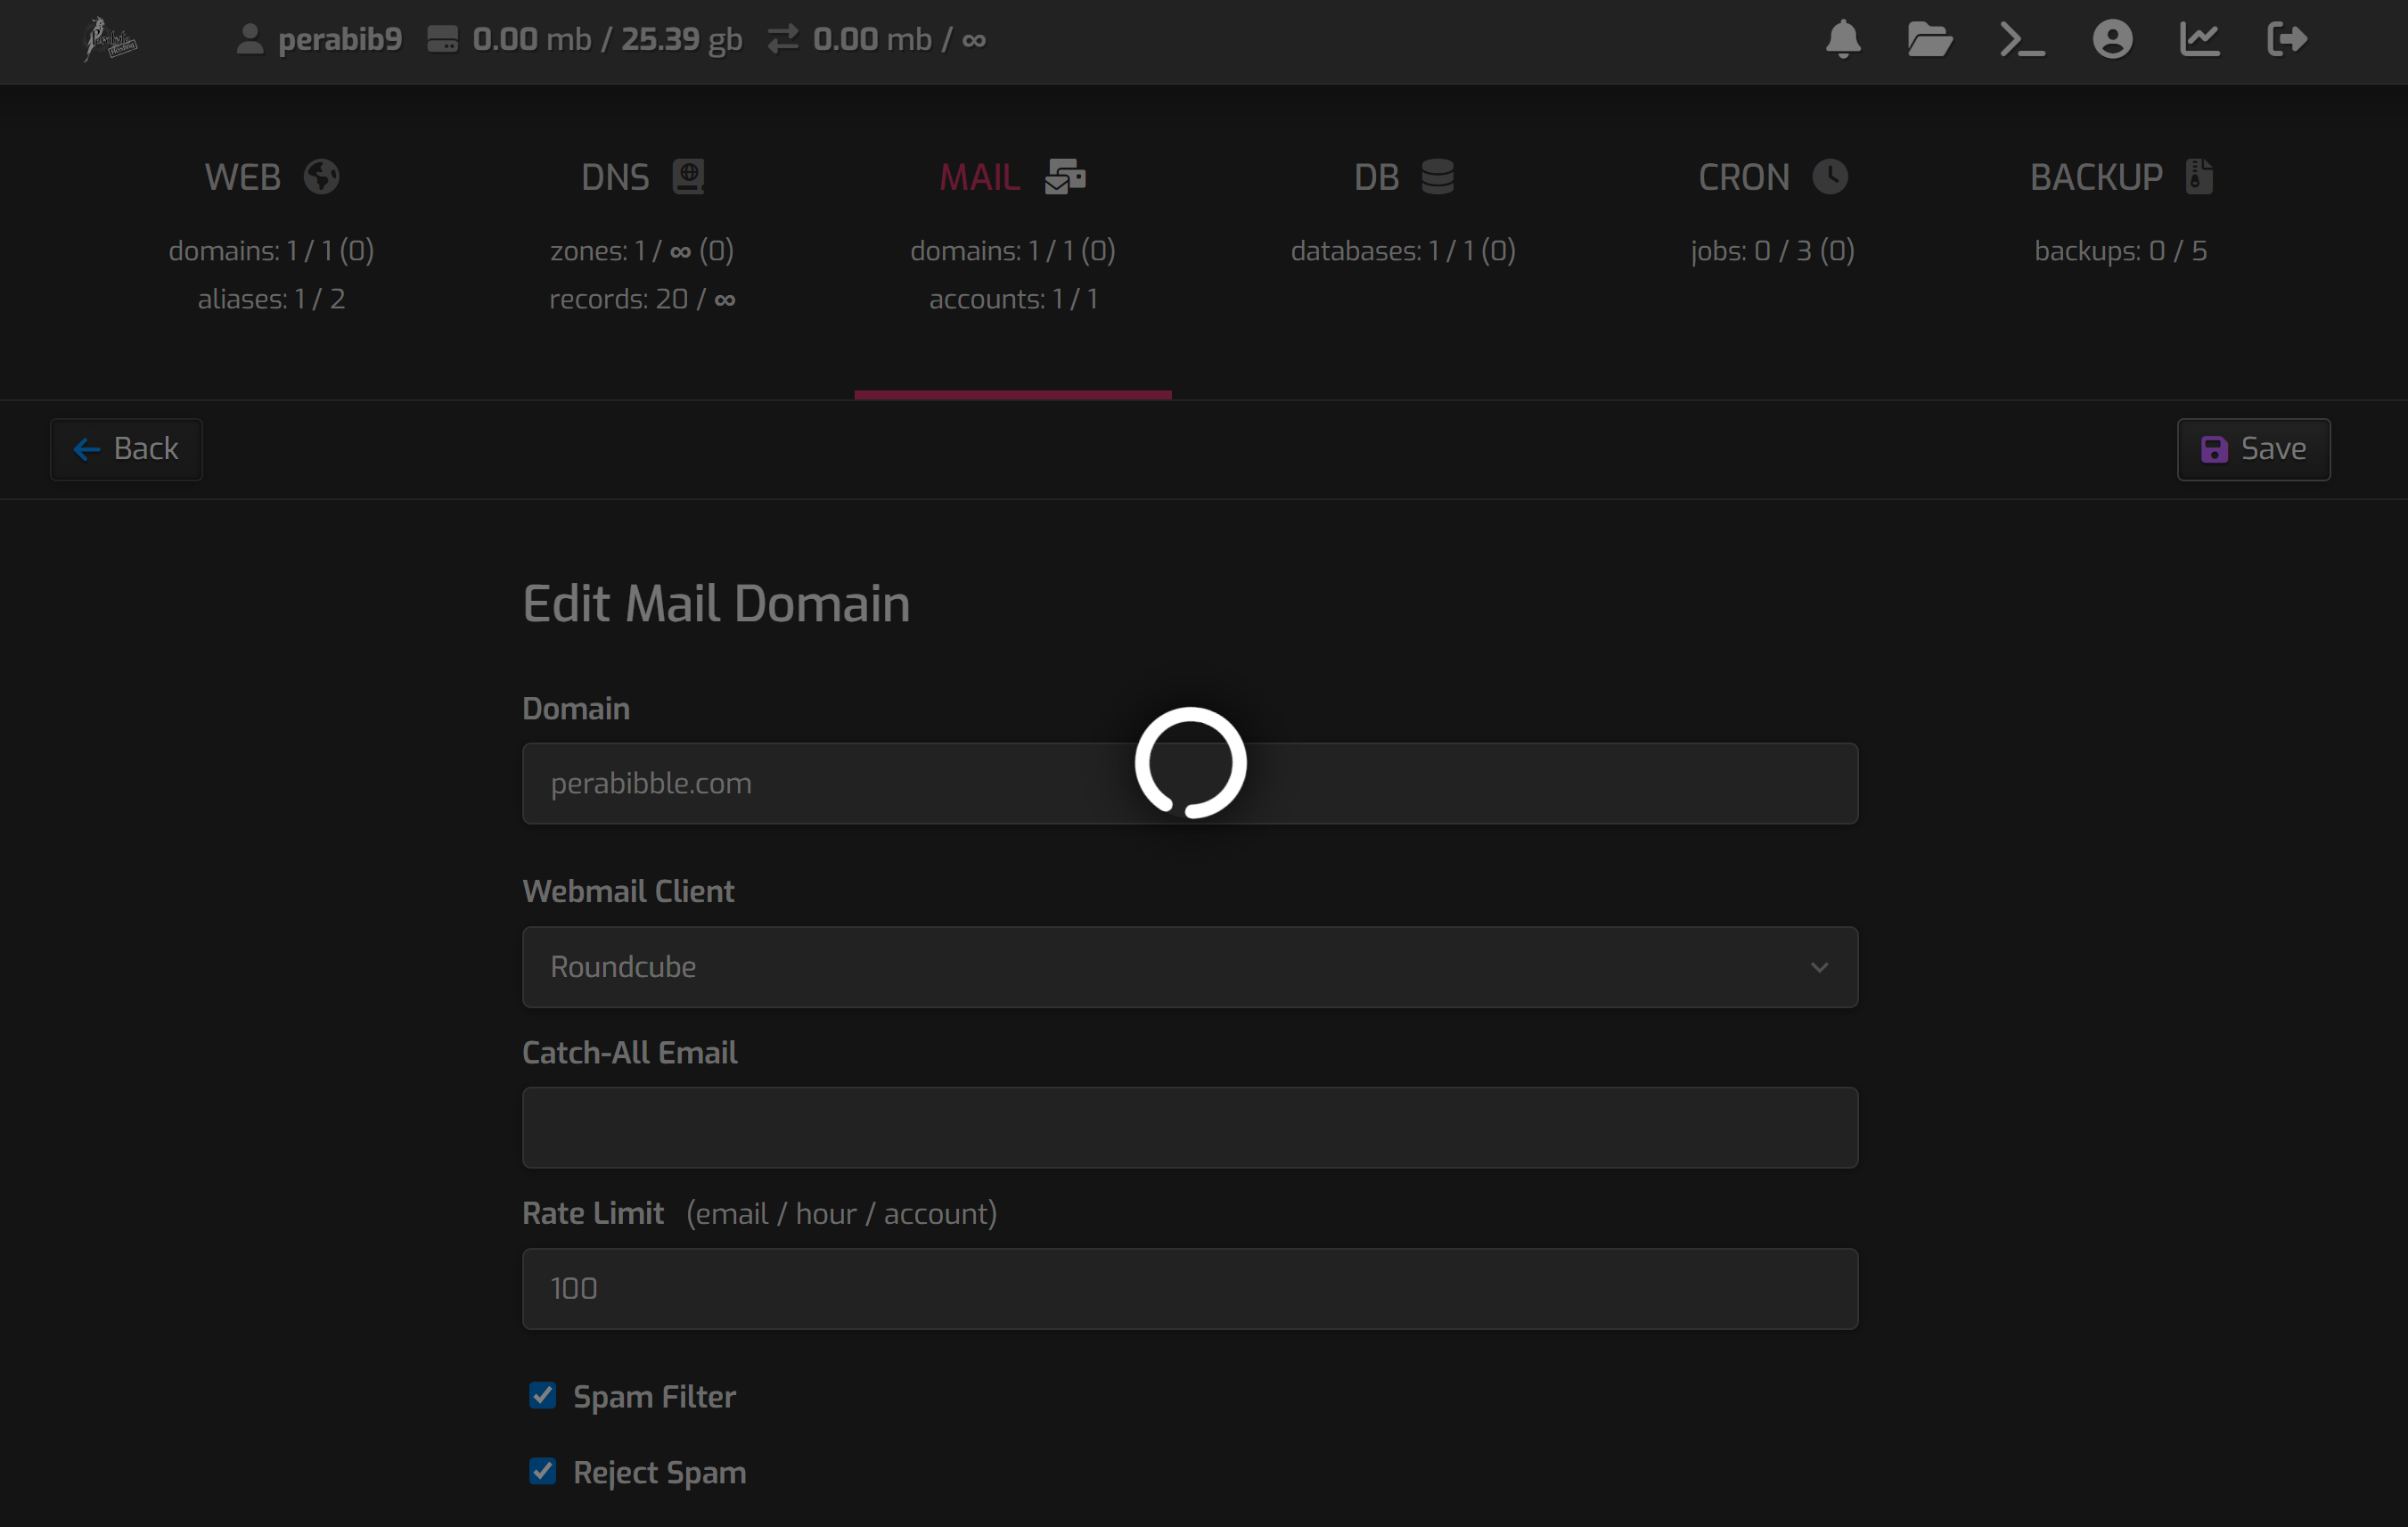
Click the "Mail" button in the navigation again. We are going to enable a setting on our mail domain to make it safer and more secure. This time, hover over the domain name and select the pencil icon to edit it:
Check the boxes "Spam Filter", "Reject Spam", and "Enable SSL for this domain". Then check "Use Let's Encrypt to obtain SSL certificate". Click save. This may take some time to load as it fetches the SSL certificate. Be patient and do not close the page!
After it saves, you should see a success message:
Setting Up The Server
Finally, it's time to get to the good stuff! We're going to put the code on the server.
Connecting via SSH
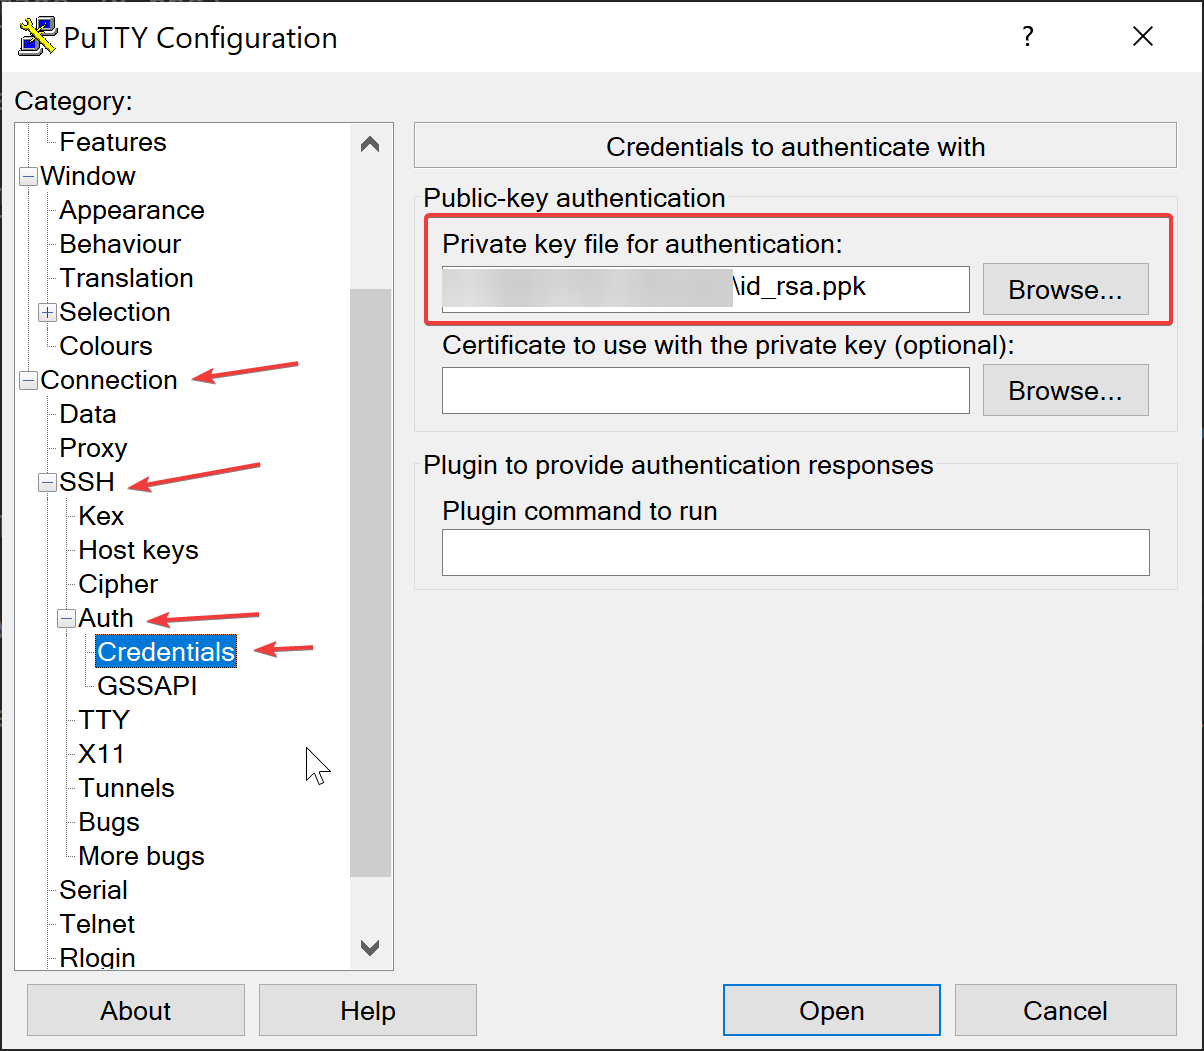
Open up PuTTY or your other favorite SSH tool. Load in your SSH key and connect to your server via YOURUSERNAME@YOURSERVERURL. For example, I am using PuTTY and my connection is perabib9@shared1.perabyte.host.
For PuTTY, you will need to have loaded in your key in the left side menu before you can connect. To do this, go to Connection -> SSH -> Auth -> Credentials, and select your .ppk file.
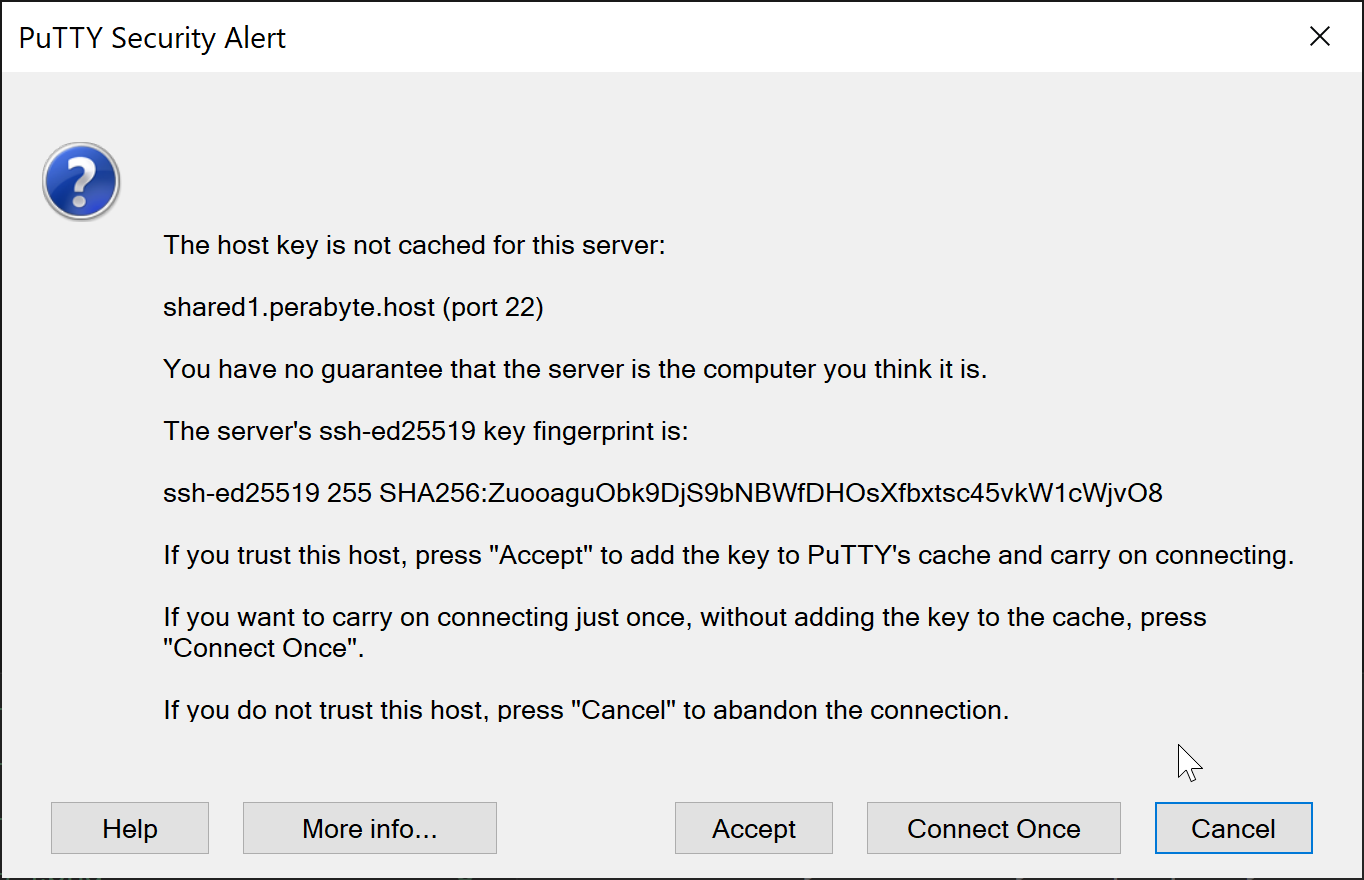
You may see a warning when connecting for the first time. Click "yes", "accept", or whatever equivalent for your SSH client.
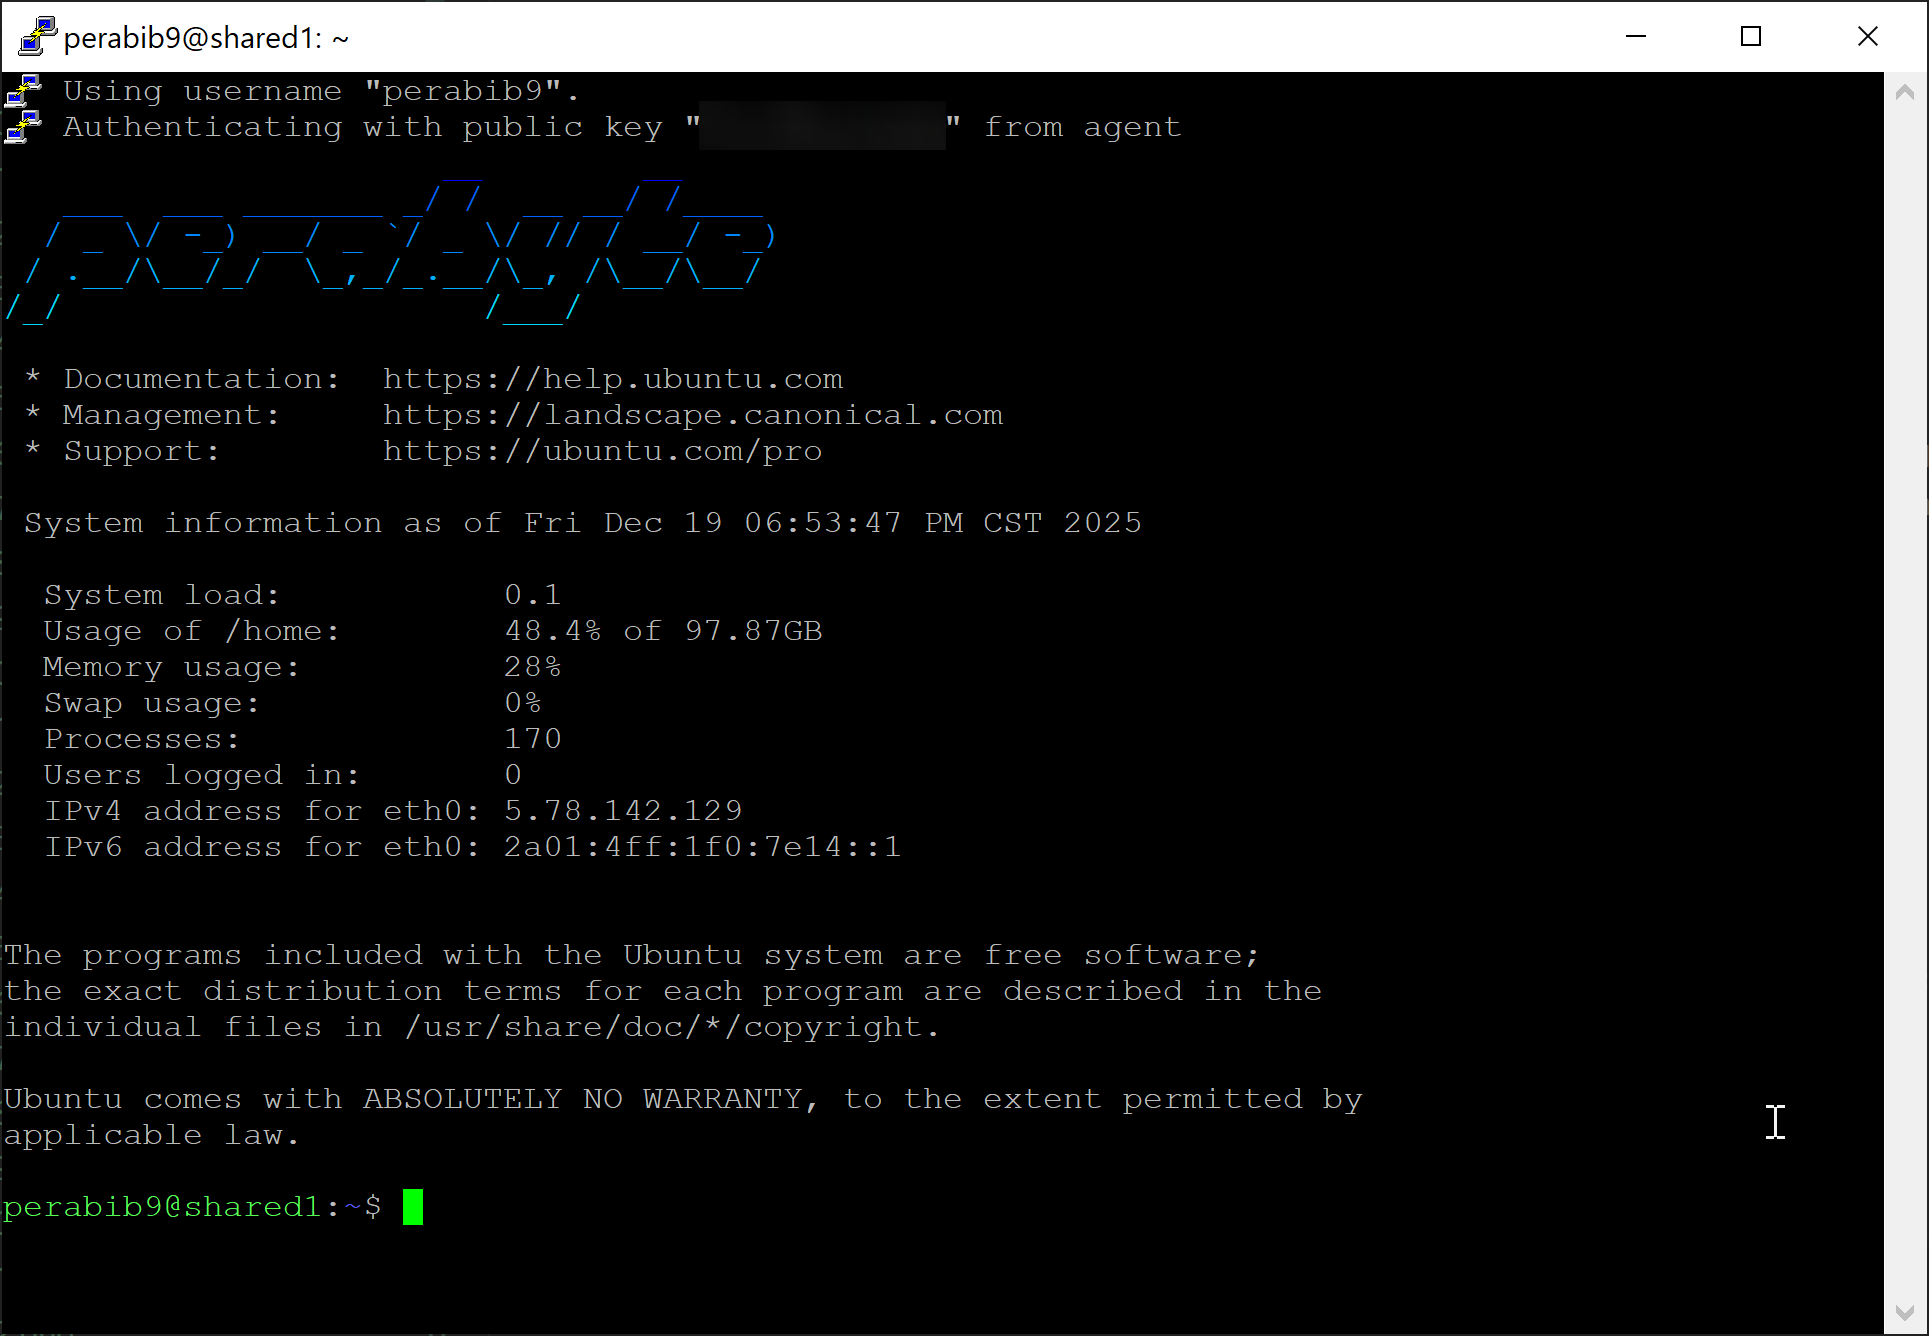
If your SSH key is properly configured, you should have logged in automatically. You will see a screen like this:
Now we are going to type in some commands. Enter all commands provided one by one.
If you are using PuTTY, press right click instead of ctrl+v to paste text into the window. It's a little strange, but you'll get used to it!
First, we are going to create the folder Lorekeeper lives in. Our control panel serves all website files out /web/YOURDOMAIN.COM/public_html, so we need to create a folder in there.
Again, if the command is successful, there will be no feedback. For example:
To confirm this was successful, if you type in ls and press enter, you should see the text in bright blue.
If the text is red, that means an error occurred. Check that you didn't make any typos, and ask the Lorekeeper Discord for help.
Instead of typing in /web/YOURDOMAIN.COM/public_html/YOURDOMAIN.COM, now we can just type in ~/YOURDOMAIN.COM!
Creating Git Hooks
Next, we're going to create a folder structure that will allow us to deploy Lorekeeper using Git. Run these commands one by one:
mkdir ~/YOURDOMAIN.COM/www
mkdir ~/YOURDOMAIN.COM/site_hub.git
If the commands were successful, there will be no feedback. For example:
Let's set up the site_hub.git folder first. We will set our default branch to be called "main", and then create a "bare" git repository in the site_hub.git folder:
cd ~/YOURDOMAIN.COM/site_hub.git
git config --global init.defaultBranch main
git--bare init
cd basically stands for "change directory". The only command that will show any feedback is the last one. For example:
Next, we will use something called Git hooks and bash scripting. This will allow us to automatically send the code from our computer, to the site_hub.git folder, all the way to the www folder.
cd hooks
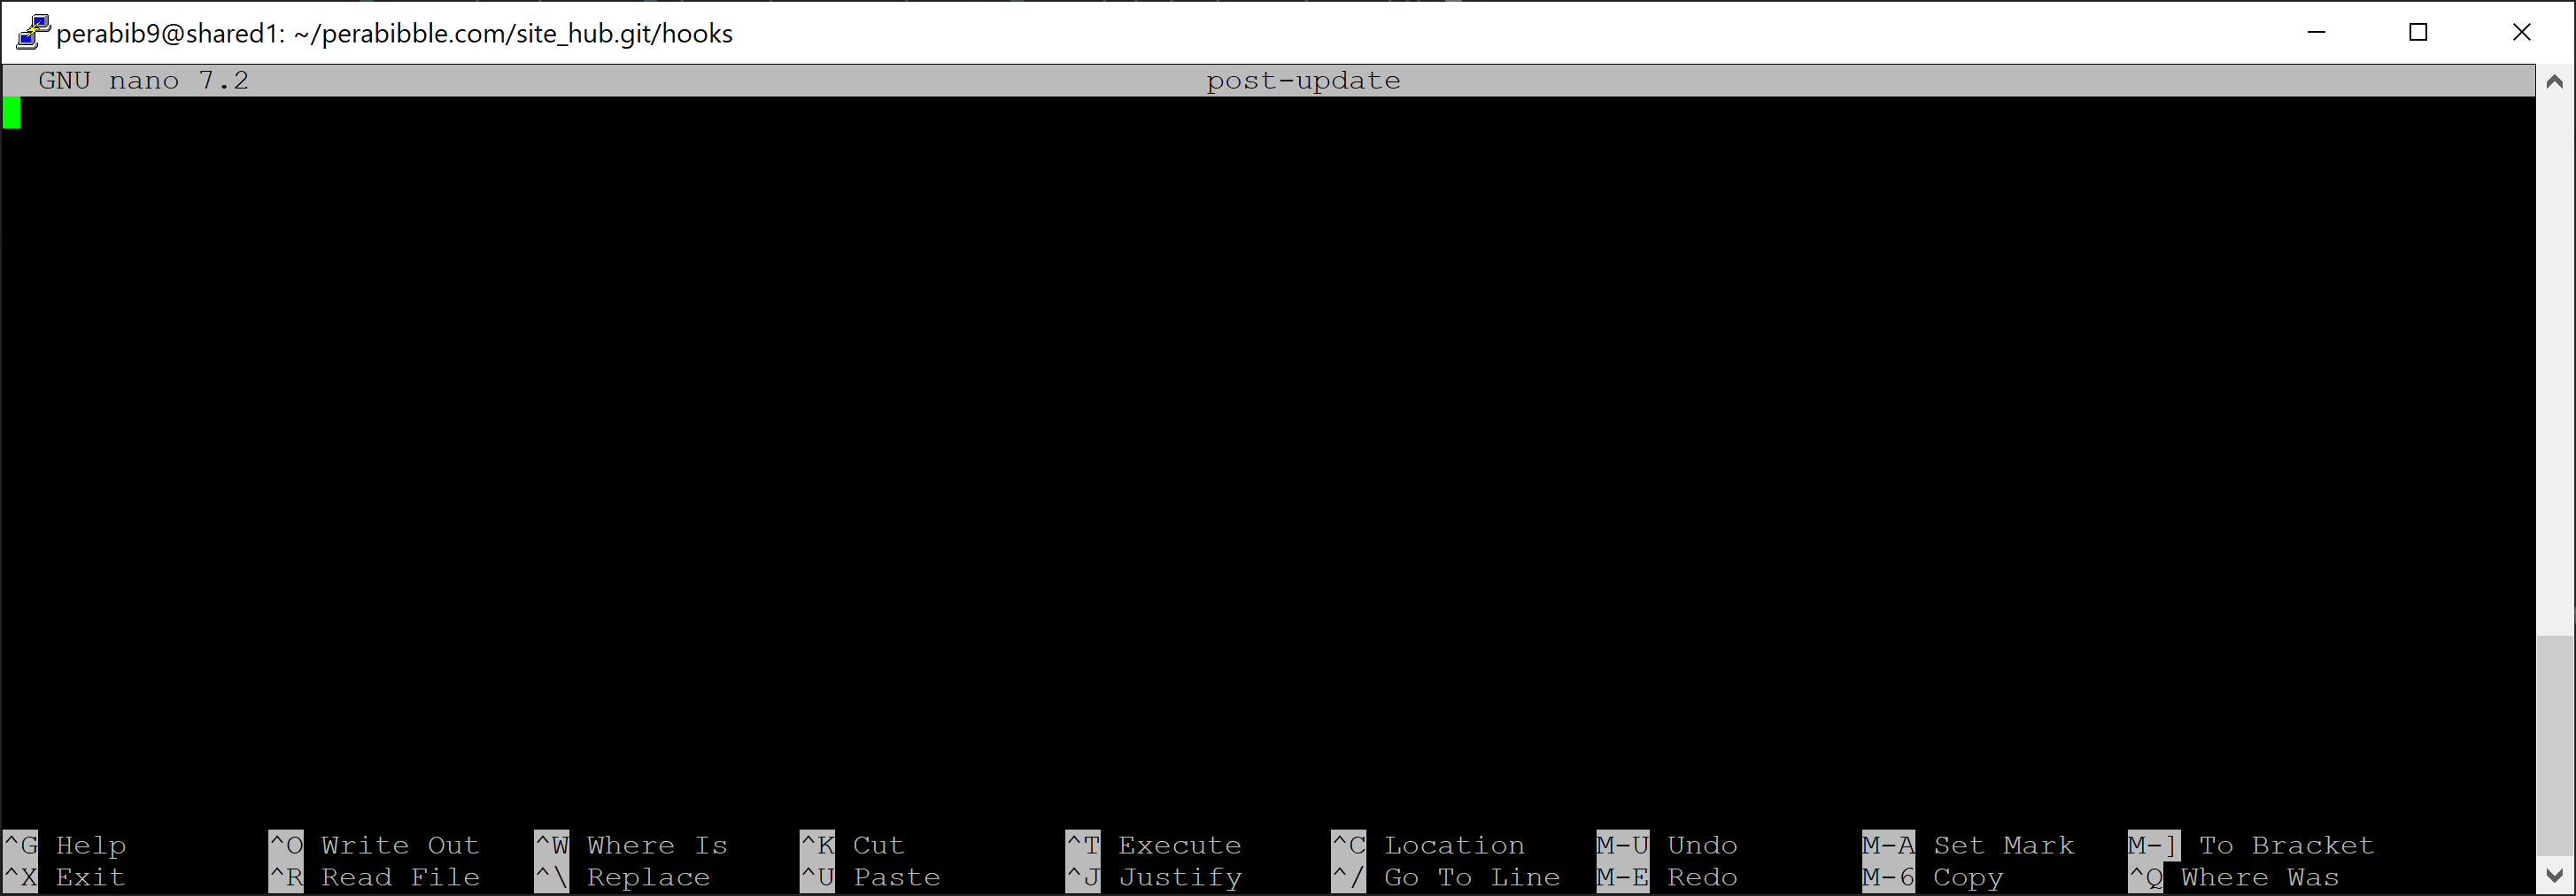
nano post-update
nano post-update will open up a command line text editor tool called nano, to create a new file named post-update. It should look like this when you run the command:
Paste in the following text:
#!/bin/shechoecho"**** Pulling changes into Prime [Hub's post-update hook]"echocd$HOME/YOURDOMAIN.COM/www ||exitunset GIT_DIR
git pull hub main
exec git-update-server-info
Replace YOURDOMAIN.COM with your domain, and keep everything else the same. For example, here's my file:
To save this file, press ctrl+x, type y, then press enter.
To verify the file saved correctly, type in ls and you should see your file:
Finally, type in the following to make the script executable:
chmod +x post-update
Now we're going to set up the www folder. Type in the following:
cd ~/YOURDOMAIN.COM/www
git init
For example:
We are going to also configure git hooks in the www folder, but the commands will be slightly different. One by one, enter in:
cd .git/hooks
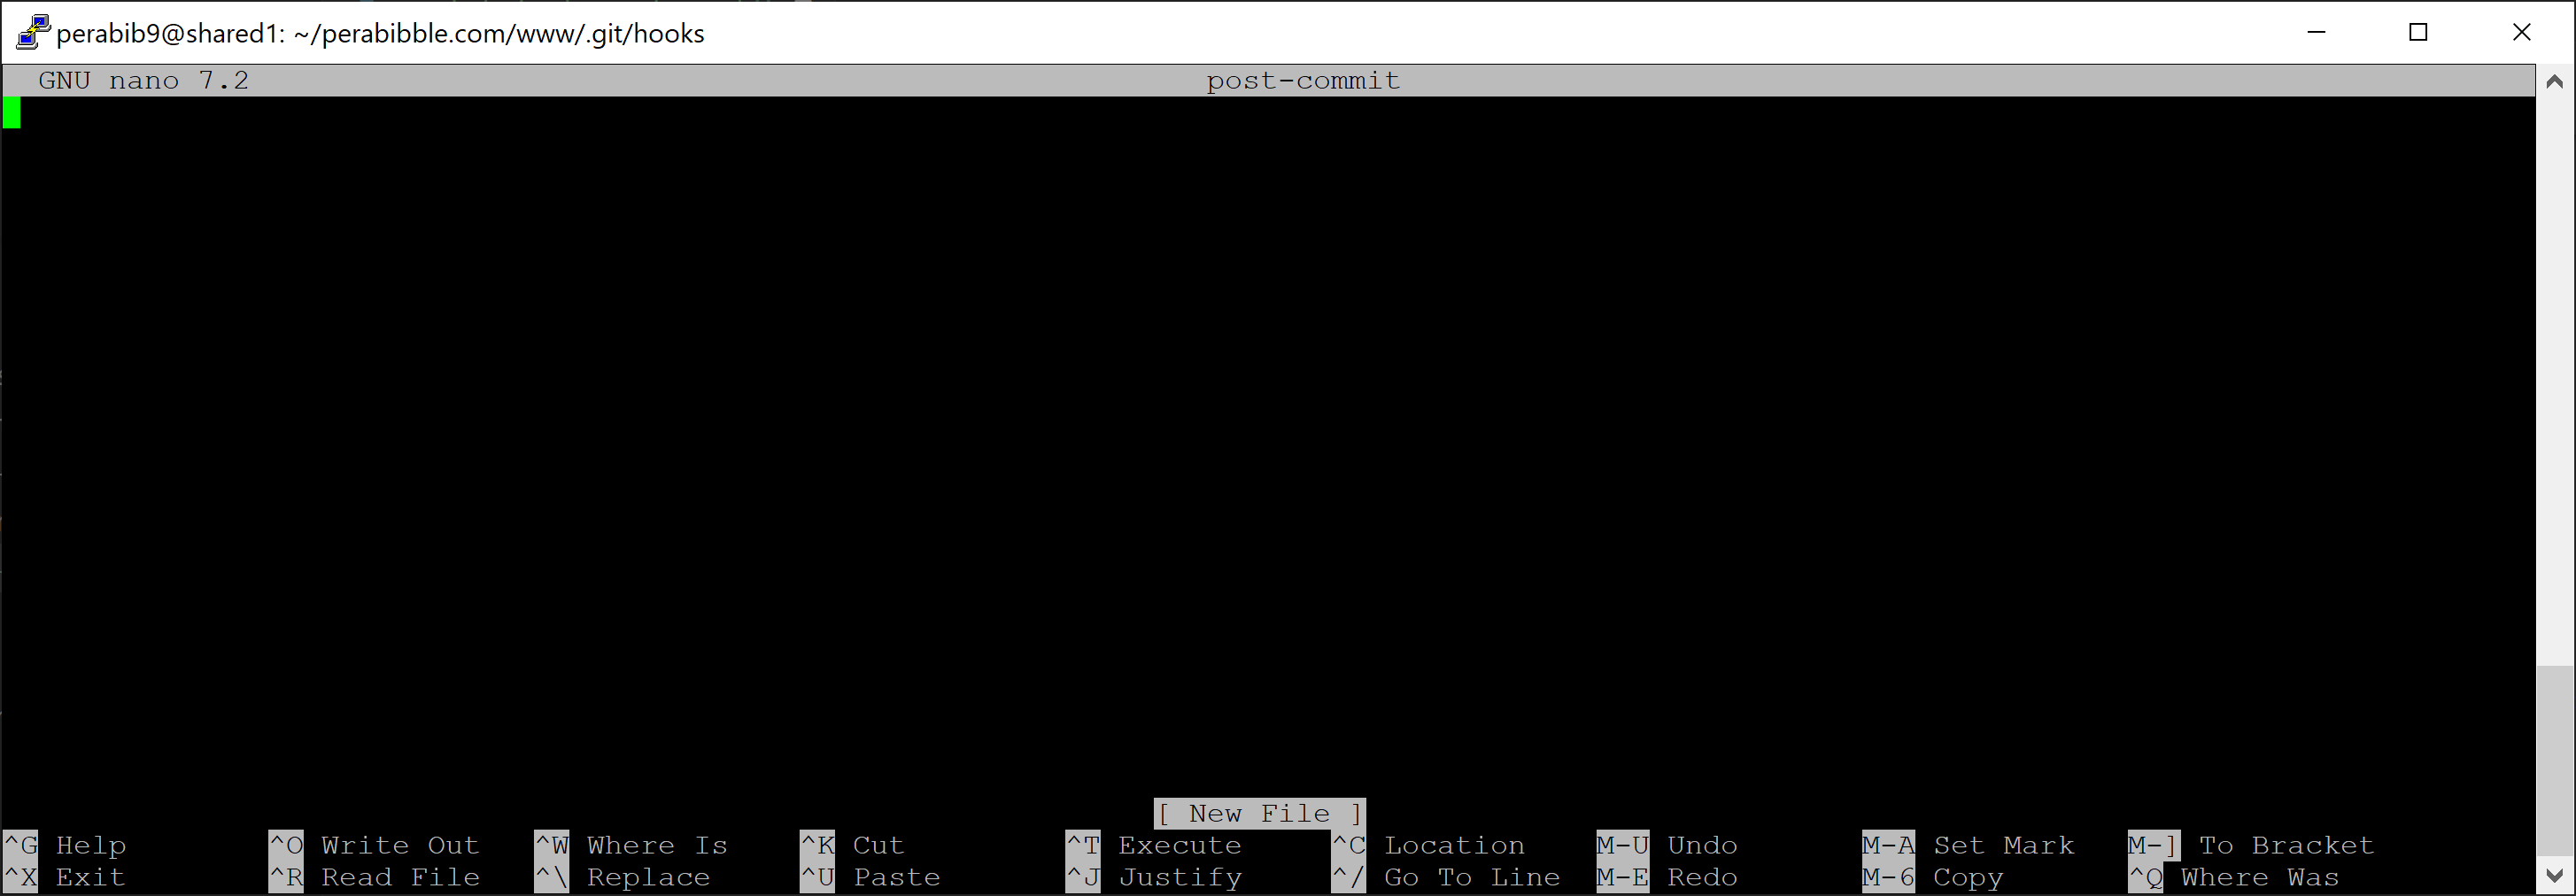
nano post-commit
You should see a screen like this:
Paste in the following text:
#!/bin/shechoecho"**** Pushing changes to Hub [Prime's post-commit hook]"echogit push hub
It should look like this:
Press ctrl+x, type y, then press enter to save this file.
It should look like this when done:
Finally, make this file executable as well.
chmod +x post-commit
We are going to run one final command in the www folder. This will add site_hub.git as a remote, so that it can acquire code from there. Enter in:
git remote add hub ../site_hub.git
If this command was successful, you won't see any feedback. For example:
Pushing the Code to Live
If you were following the prerequisites, you already have a local copy of Lorekeeper running using SourceGit. We are now going to use SourceGit to push the code live.
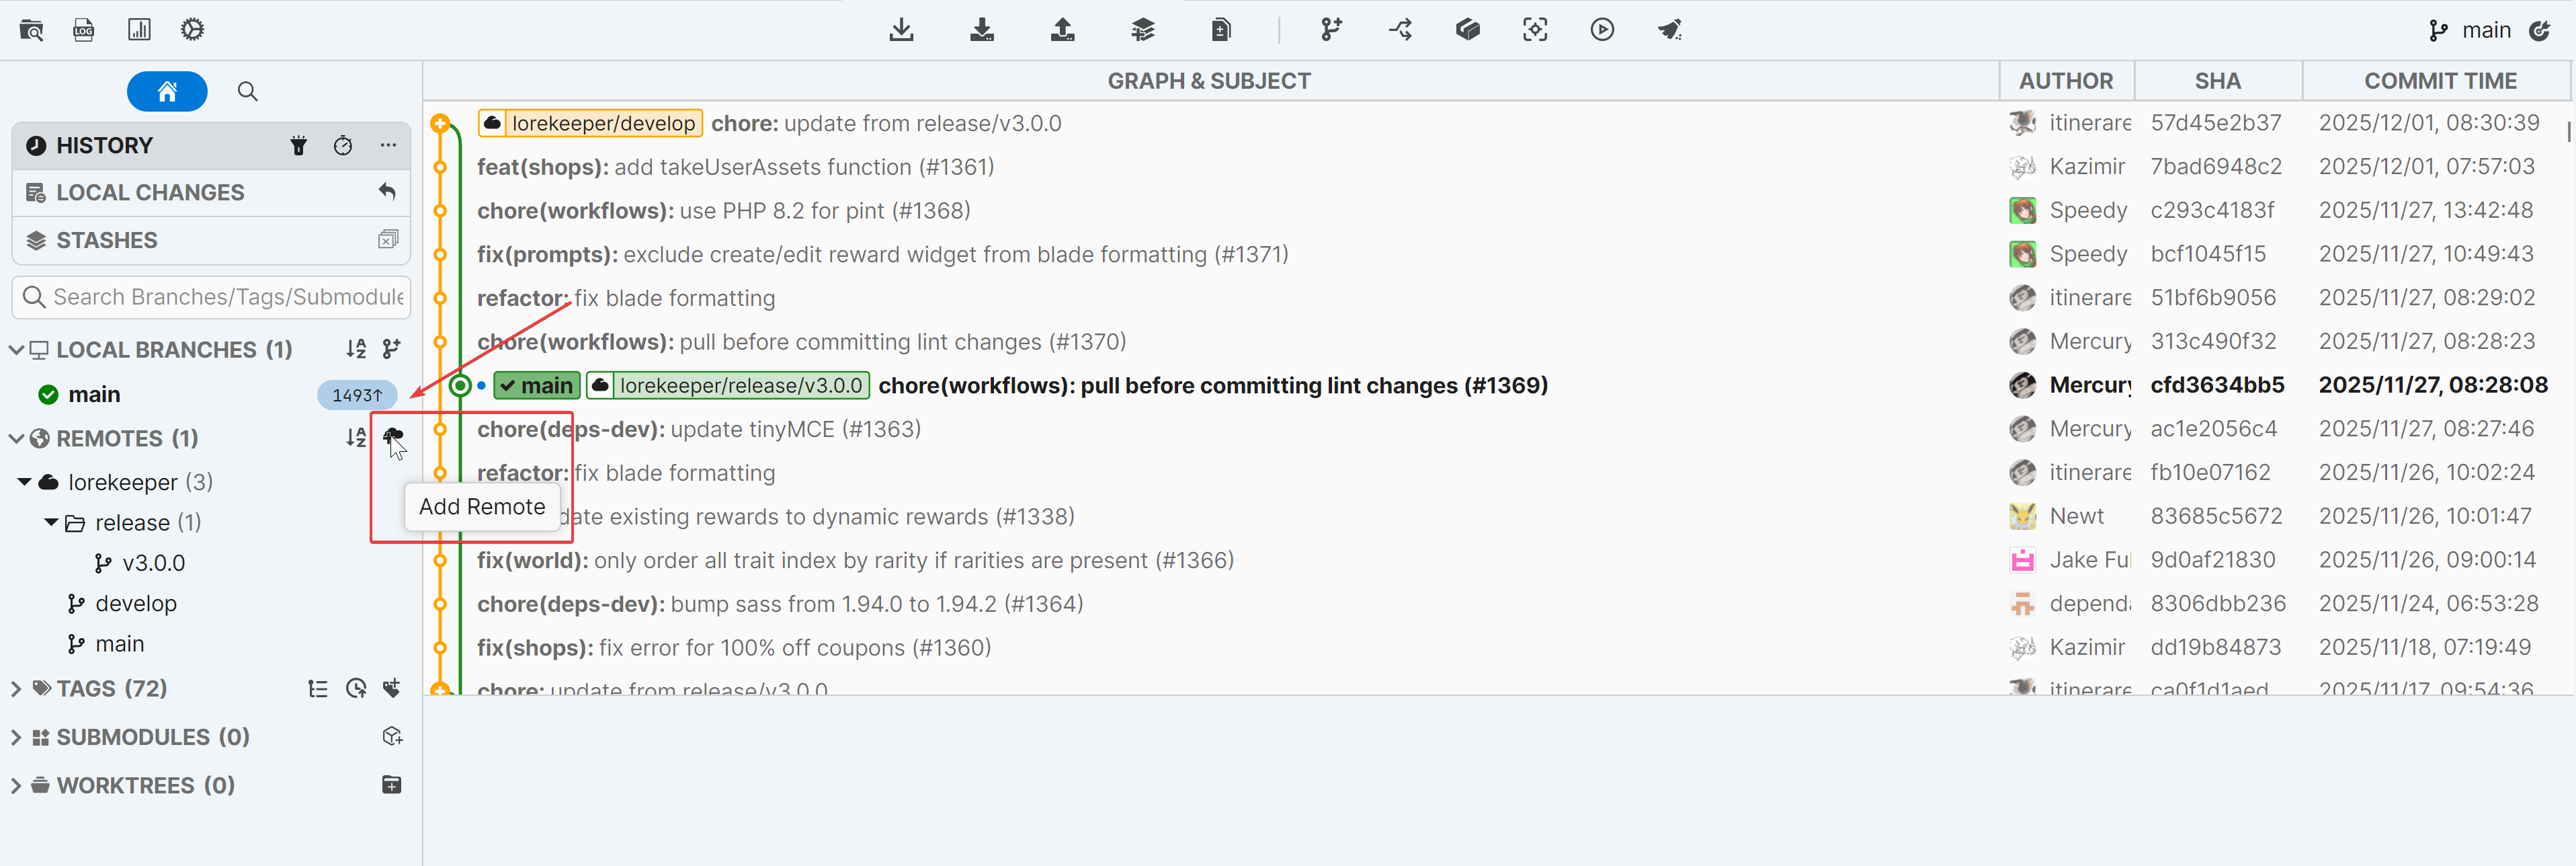
Open SourceGit and press this button to "Add Remote".
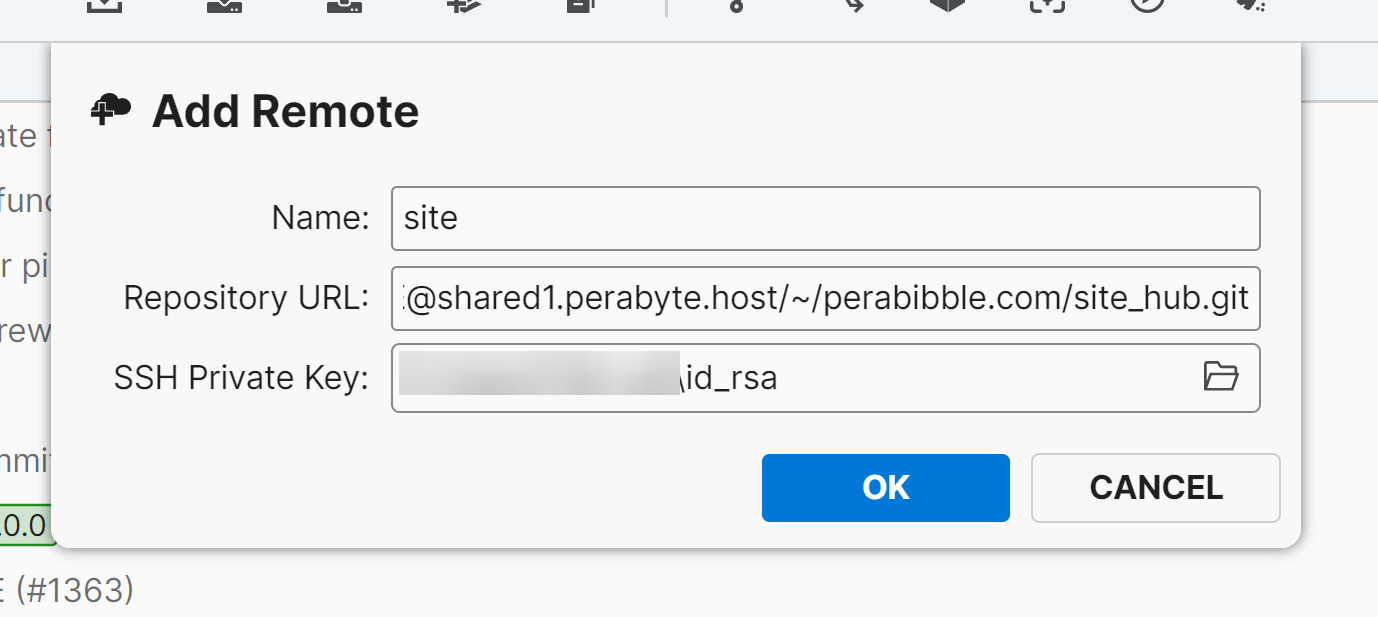
Enter in the following information:
Name: site
Repository URL: ssh://USERNAME@SERVERURL/~/YOURDOMAIN.COM/site_hub.git. For example, mine is ssh://perabib9@shared1.perabyte.host/~/perabibble.com/site_hub.git
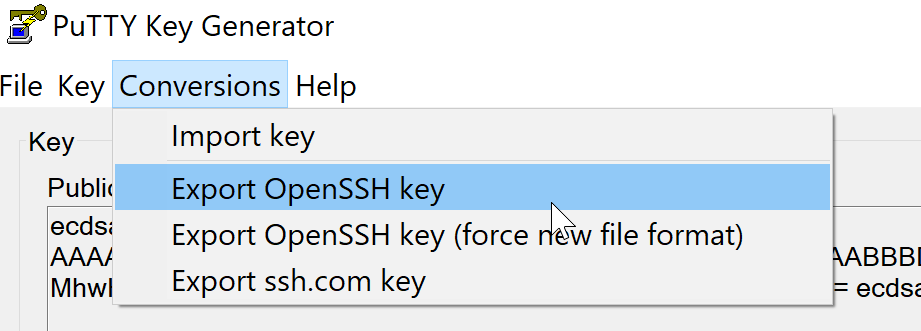
When you type in the Repository URL, it will automatically open a field for you to select your private SSH key. You want to select your key formatted for OpenSSH, NOT the .ppk file.
You can save a "formatted for OpenSSH" key in PuTTYgen by opening your .ppk file and selecting Conversions -> Export OpenSSH key.
It should look like this:
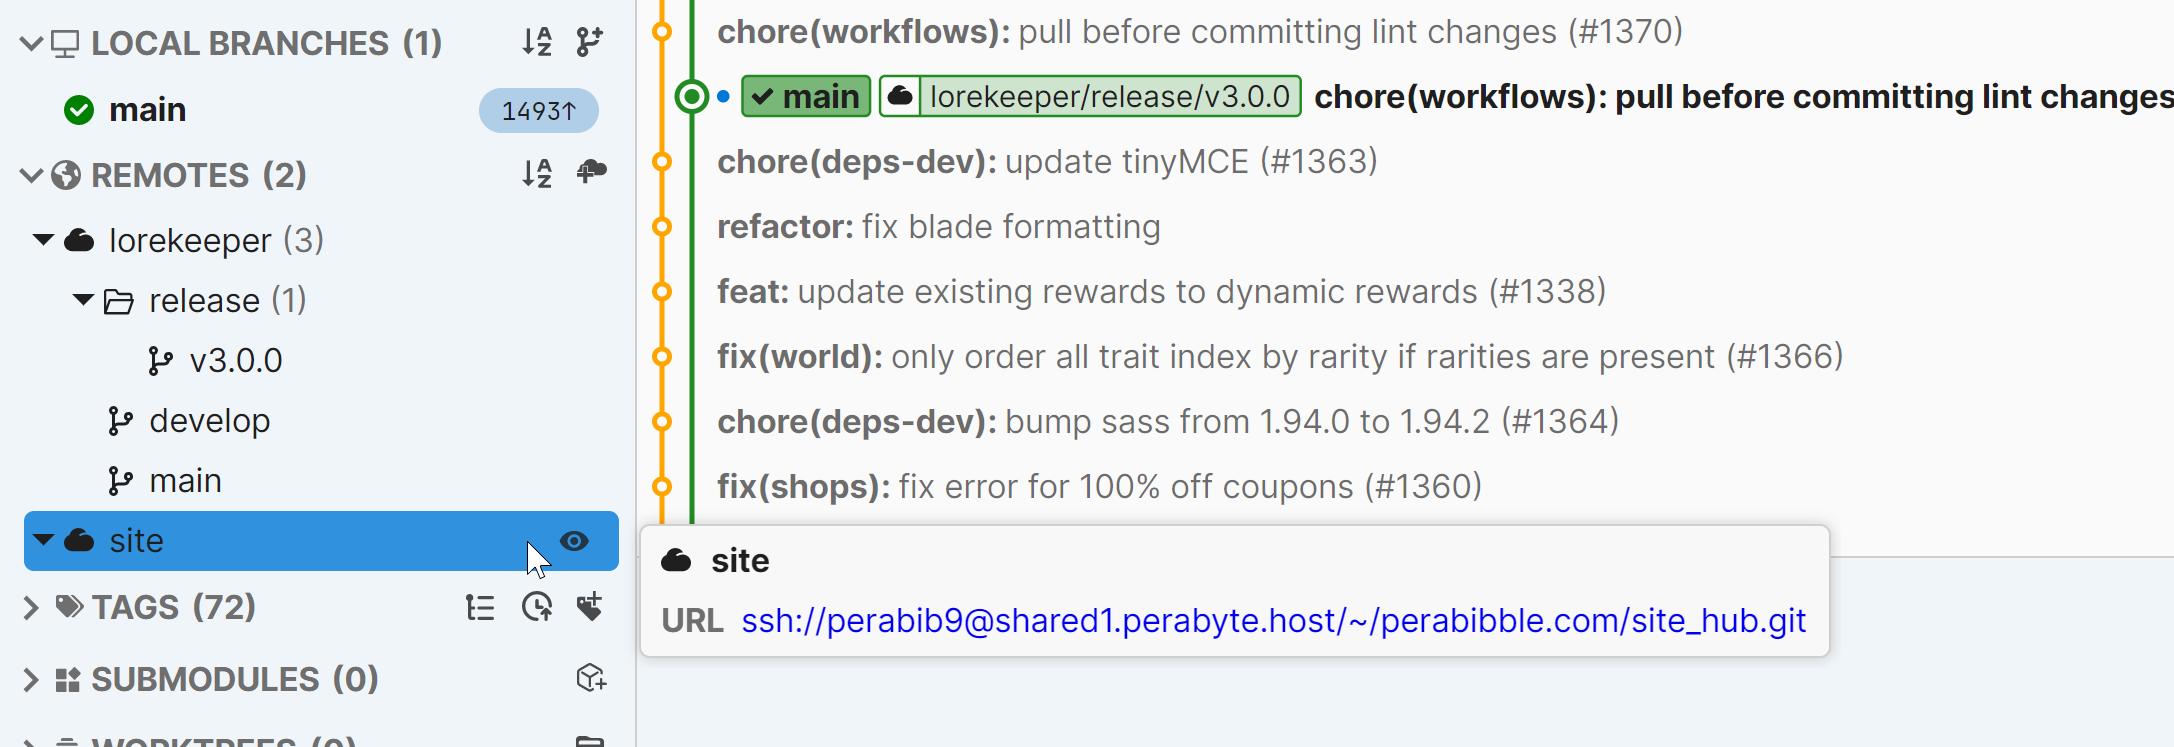
Press "OK". You shouldn't see any errors, and your site will appear in the sidebar:
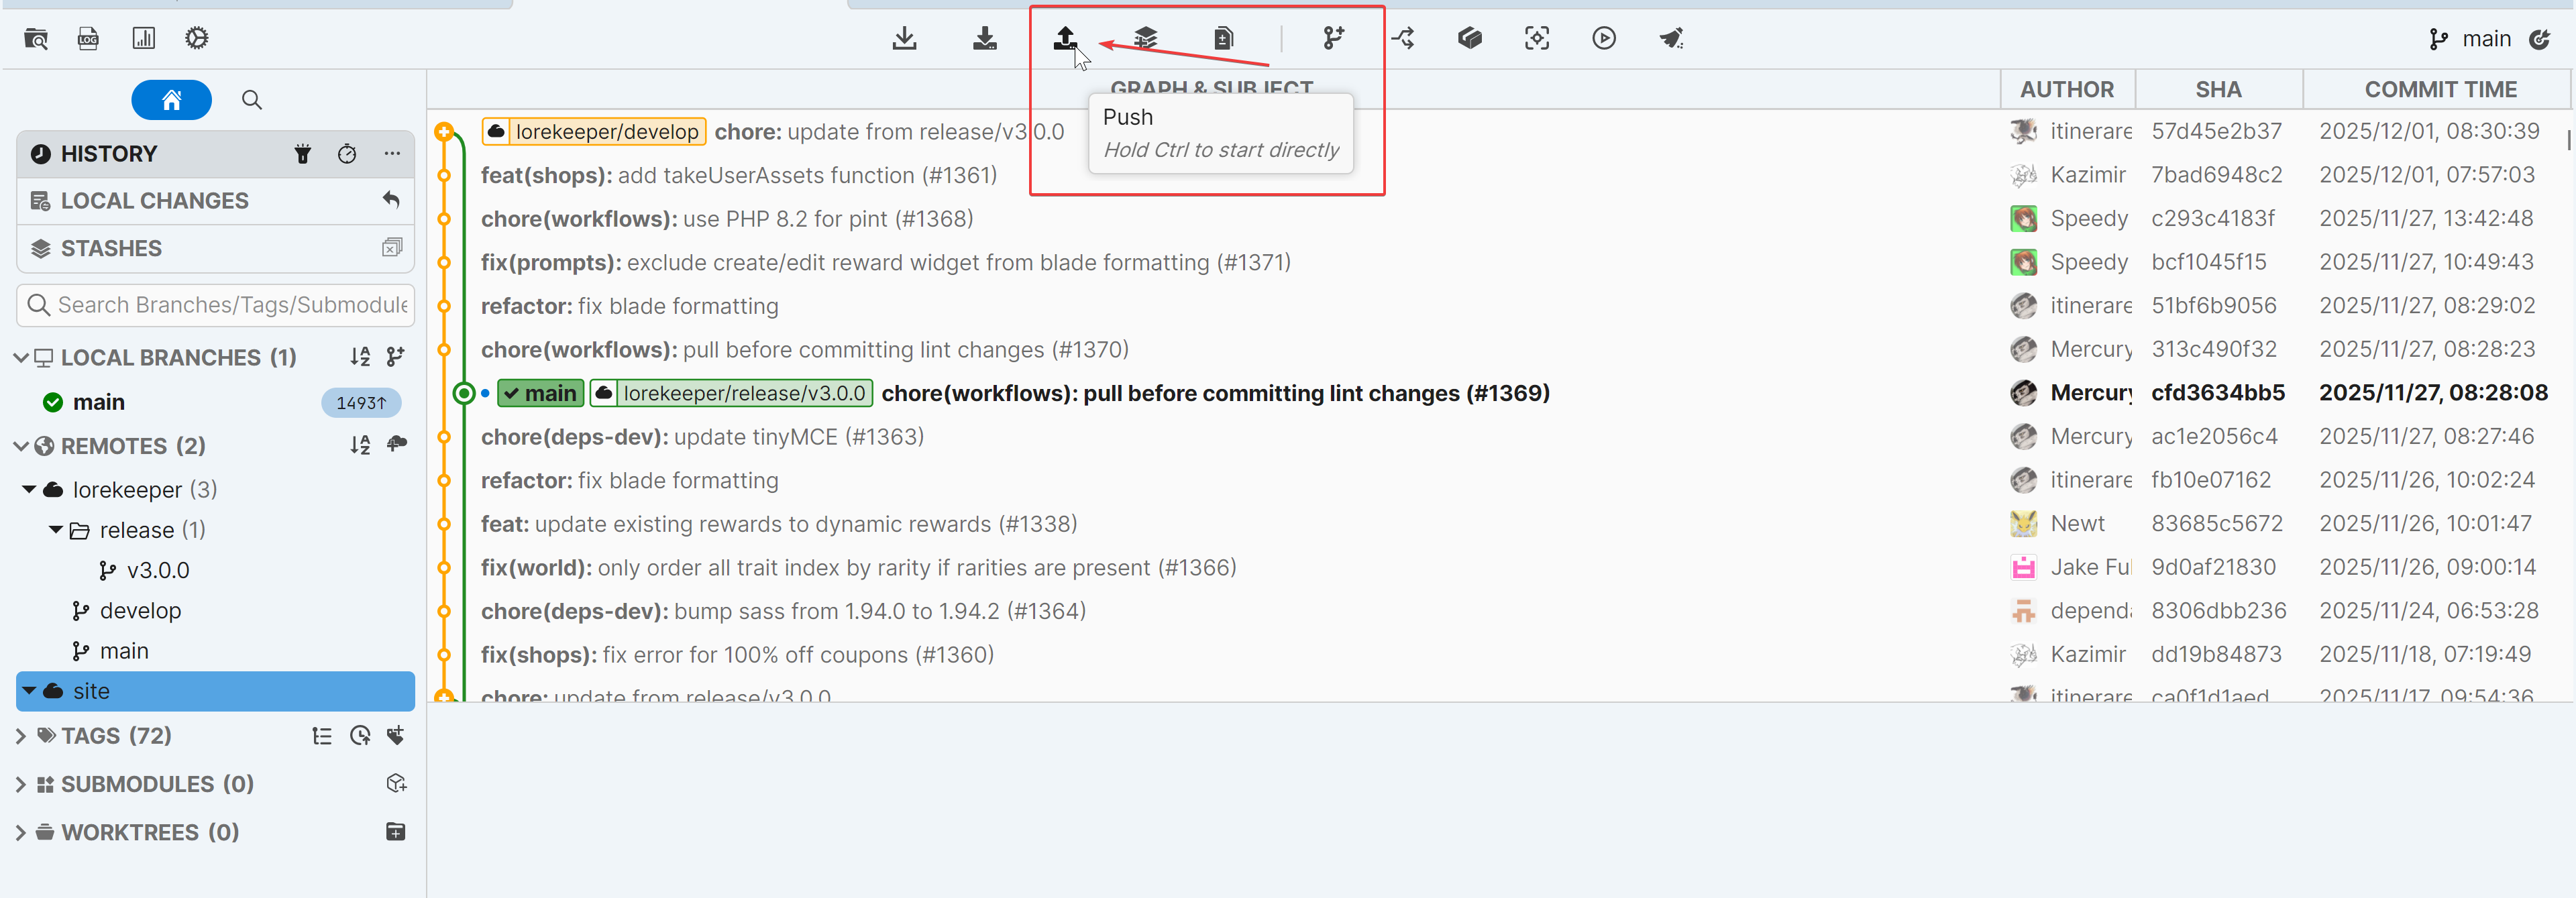
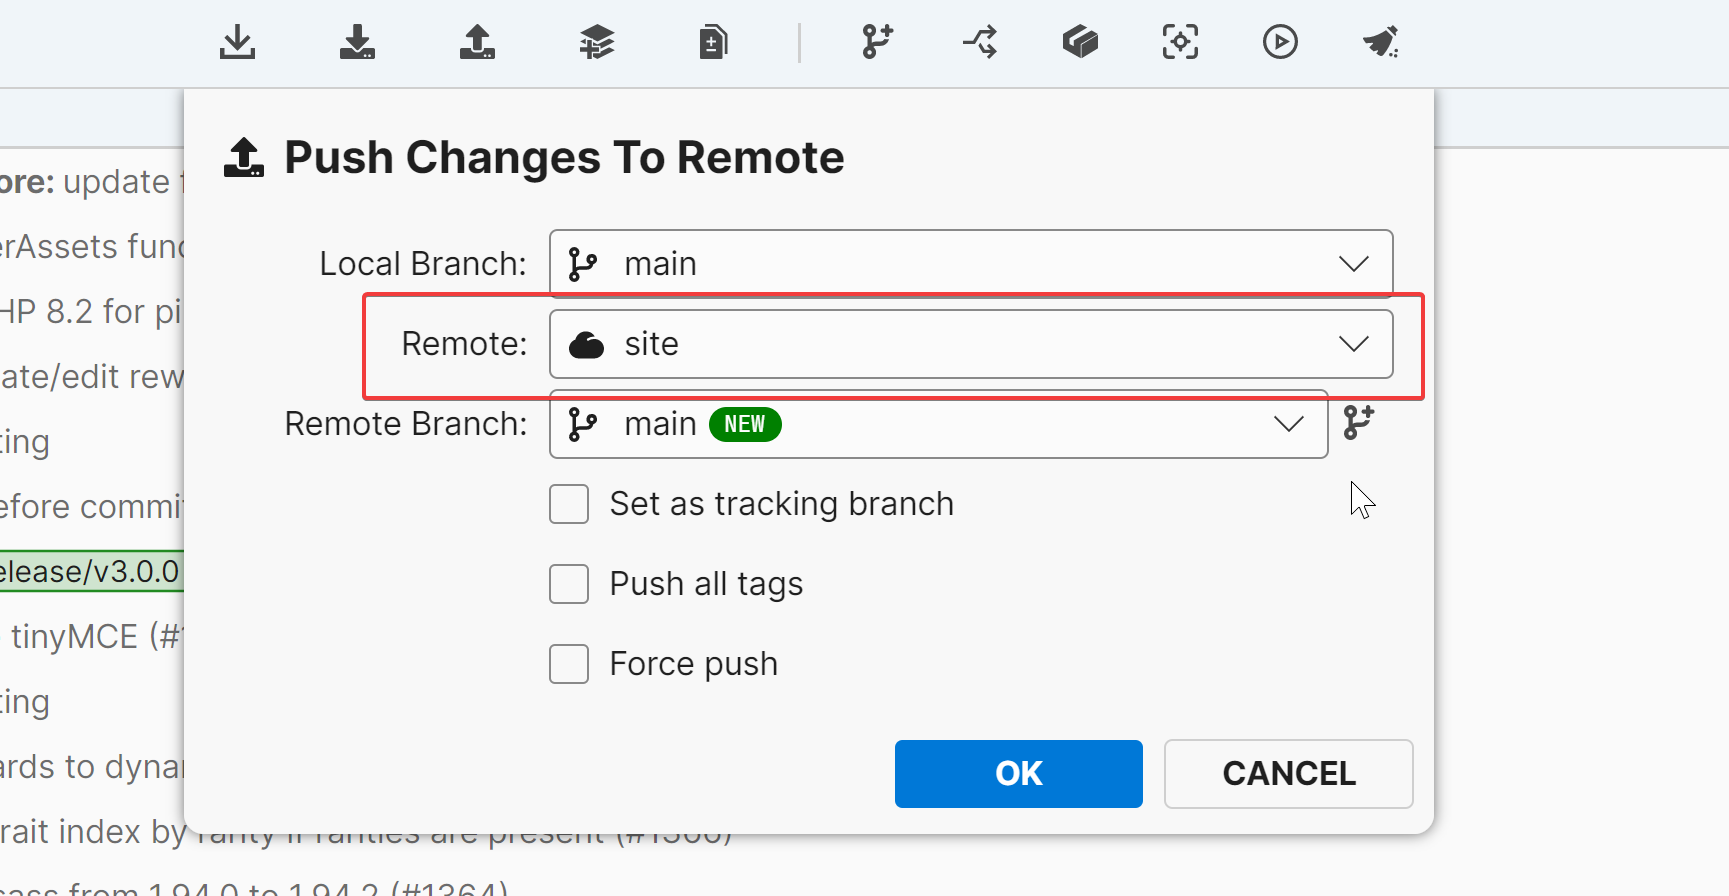
At the top, we are now going to select the "Push" button.
Change the "Remote" from whatever it was previously to site. "Local branch" and "remote branch" should both be selected as main. For example:
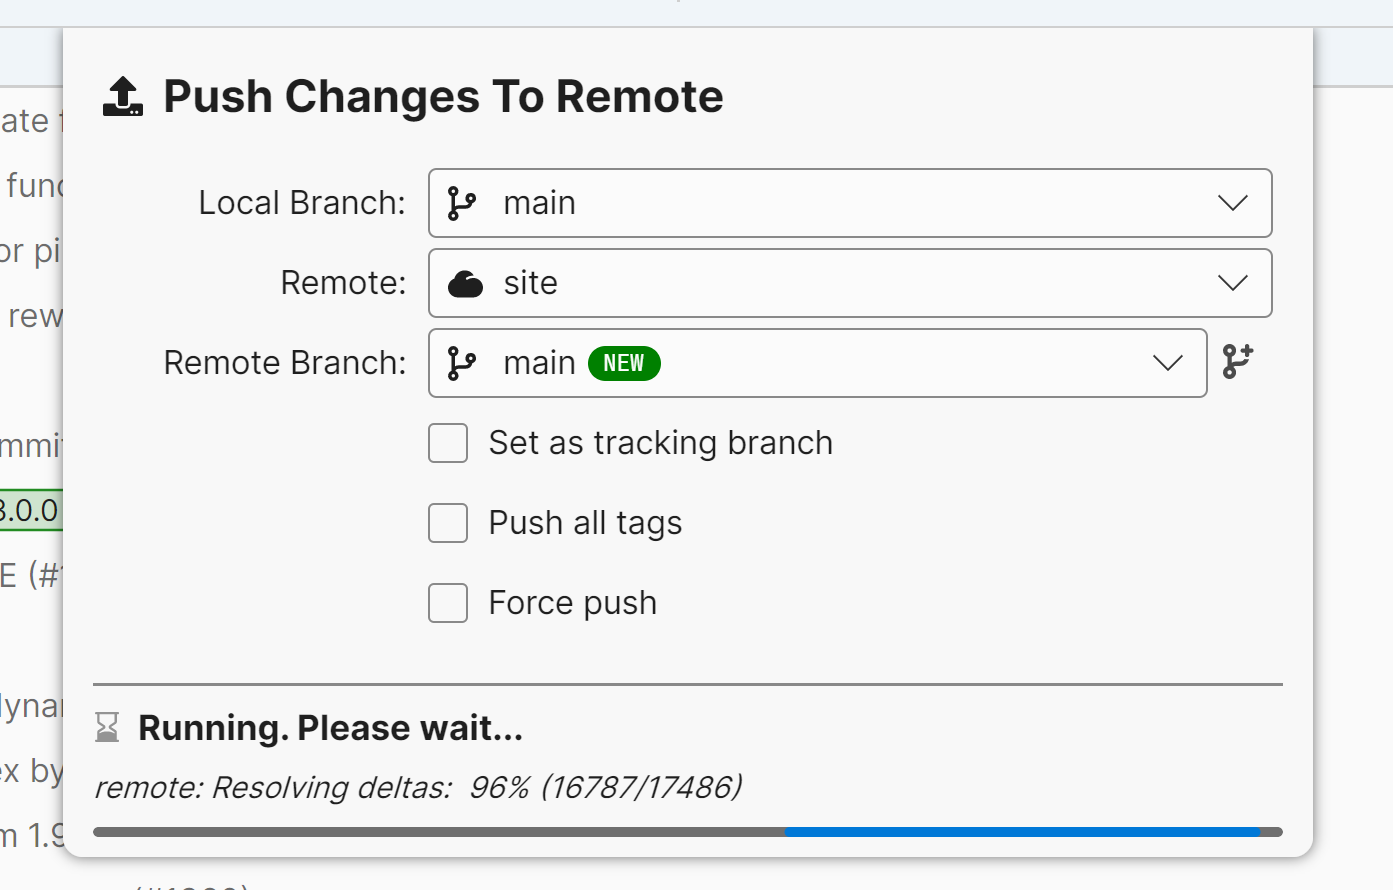
Leave everything else as default, and press OK! This may take some time to run. The window will close automatically when completed.
Go back to PuTTY or your SSH tool. Type in the following:
cd ~/YOURDOMAIN.COM/www
ls
You should see all of your Lorekeeper files!
Running Composer
Composer is installed by default on Perabyte. All you need to do is run one command:
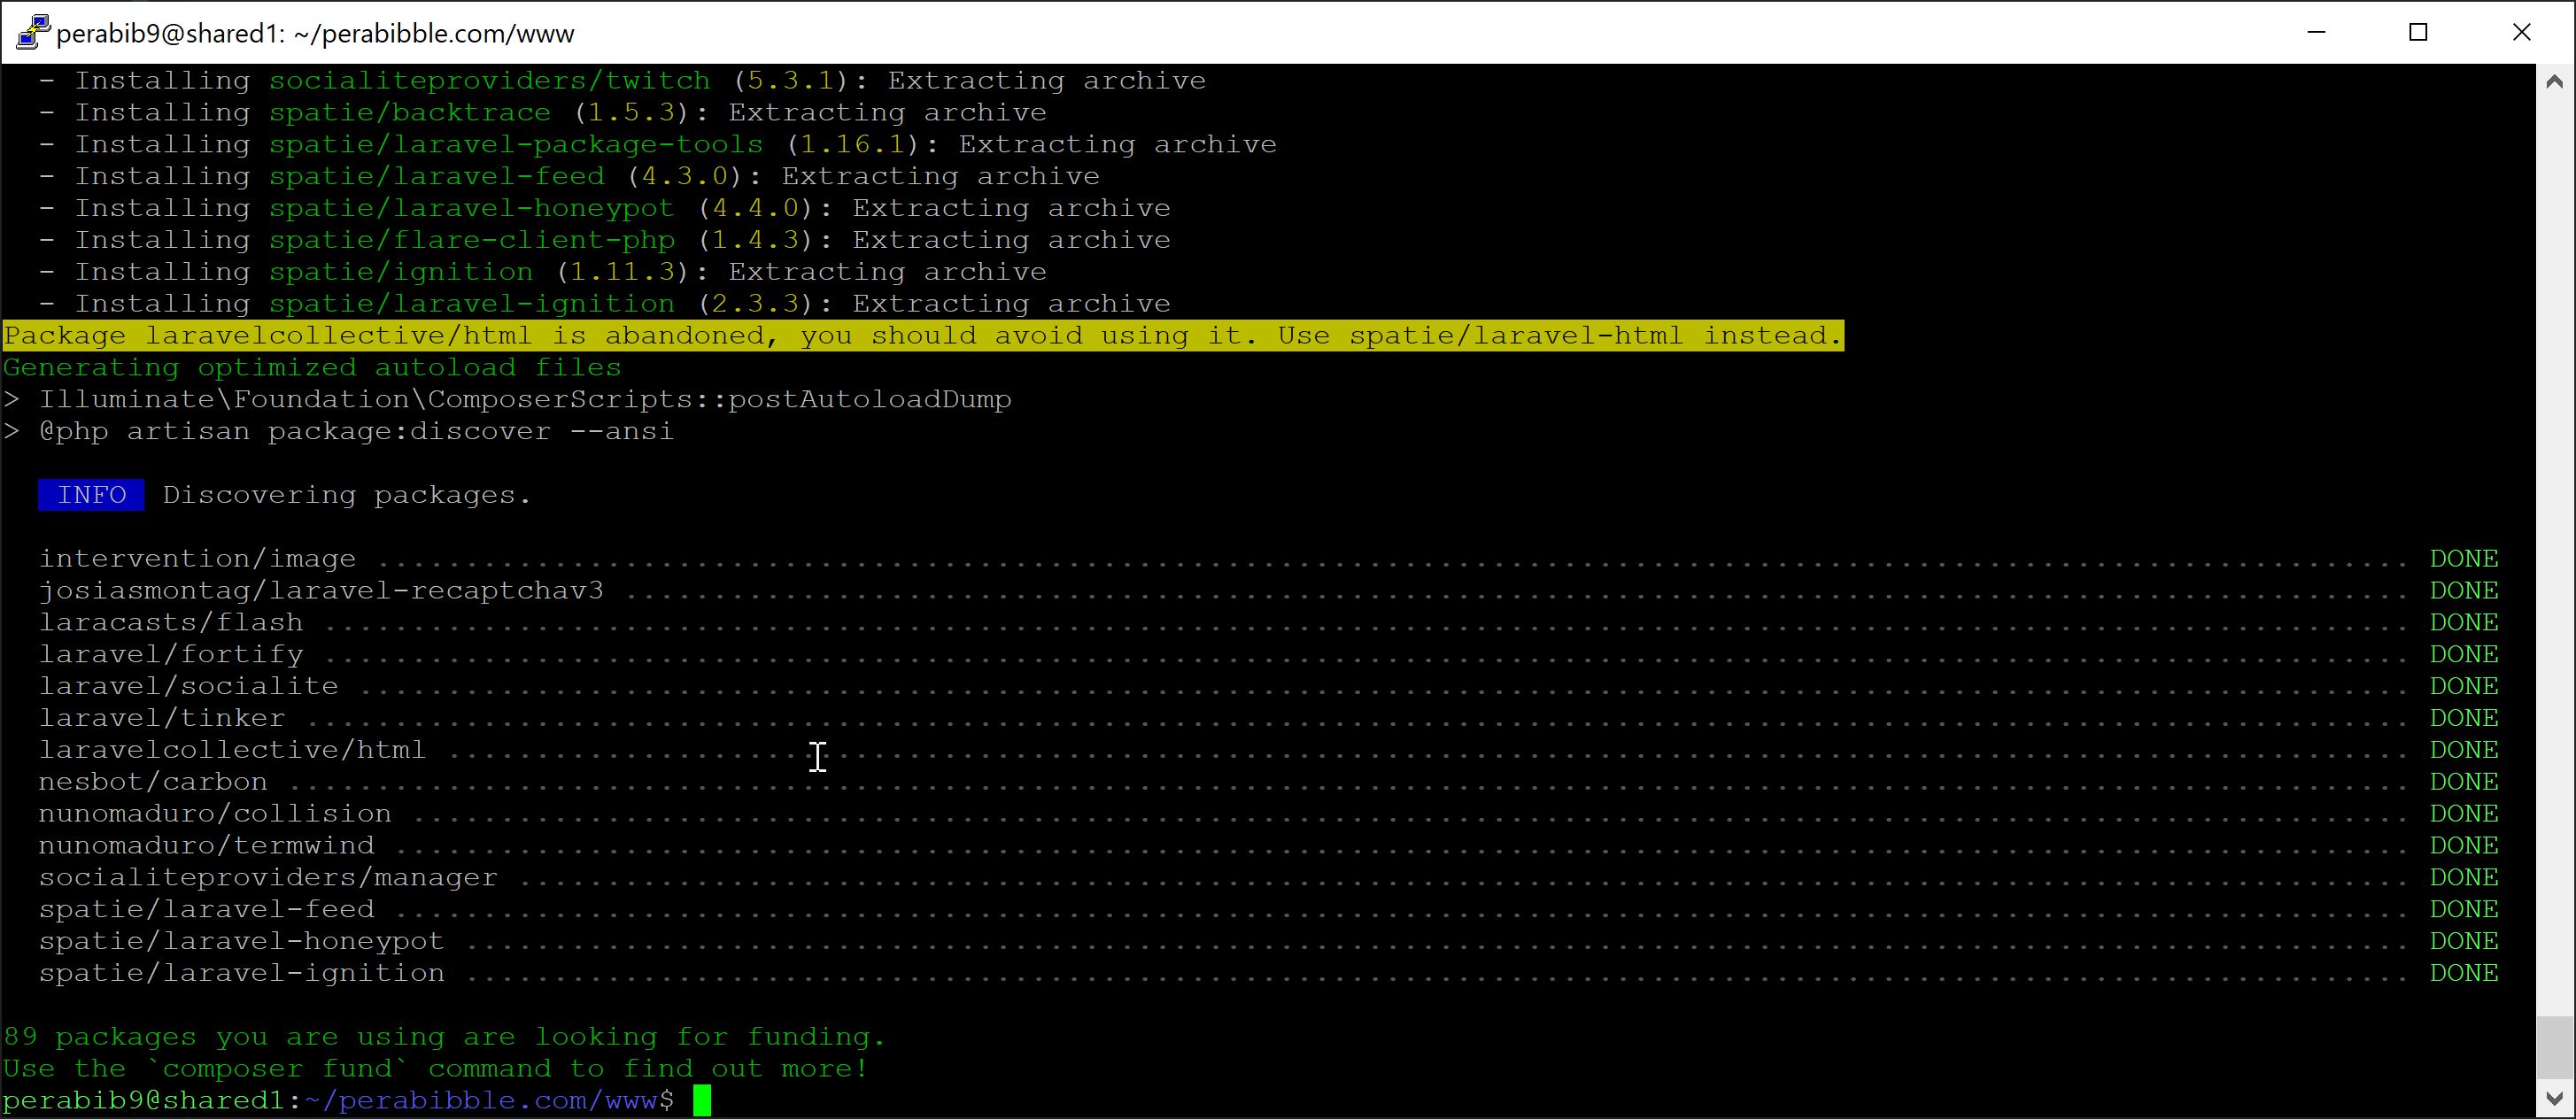
composerinstall
...and Lorekeeper will be installed for you! It should look like this when you're done:
Site Configuration
Configuring SSL and the Document Root
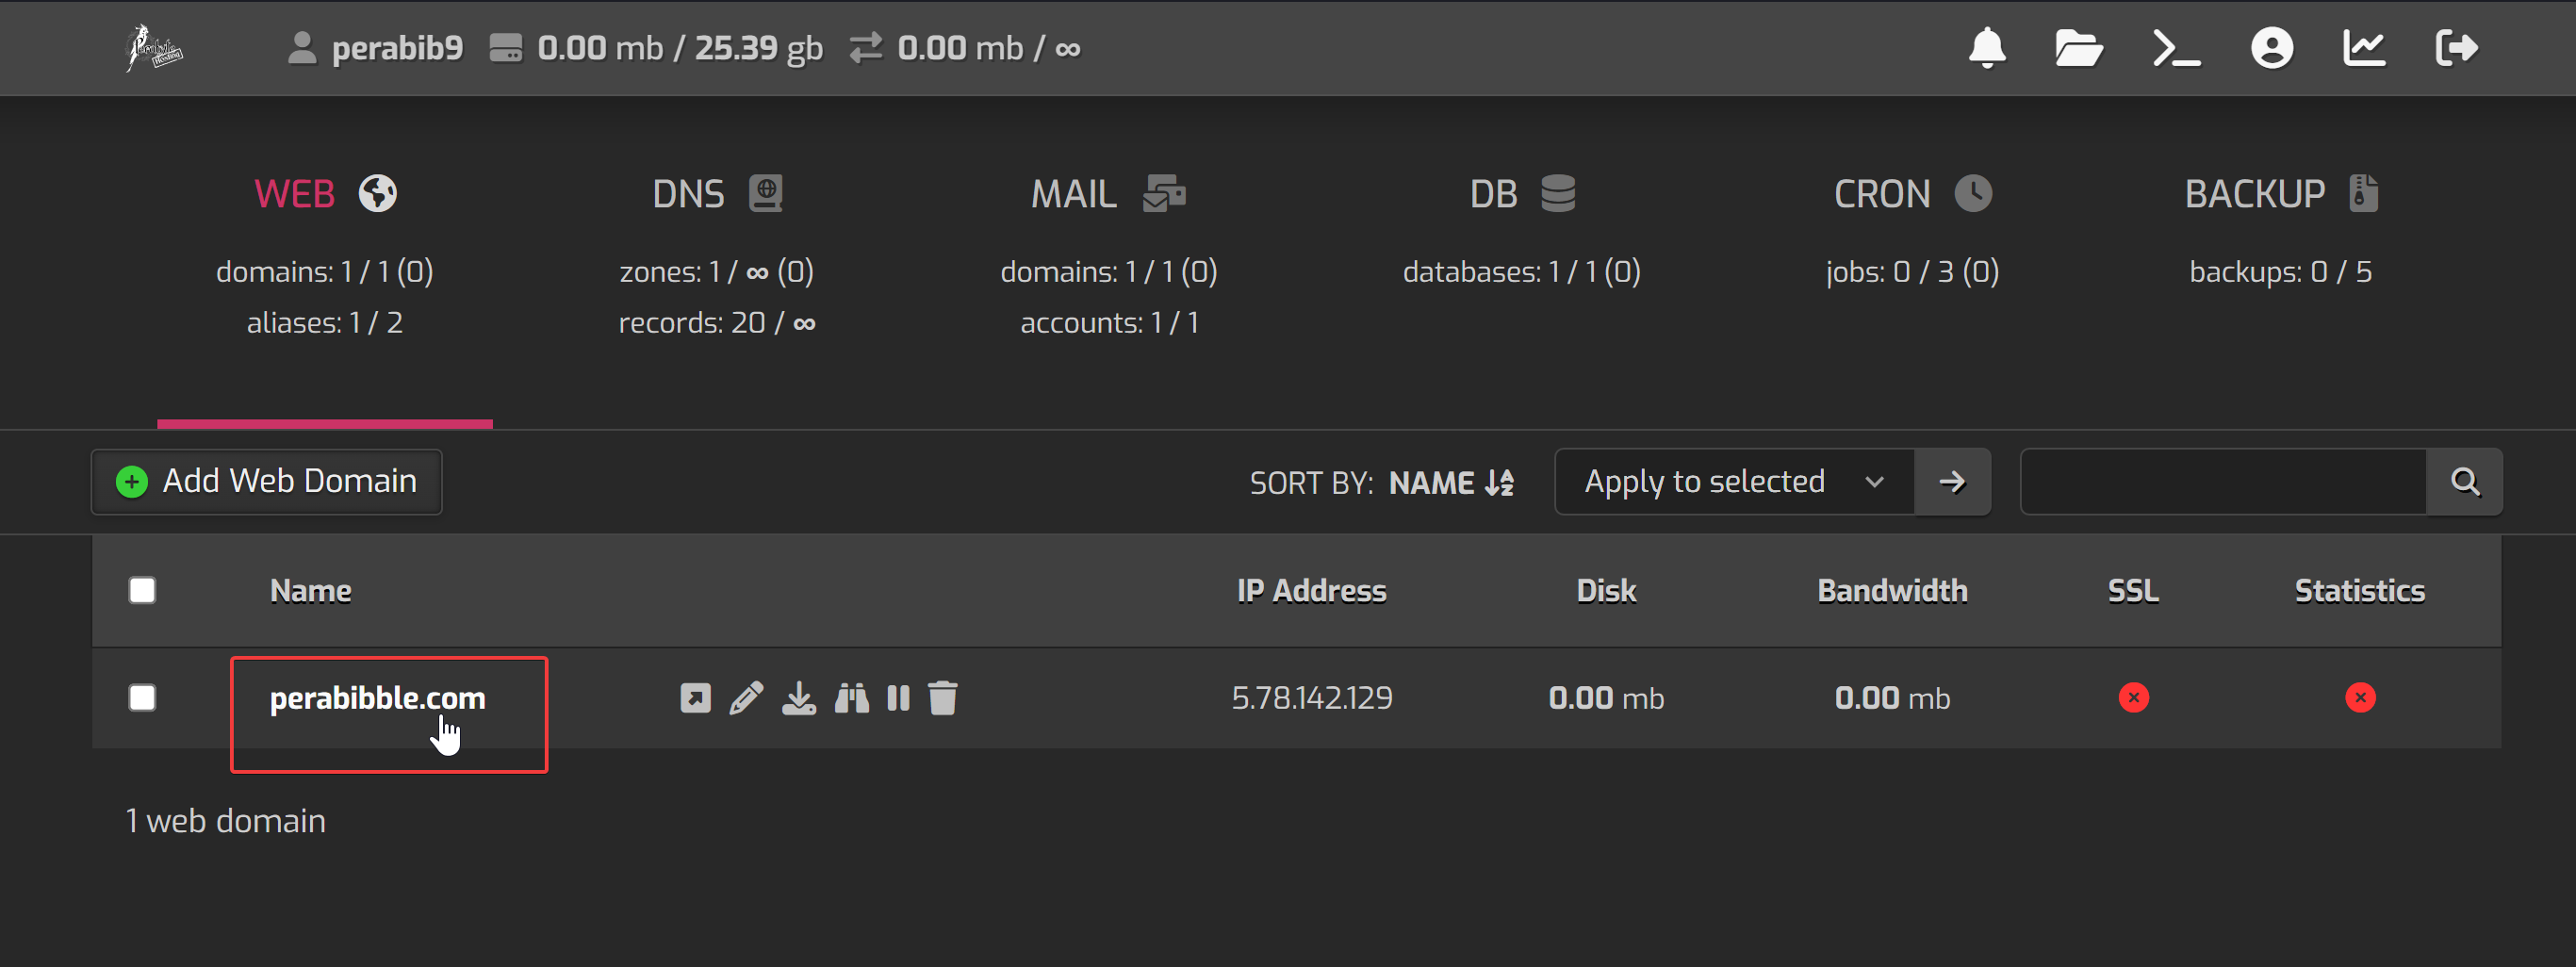
Now that the files exist on the server, we need to tell the control panel where our Lorekeeper is located. Go back to the control panel and click the "Web" button.
Click on your domain name.
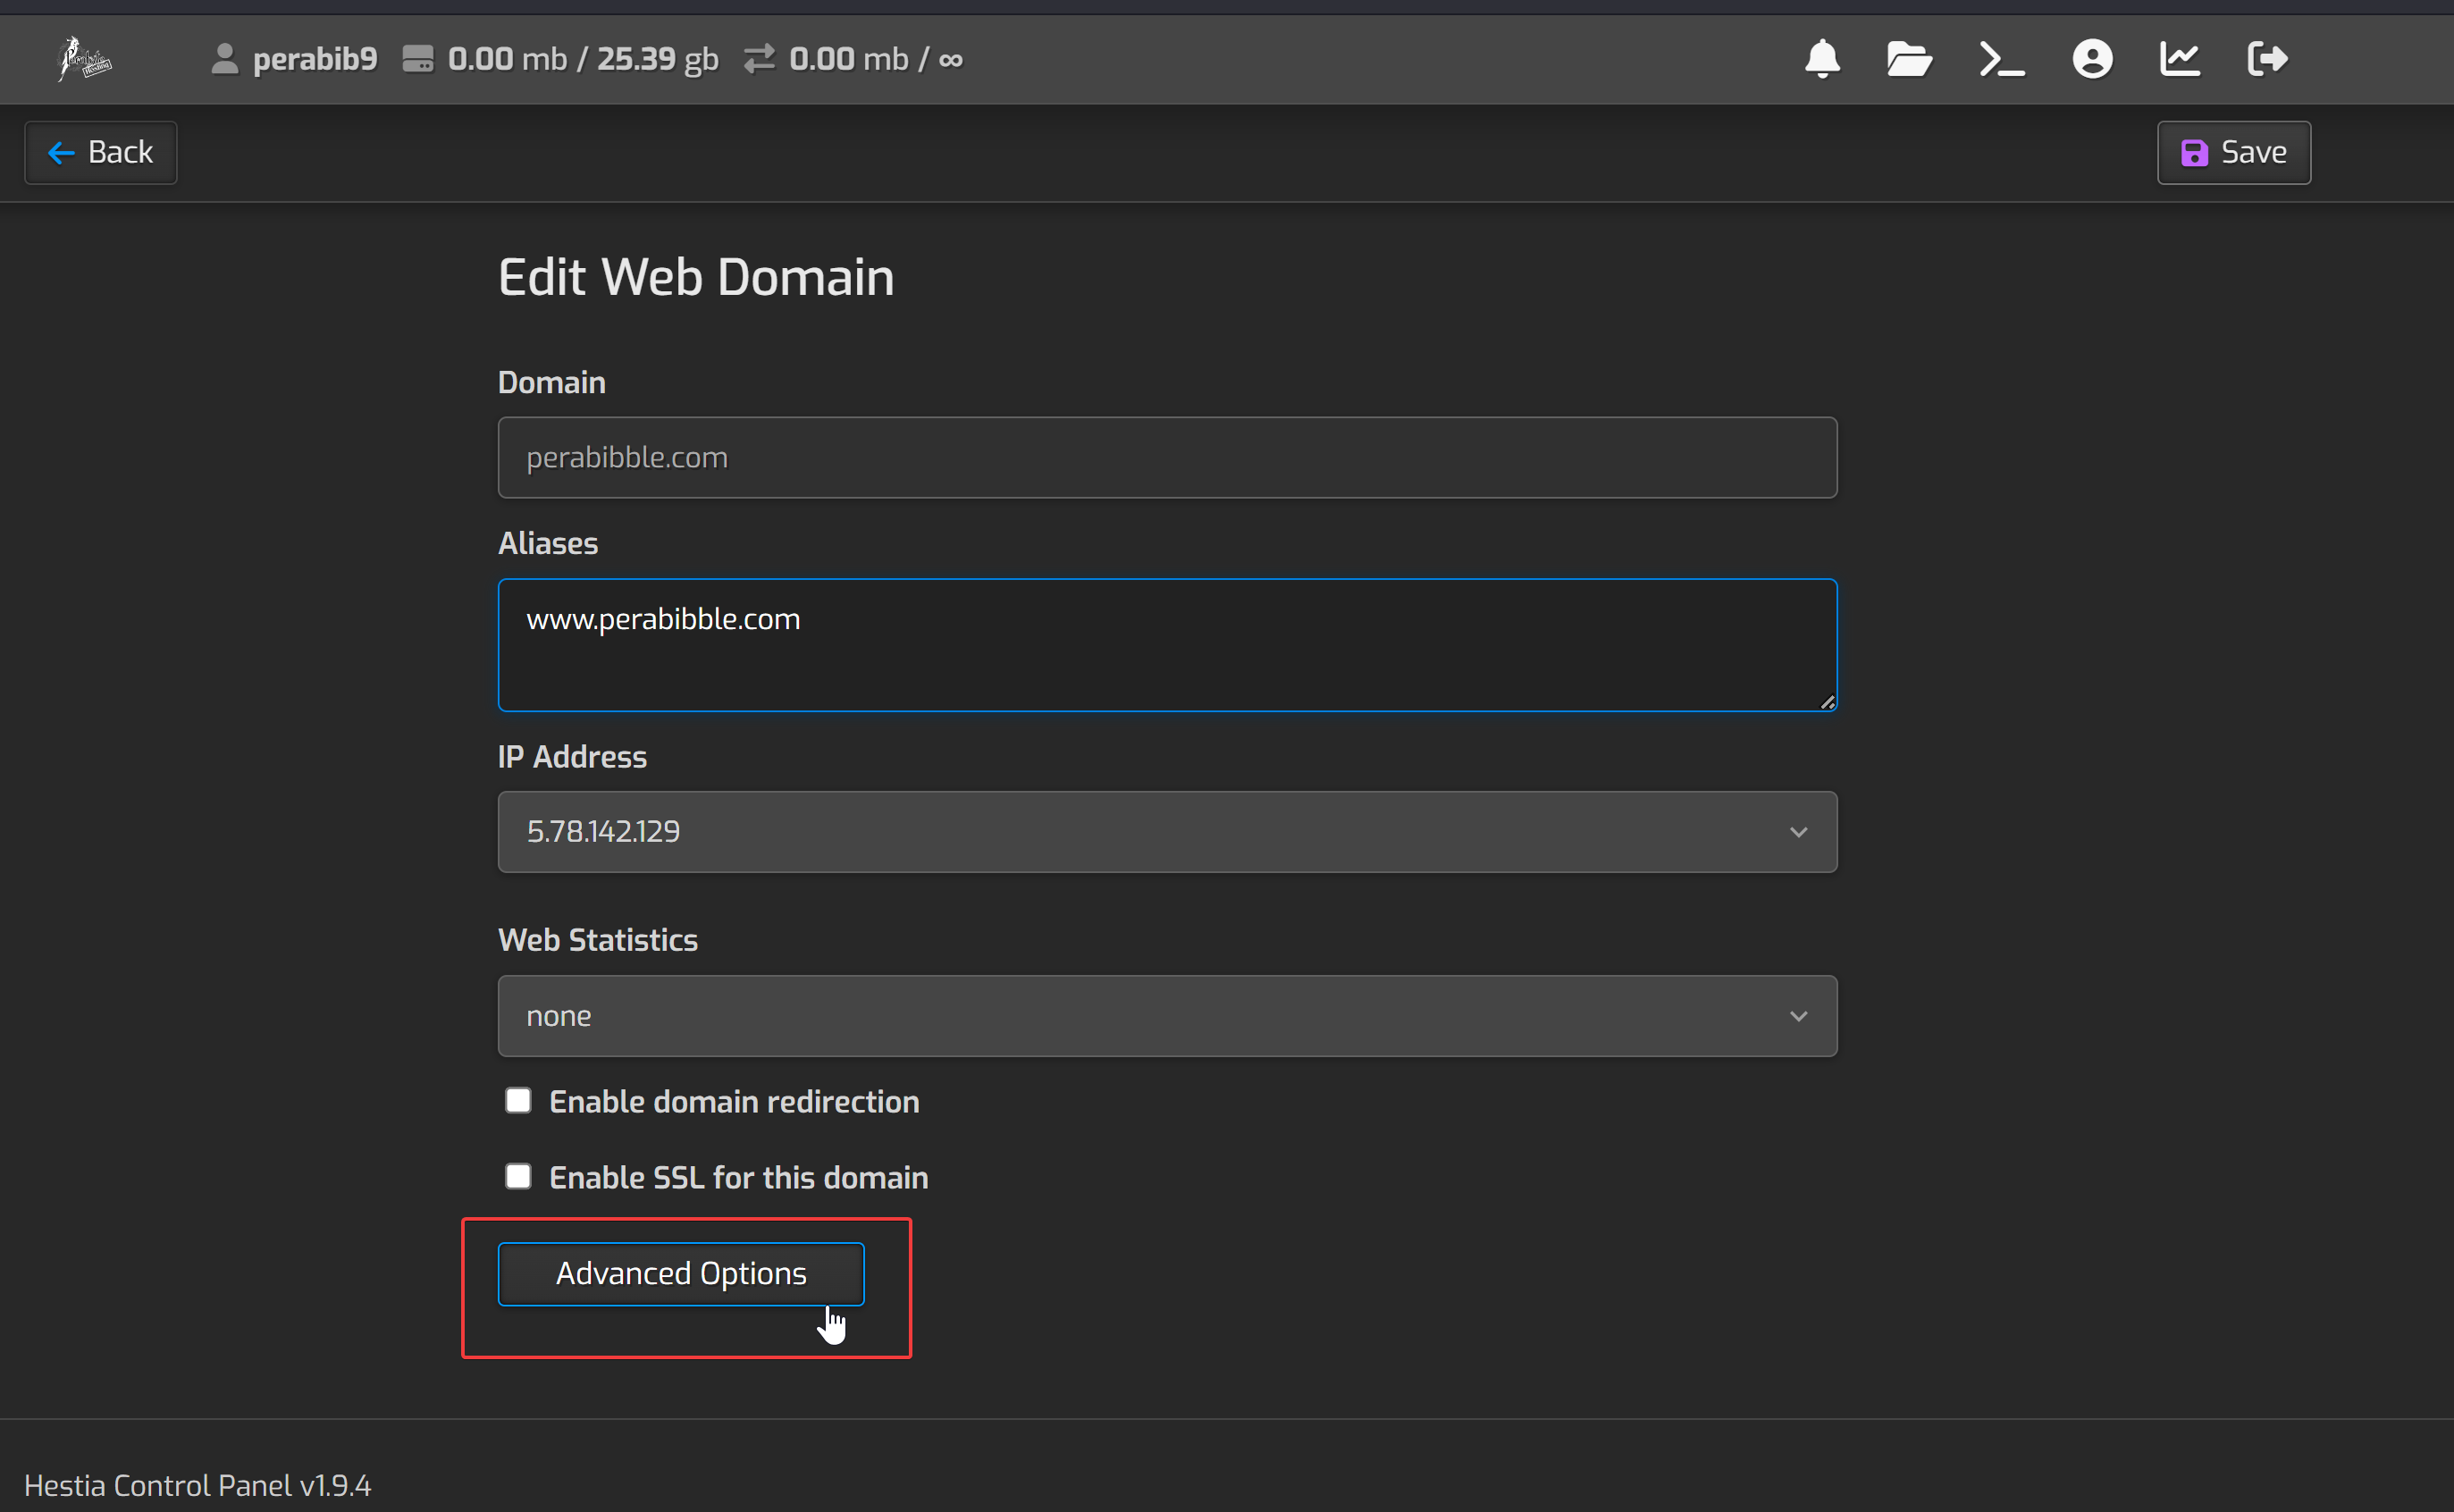
Scroll down and click "Advanced Options".
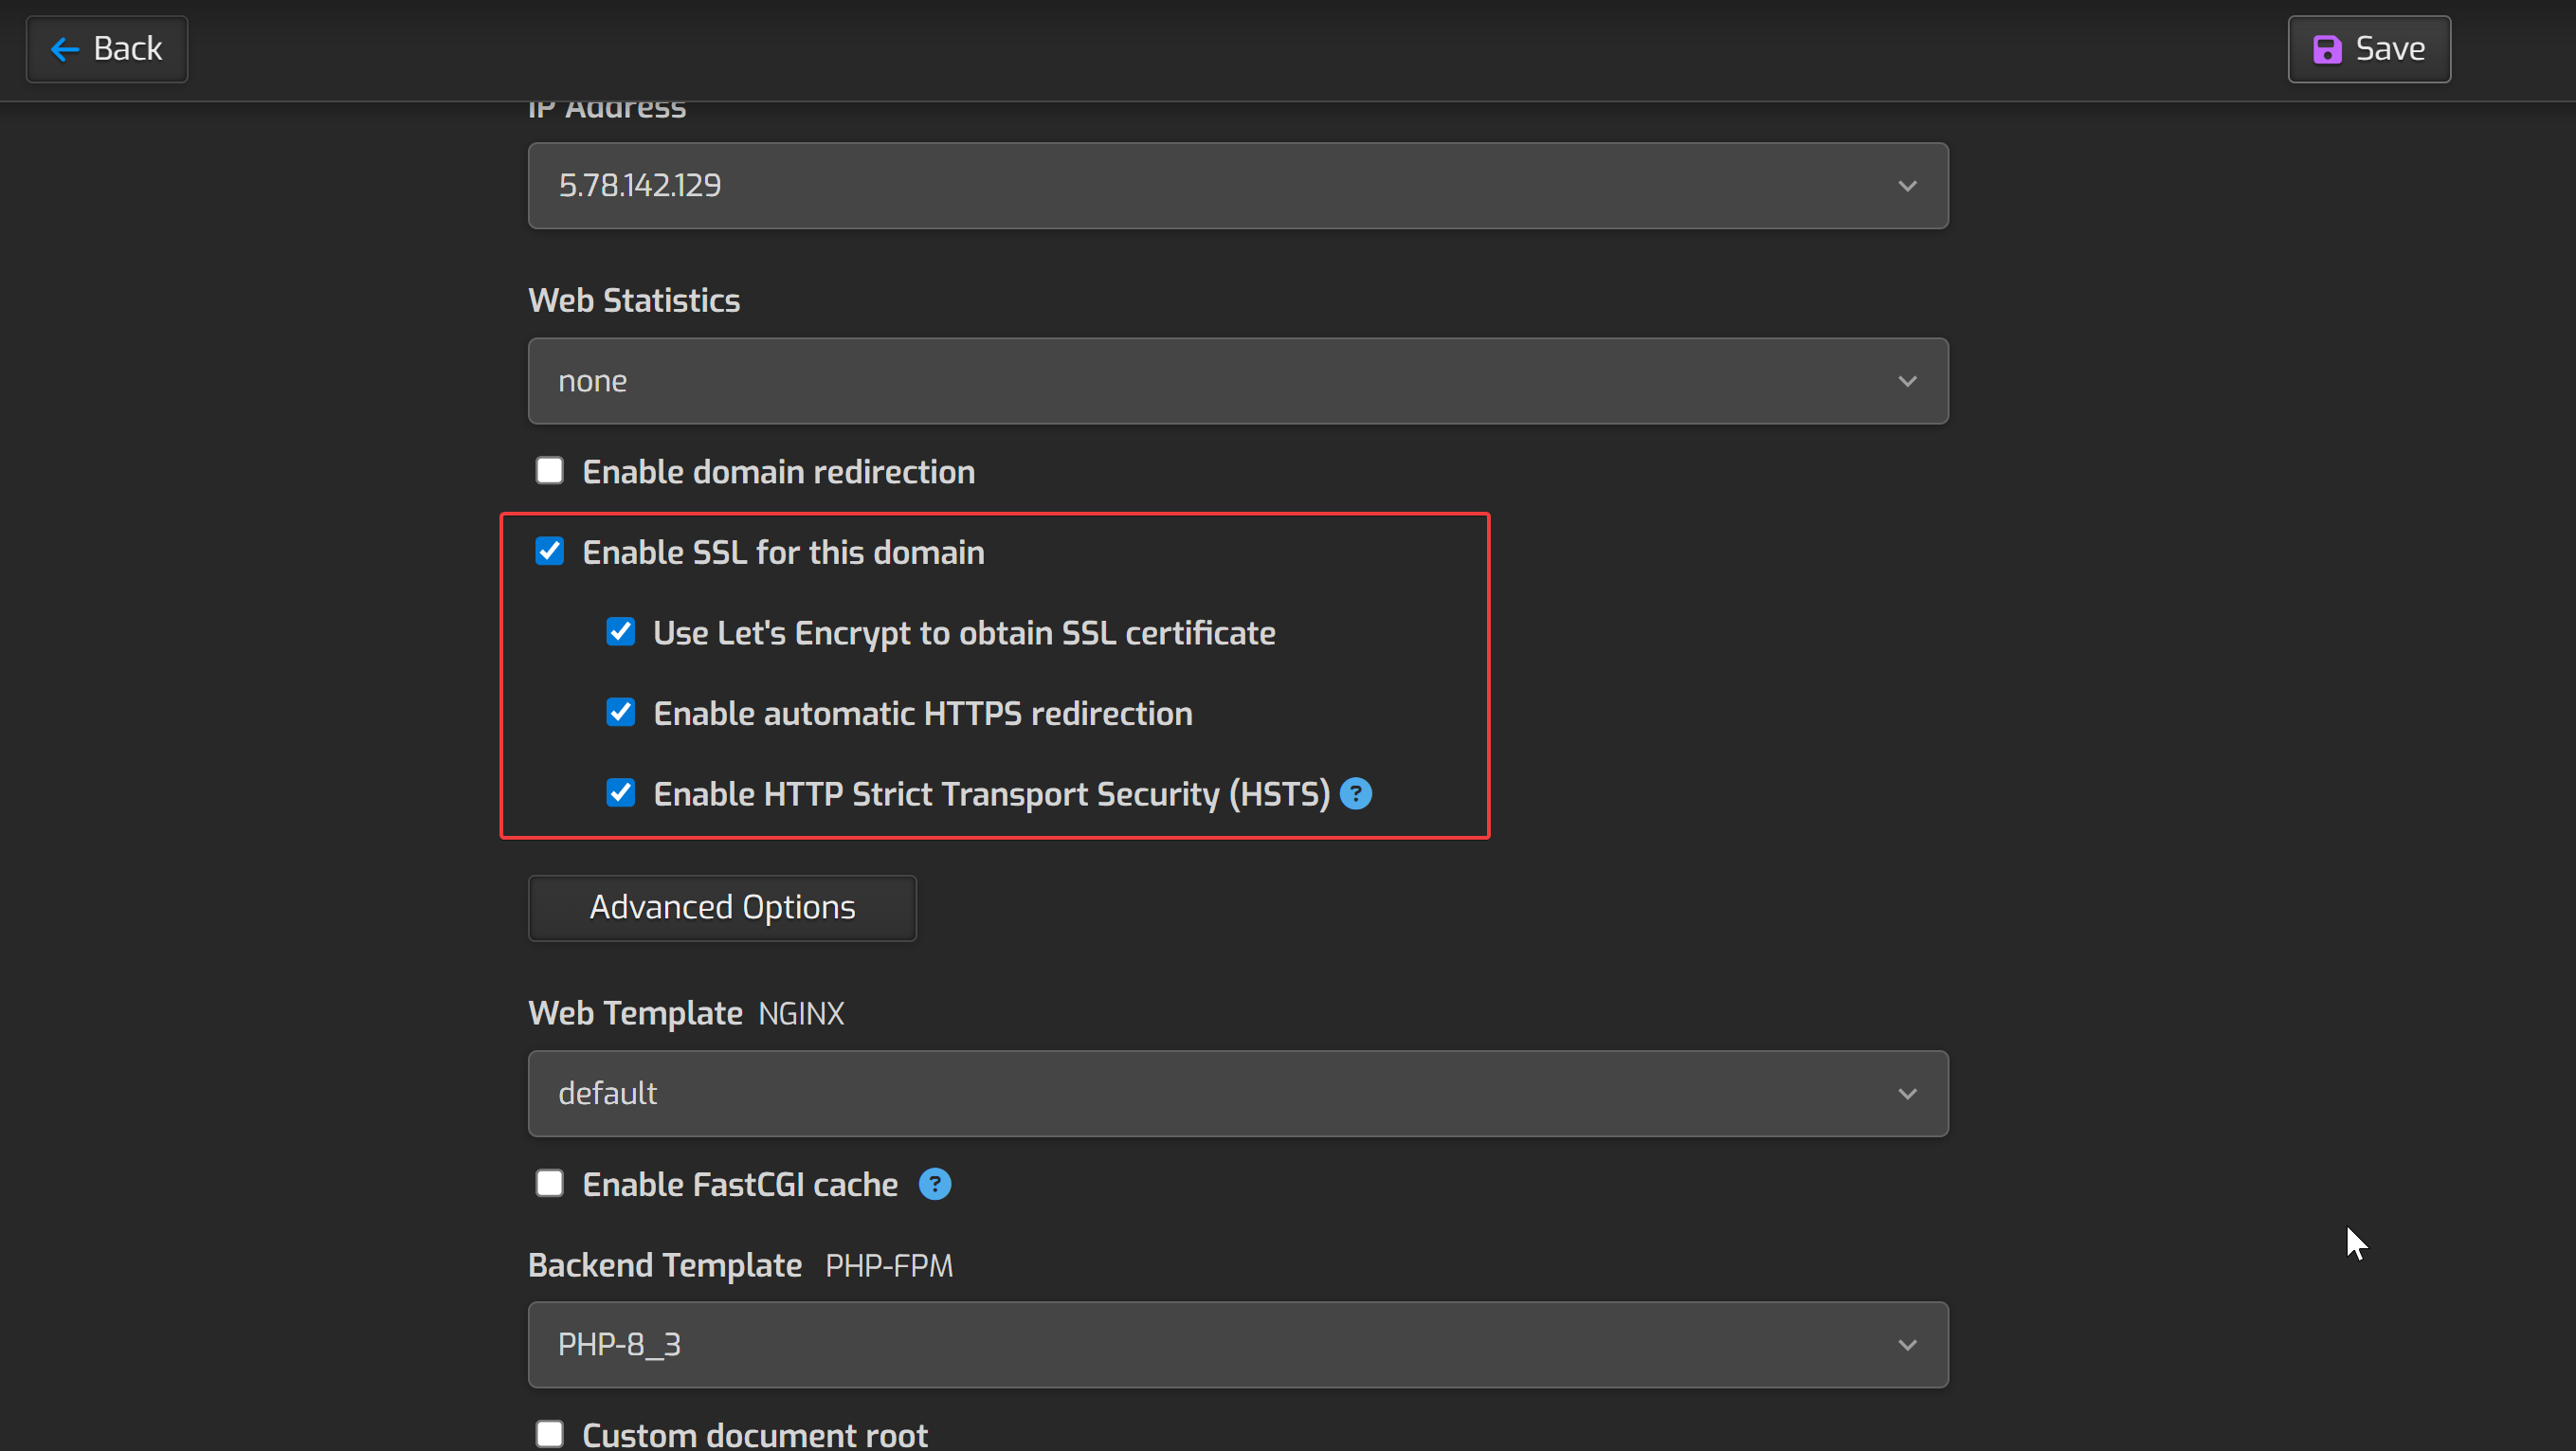
We are going to select several things here. Check the box for "Enable SSL for this domain" and check all the boxes under it -- "Use Let's Encrypt to obtain SSL certificate", "Enable automatic HTTPS redirection", and "Enable HTTP Strict Transport Security (HSTS)".
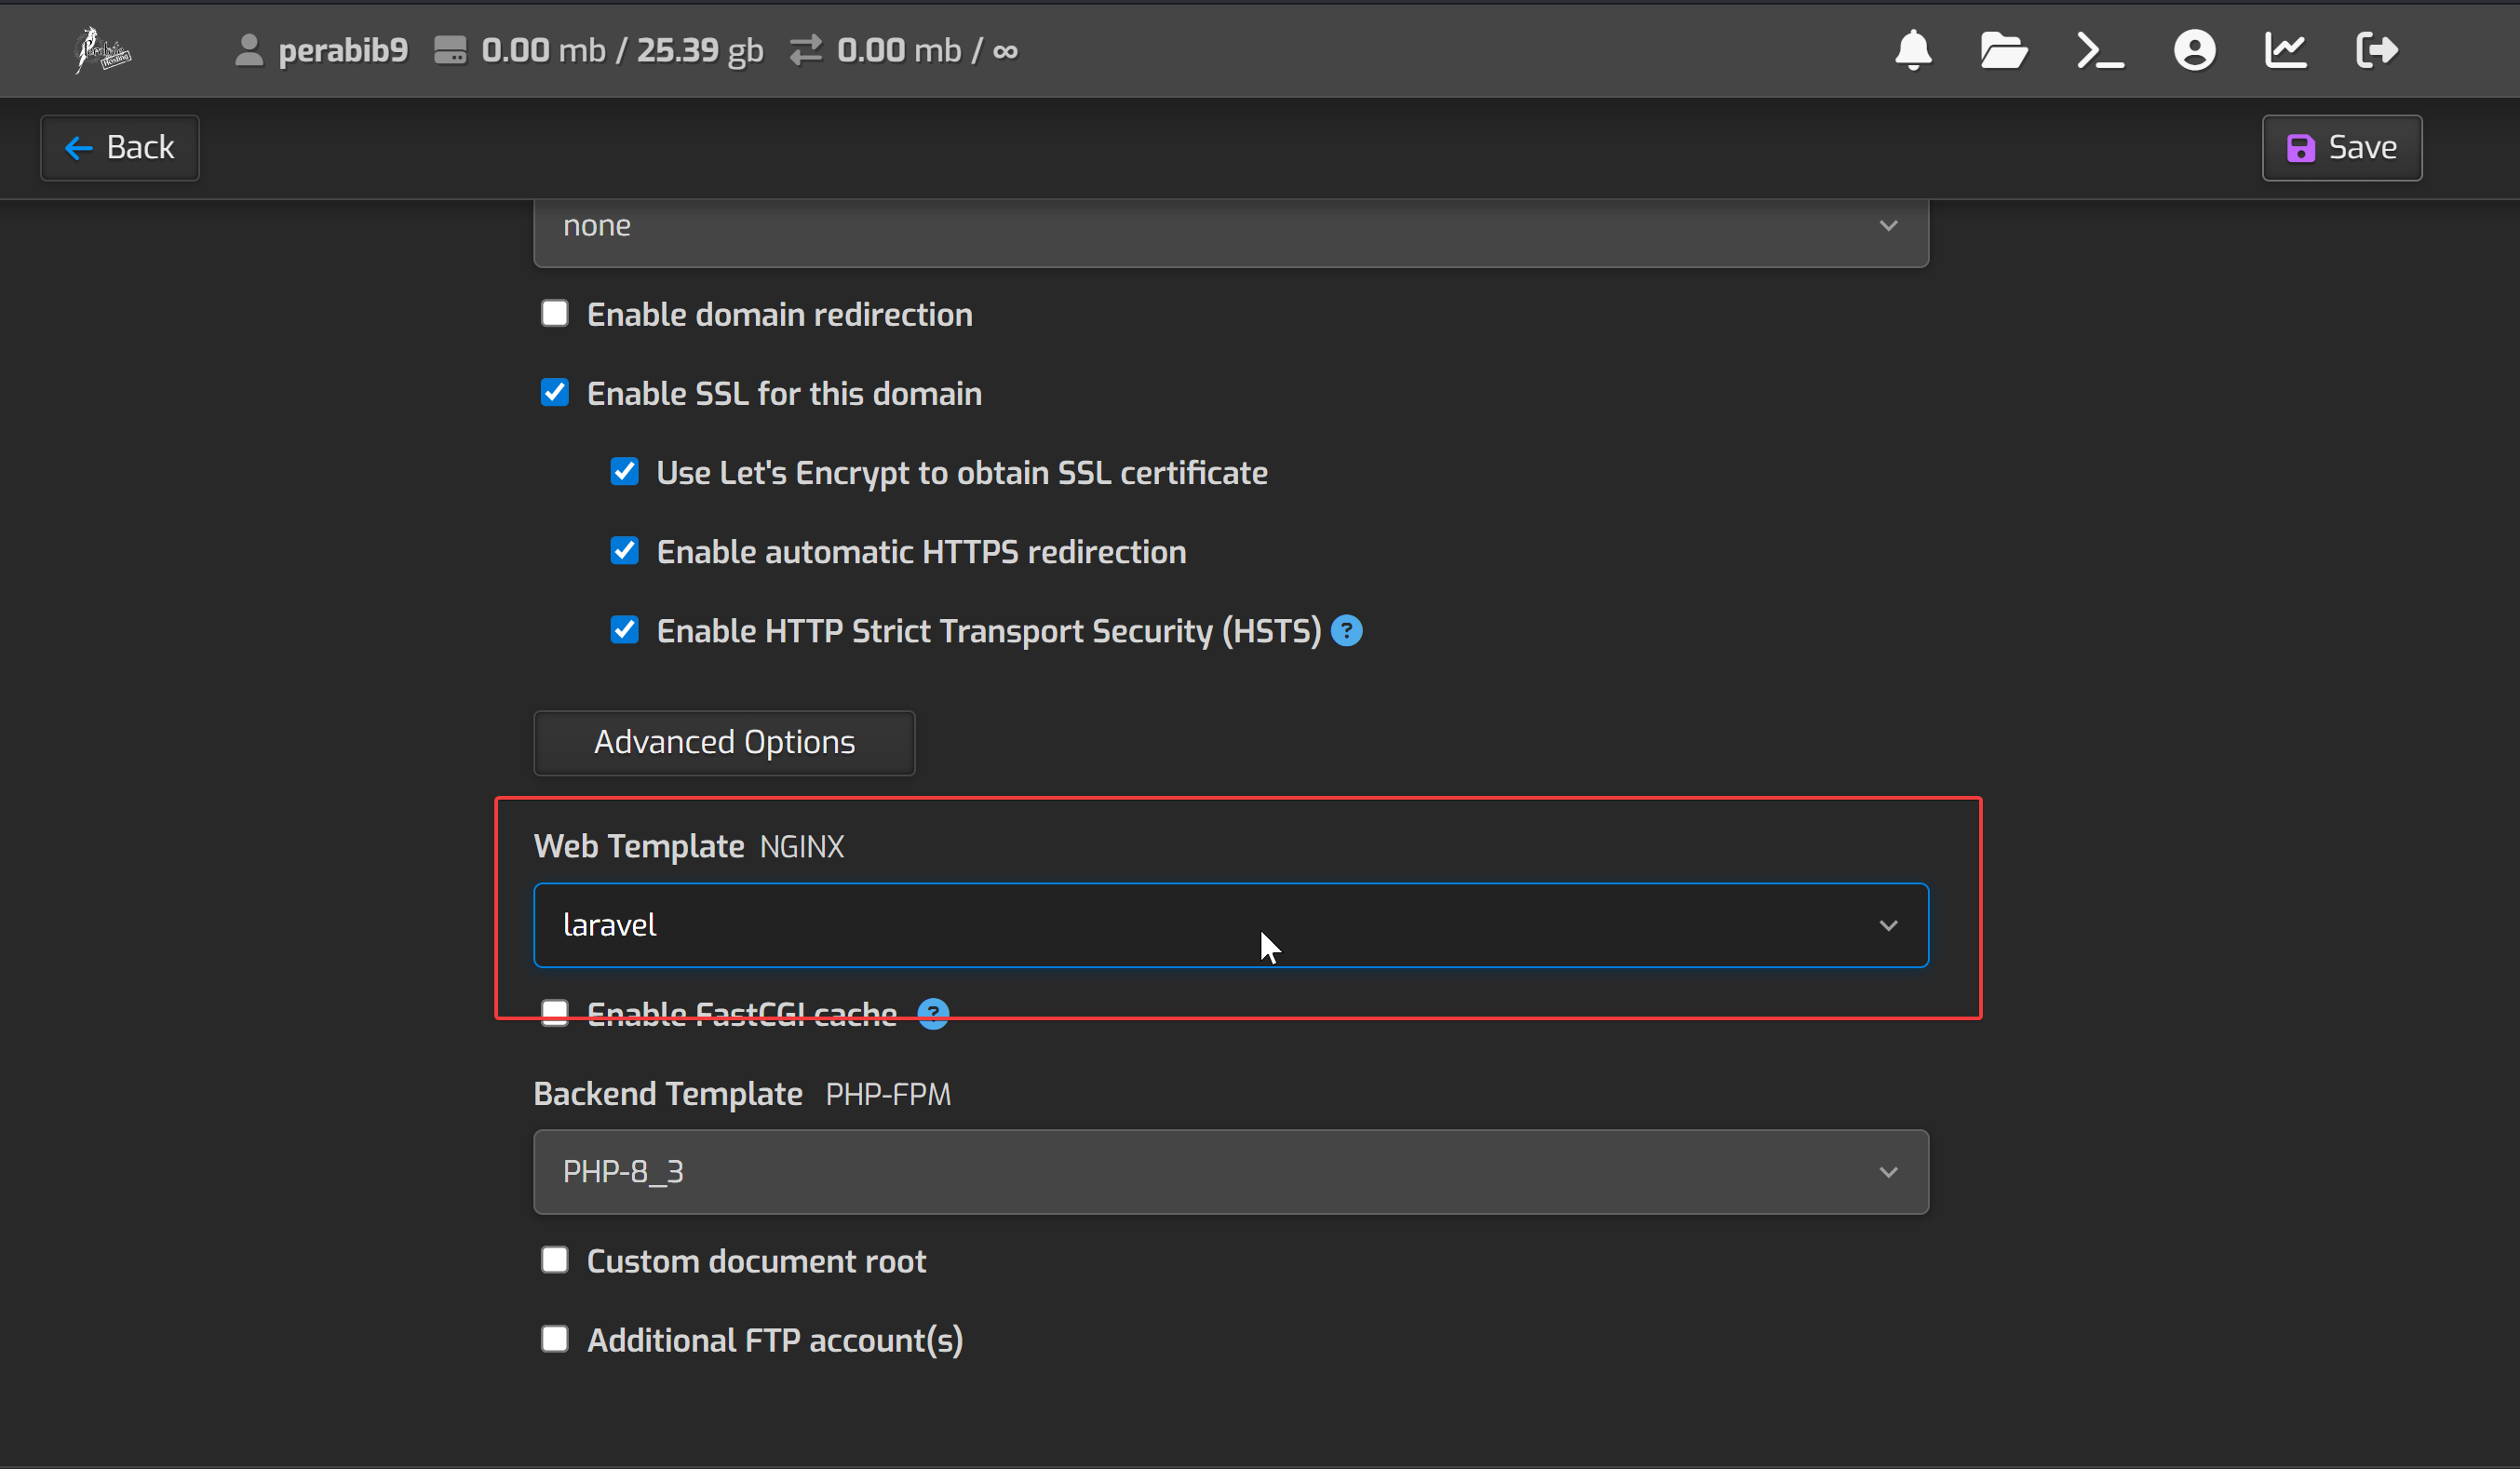
Next, click the dropdown for "Web Template". There are a LOT of options, but we only care about one -- select laravel.
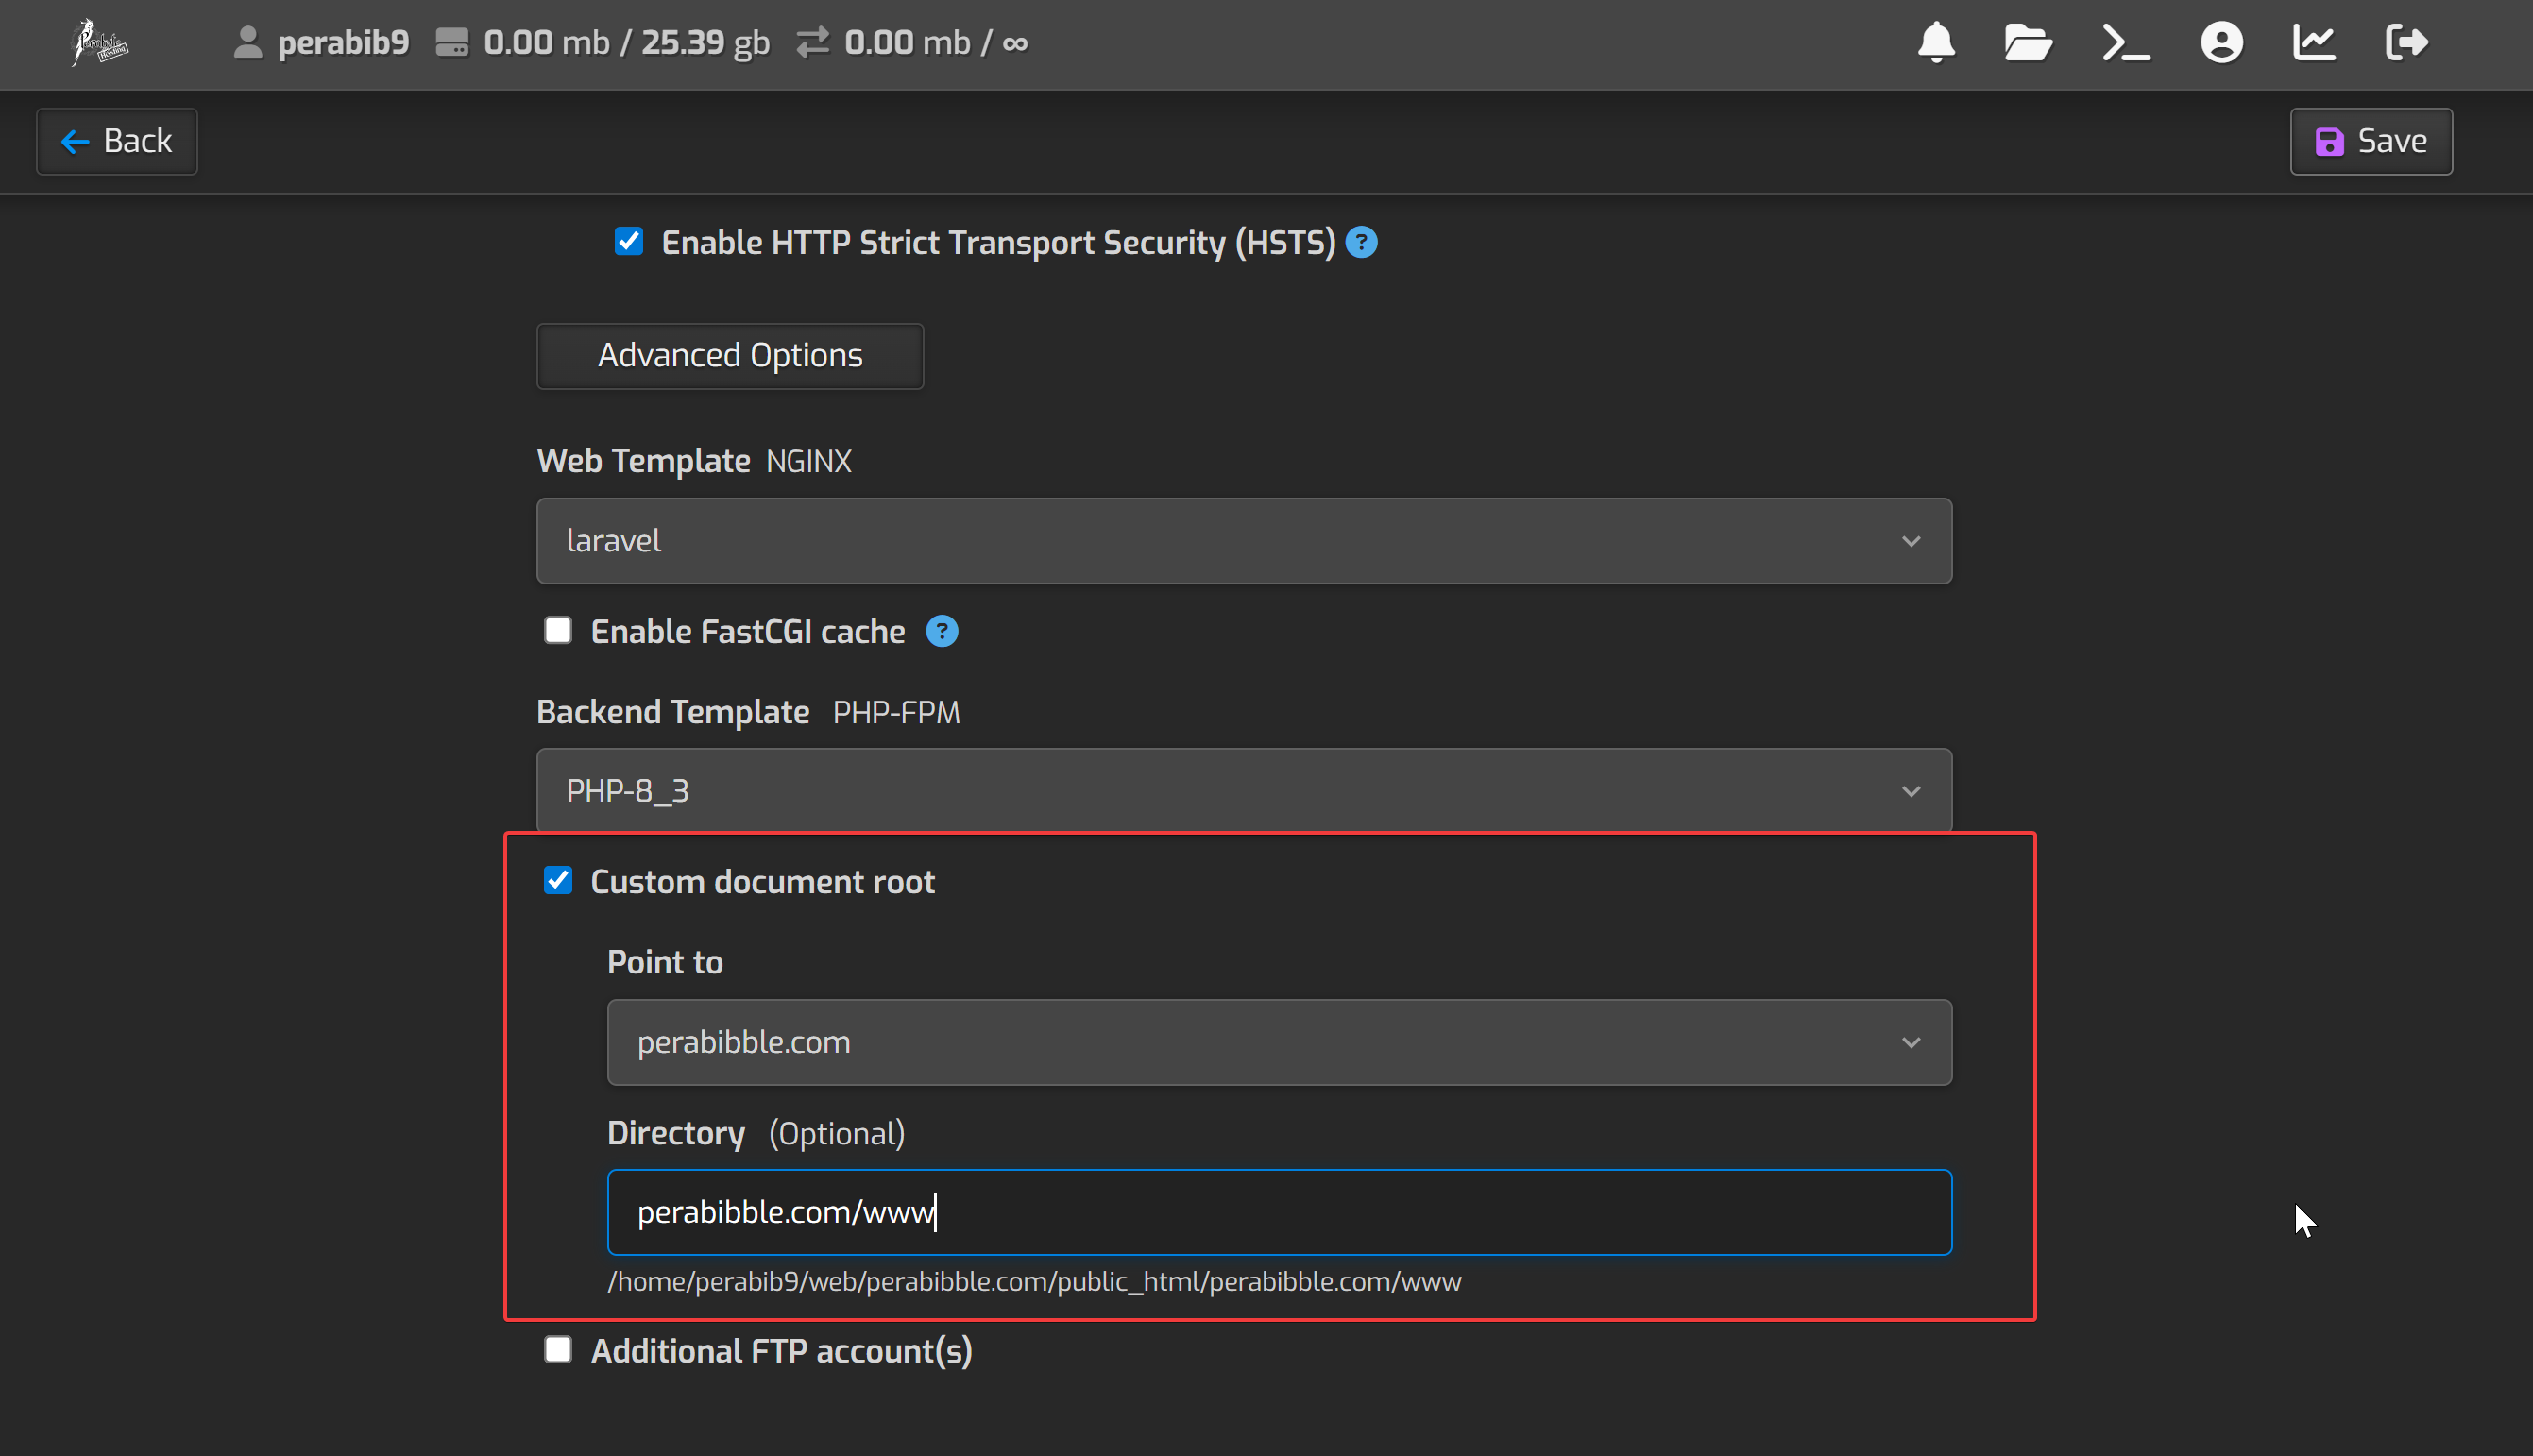
Next, check "Custom document root" and in directory type SITENAME.COM/www. For example:
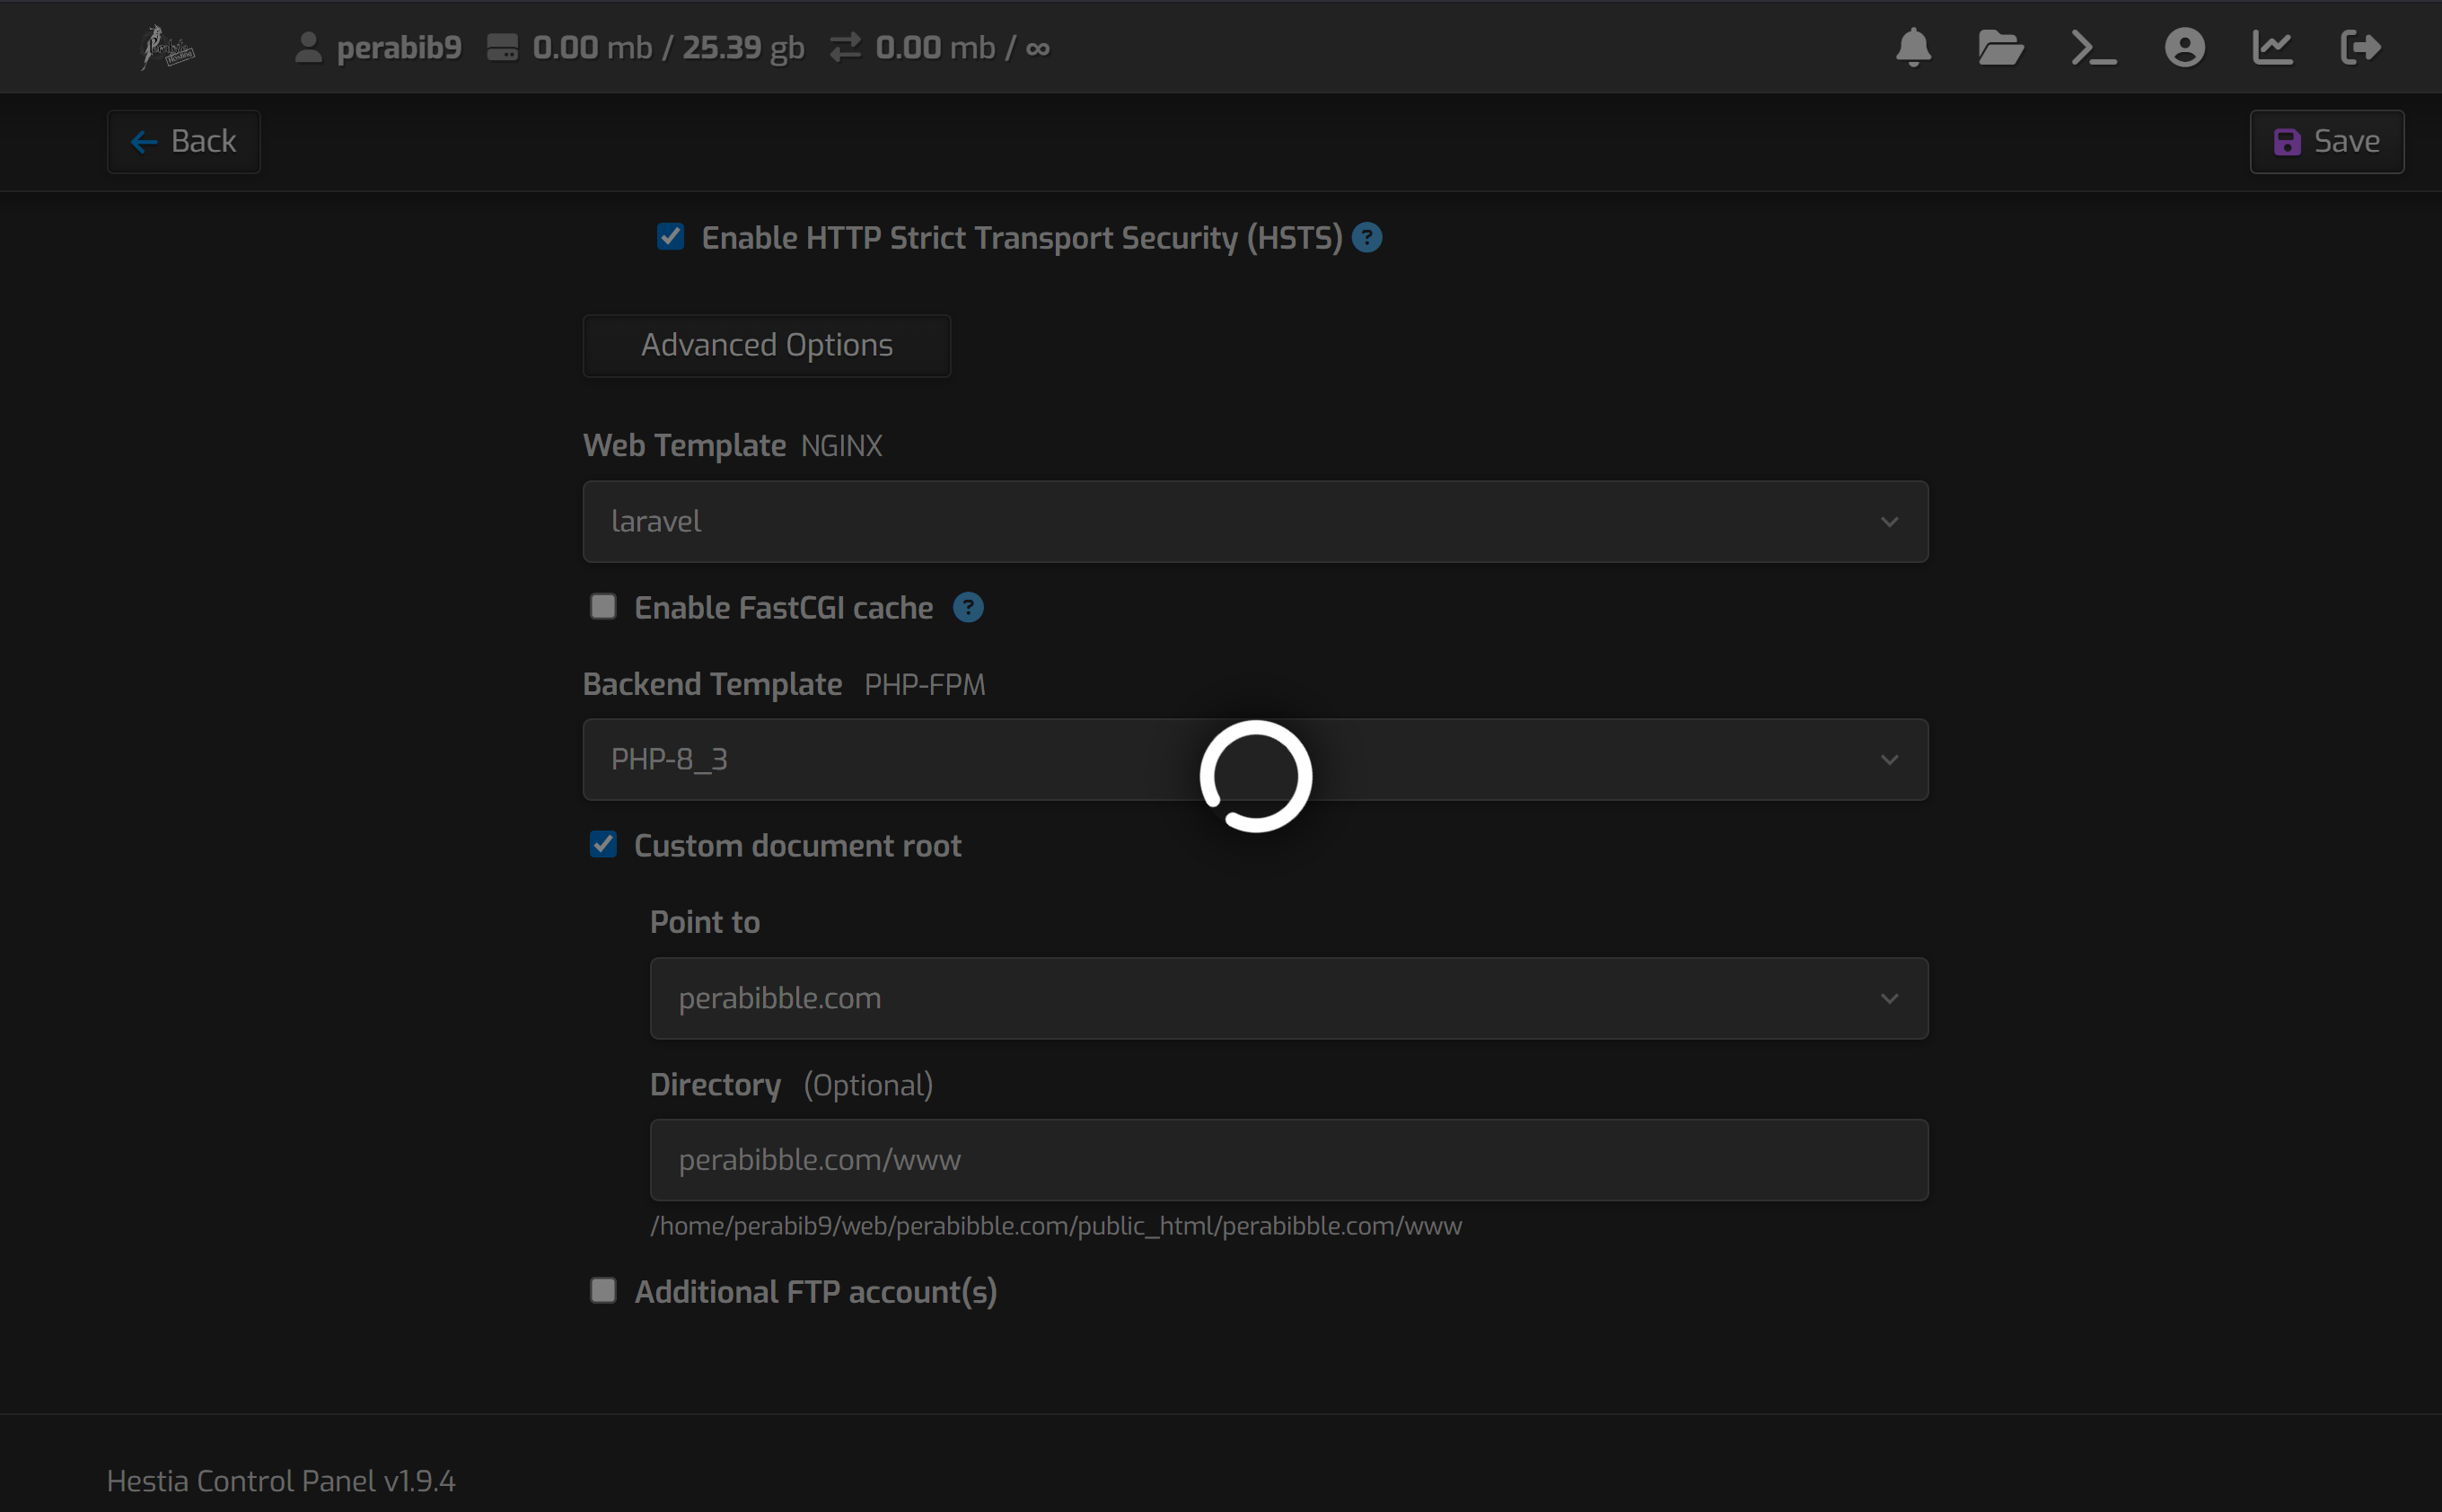
Click "Save". This may take a long, LONG time to load as it generates the SSL certificate. Be patient and don't close the window!
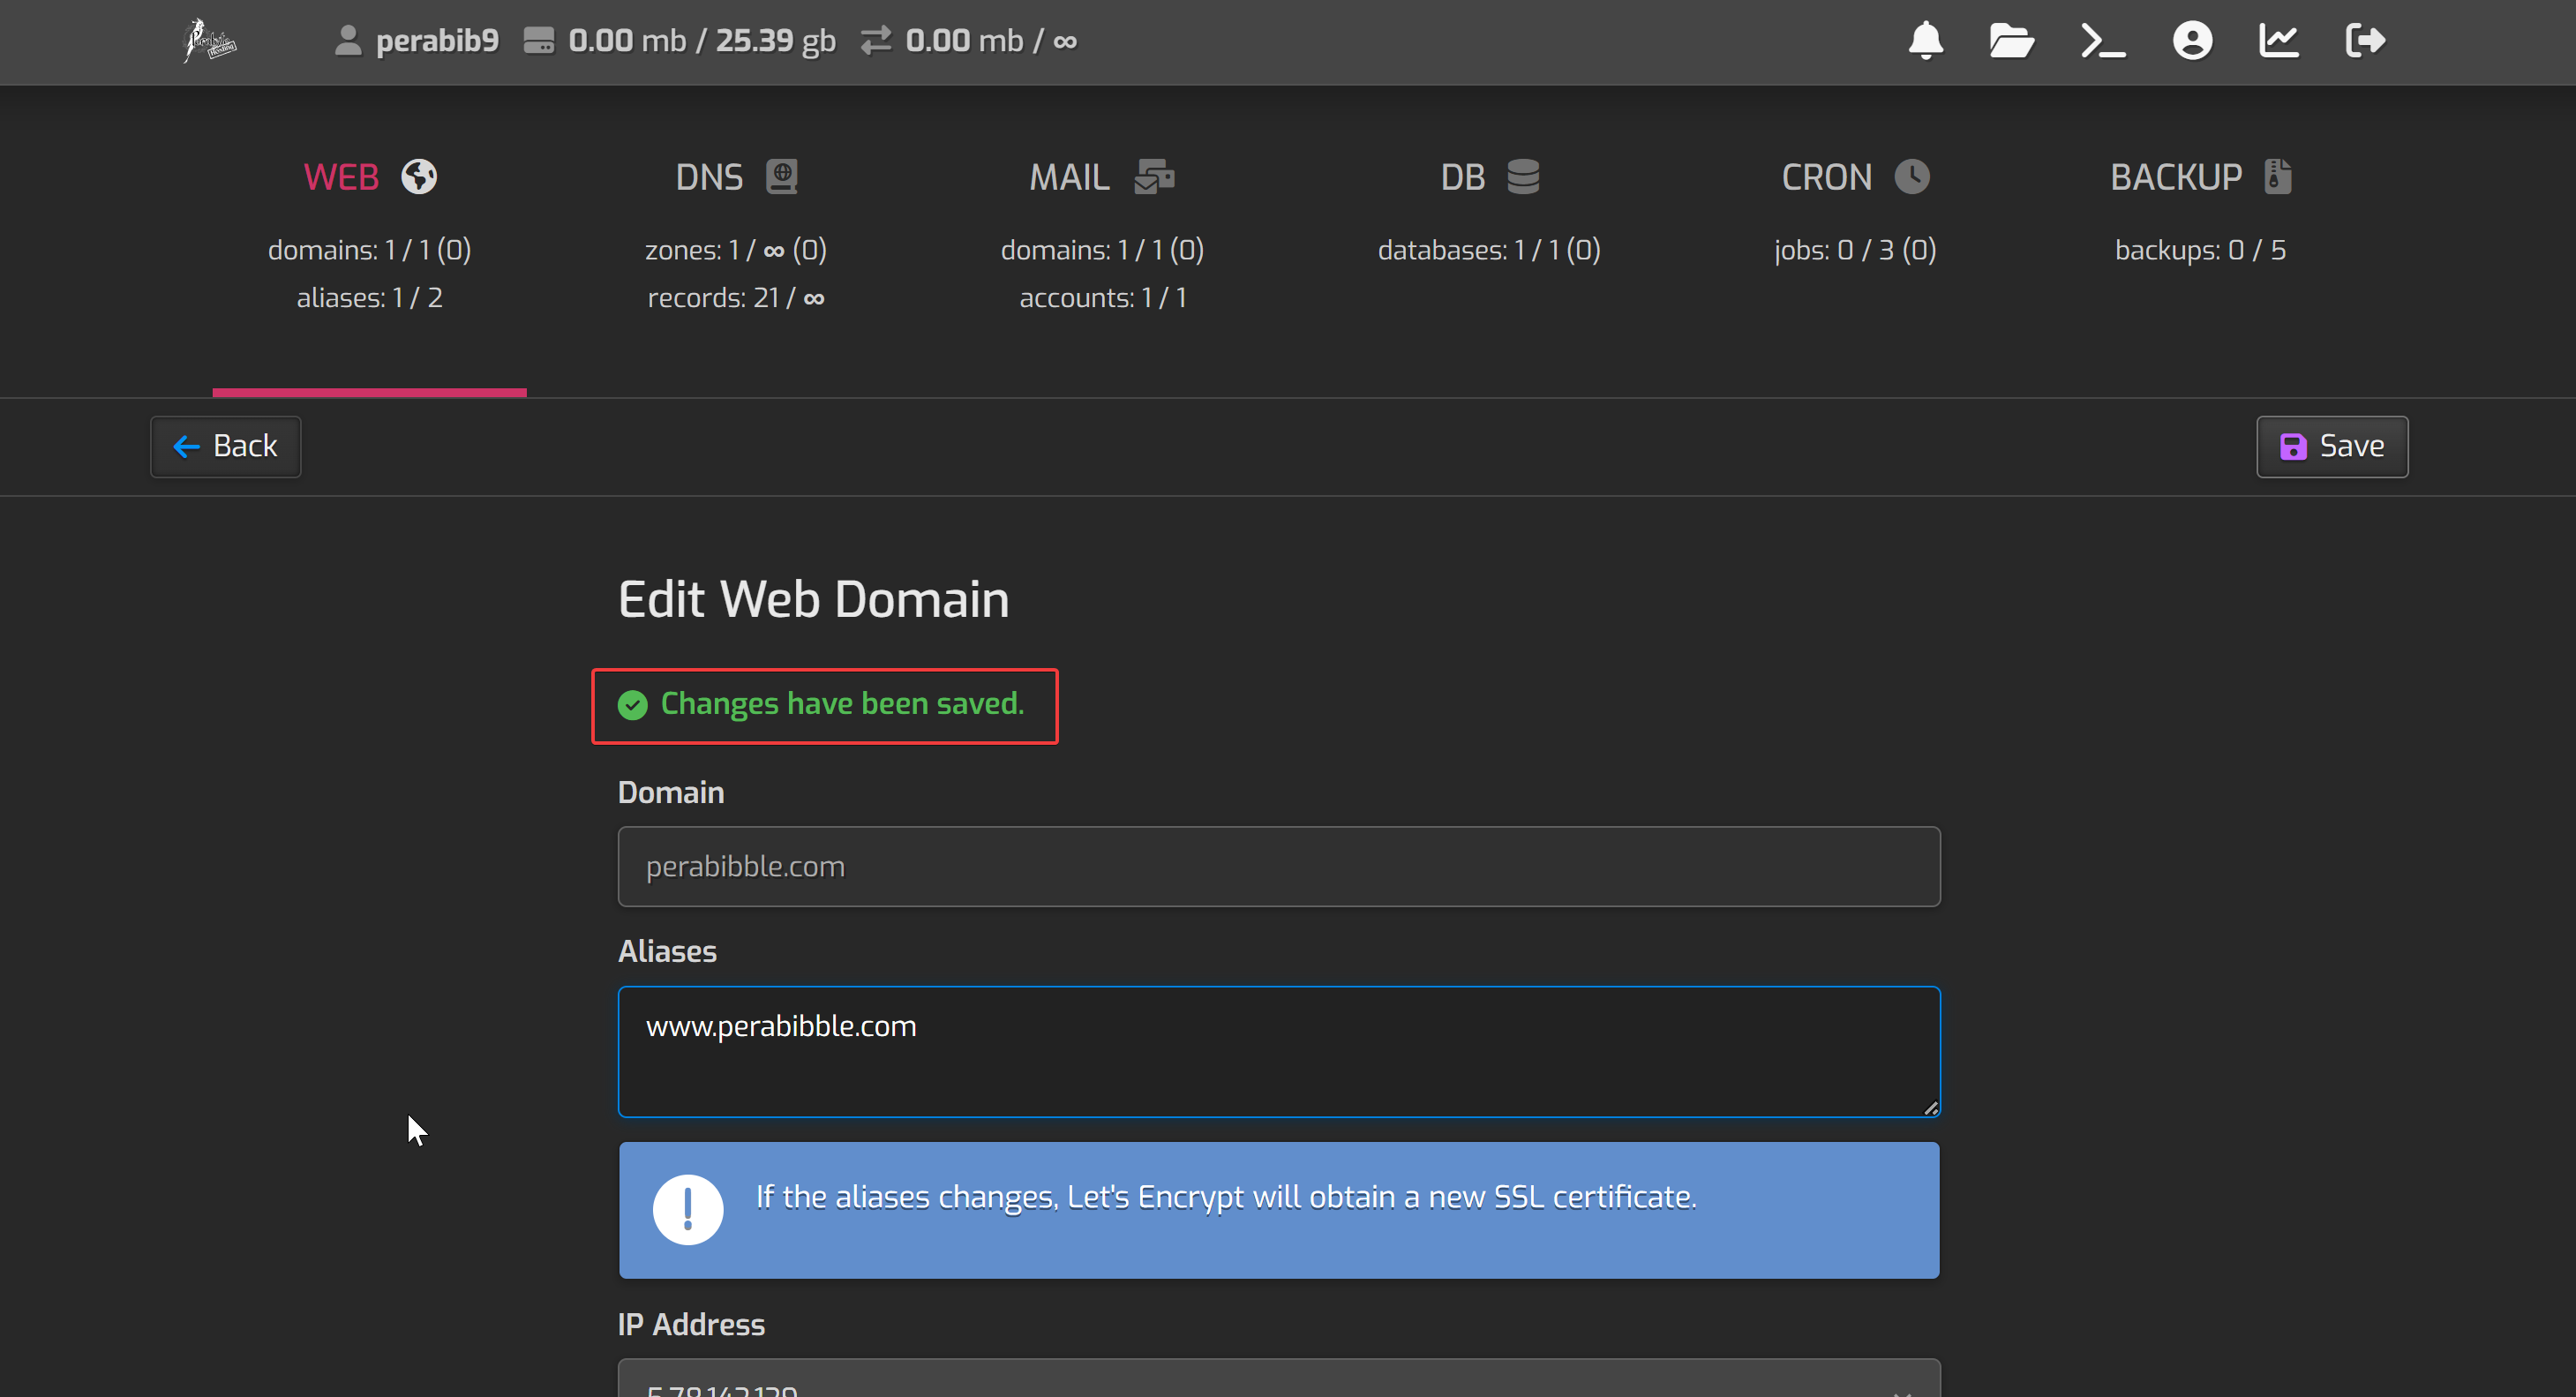
After that's completed, you should see a success message:
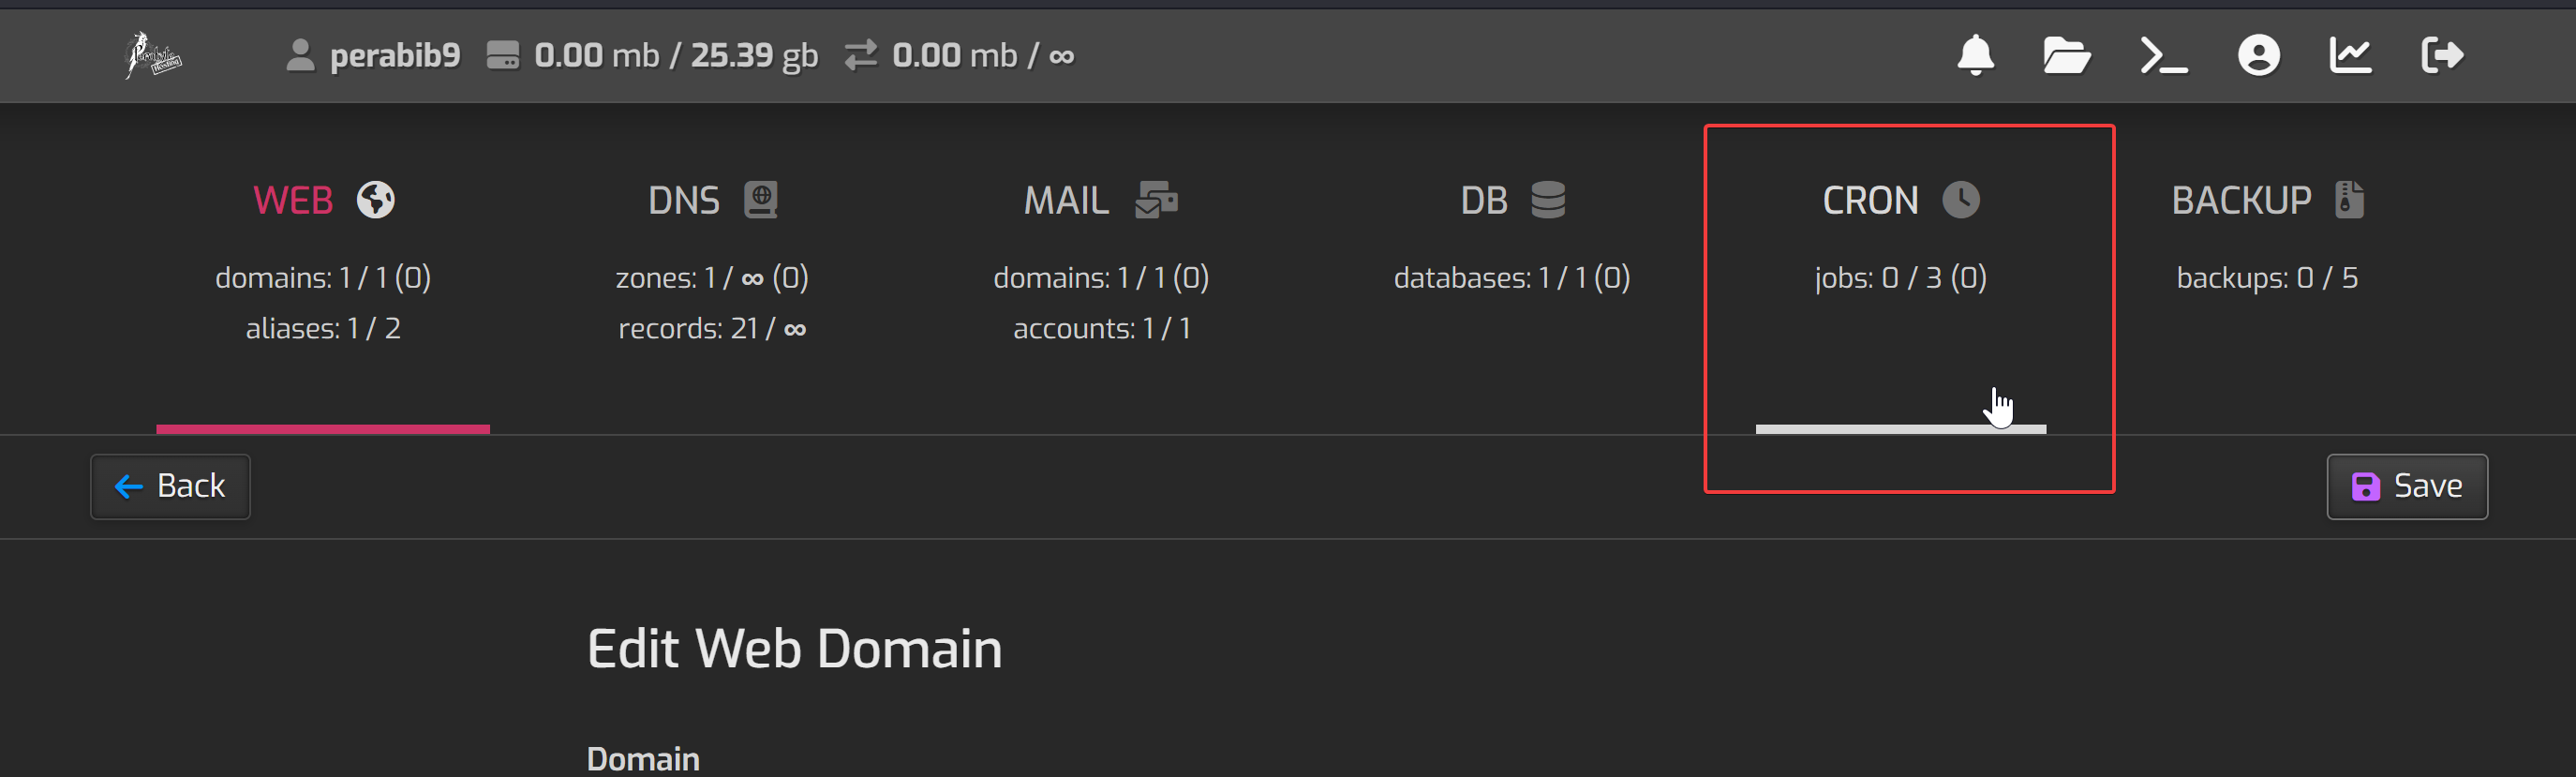
Configuring the Cron Jobs
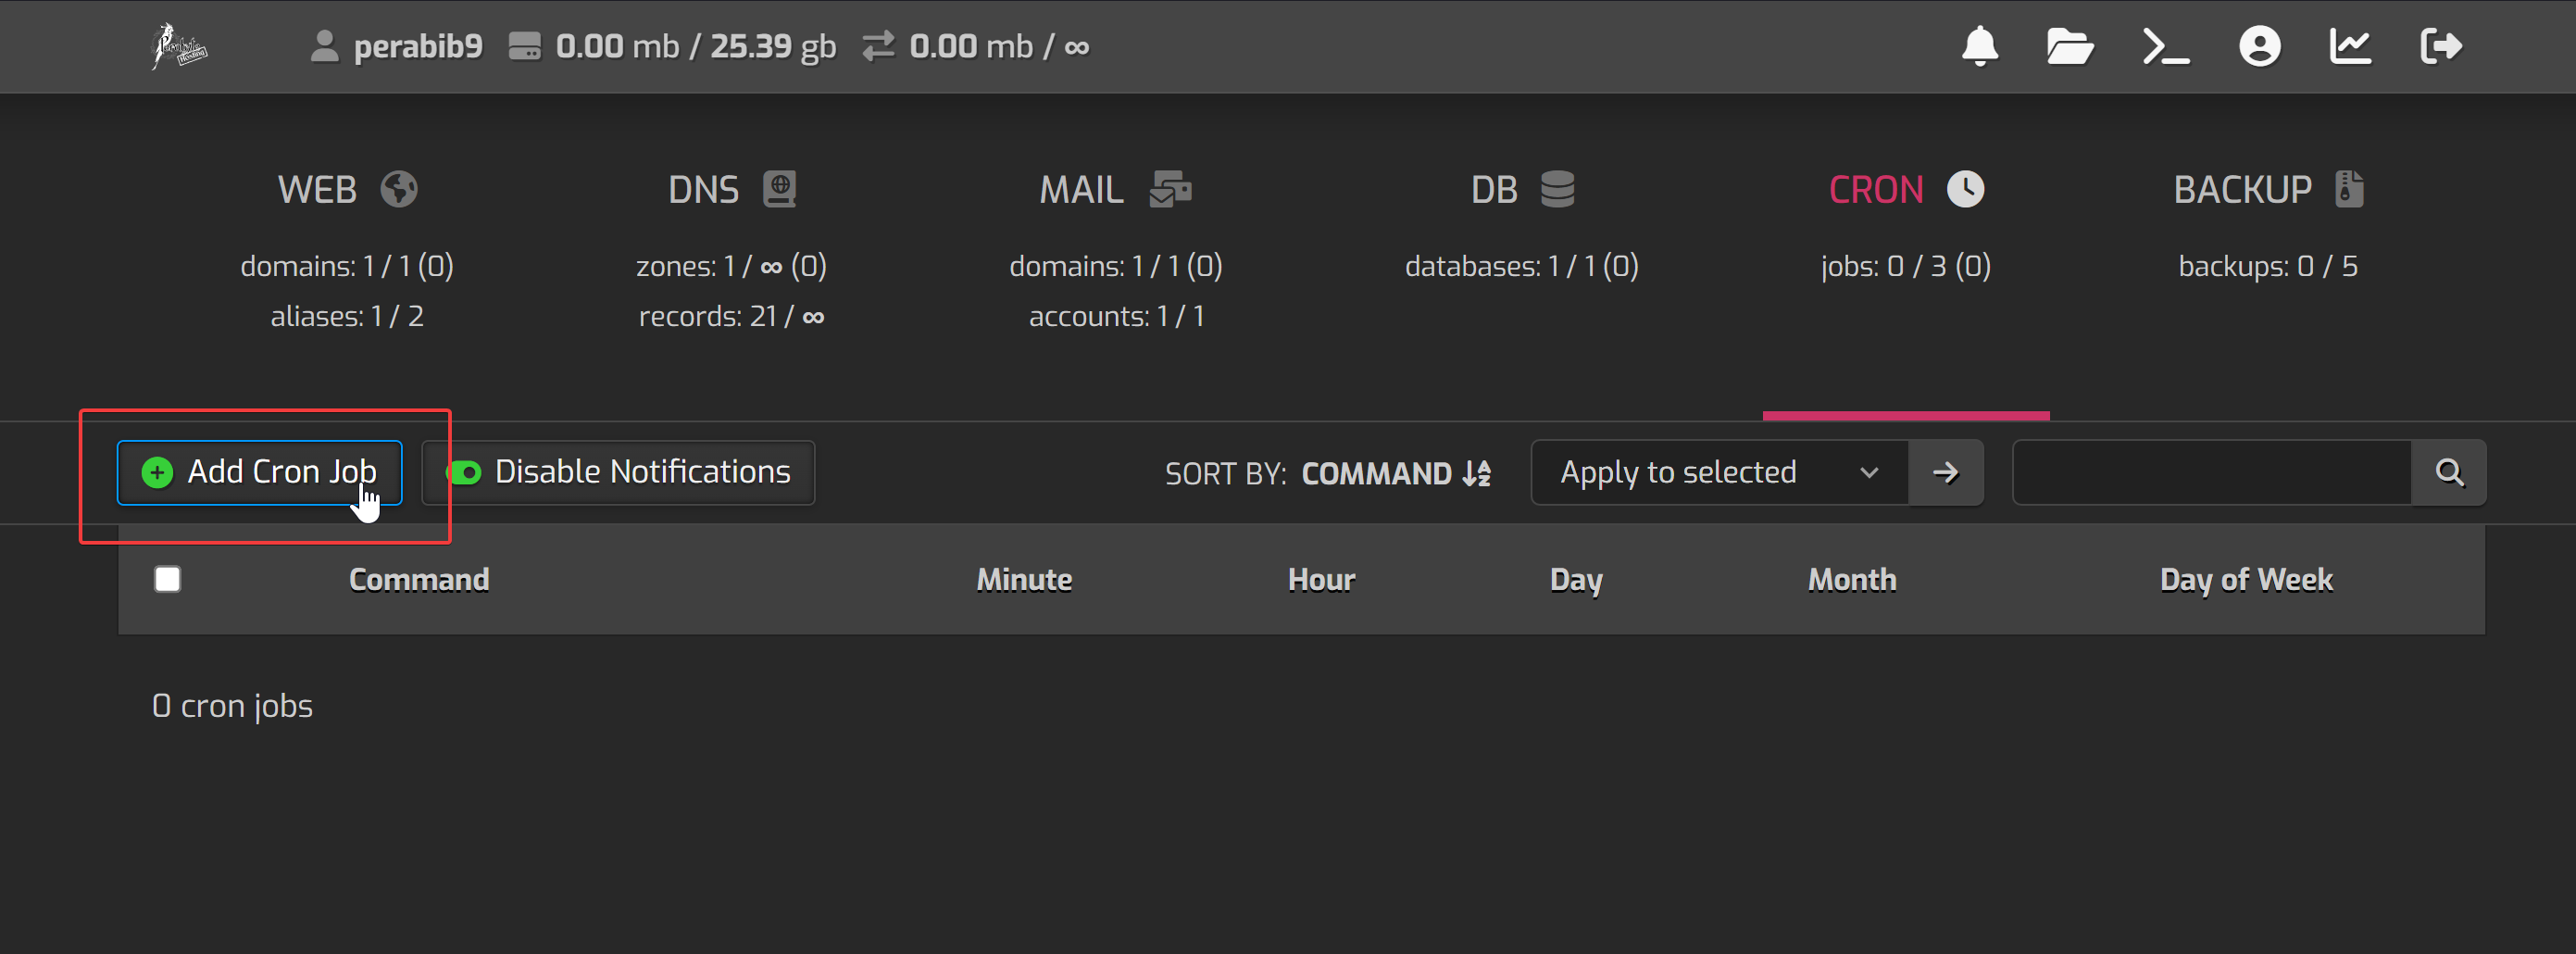
The last thing we need to configure in the control panel is our cron job. This is what tells Lorekeeper to do things at certain times, like schedule news posts, etc. In the top navigation, select "Cron".
Click "Add Cron Job".
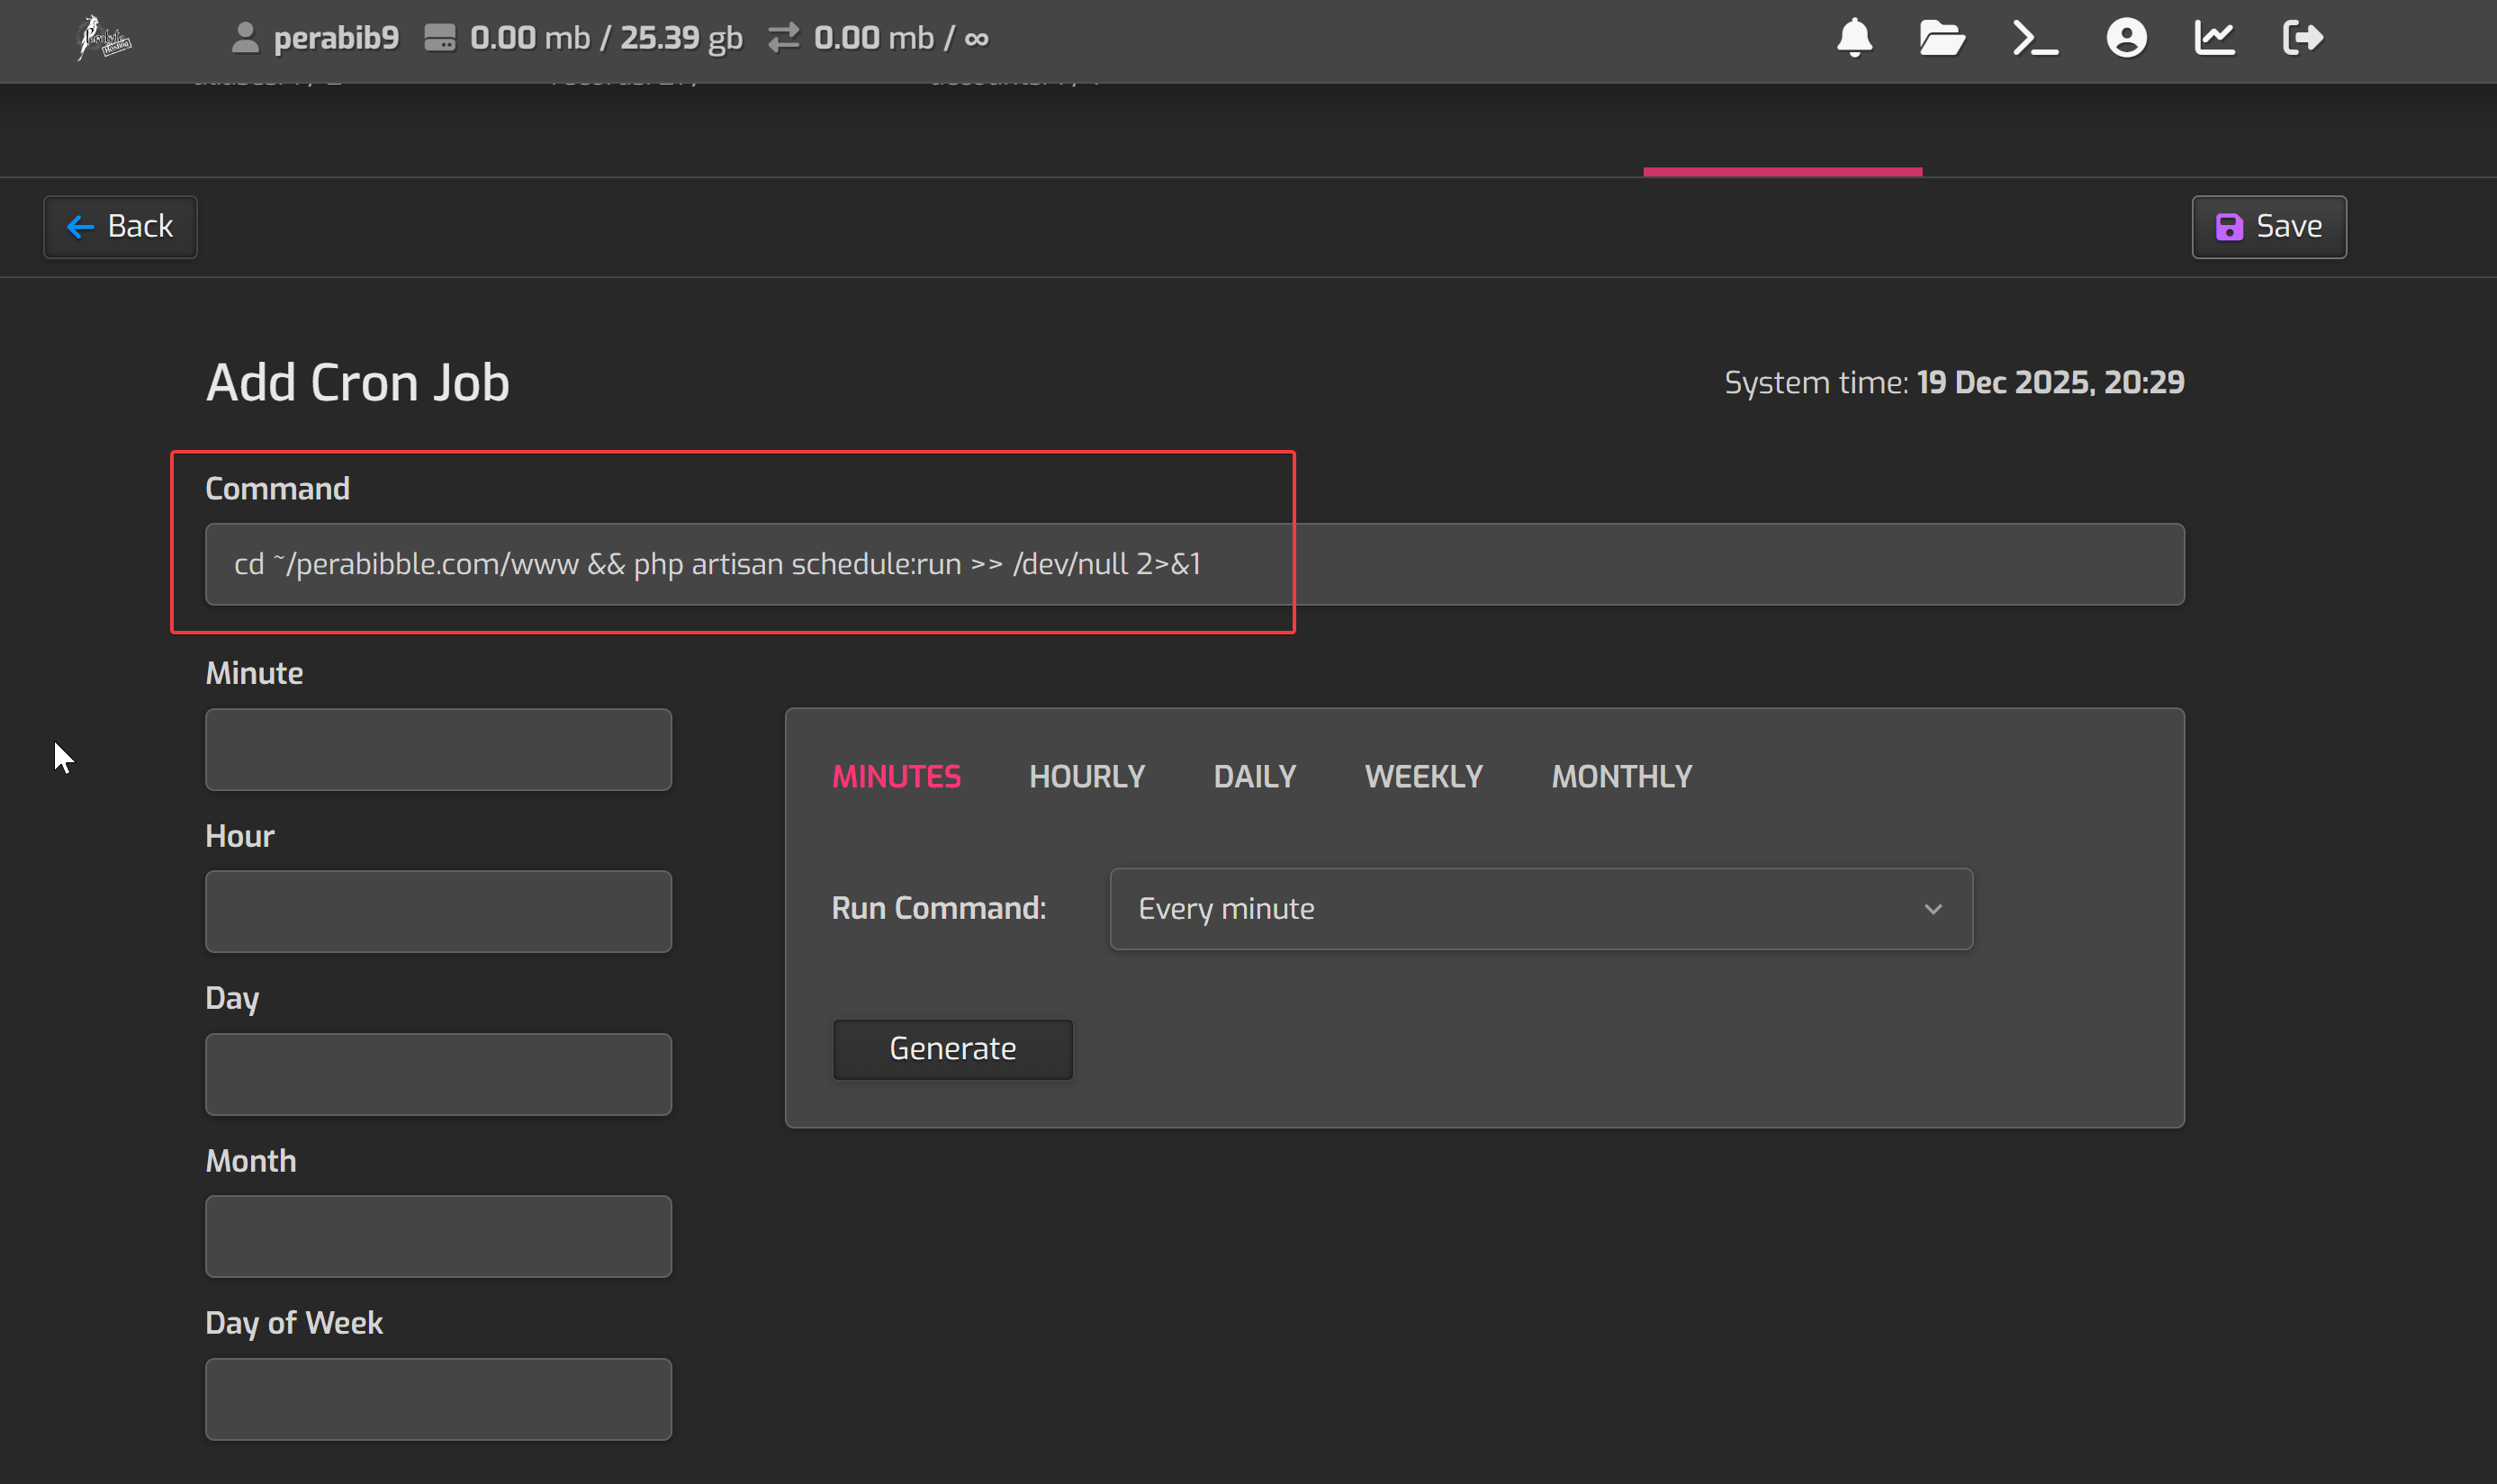
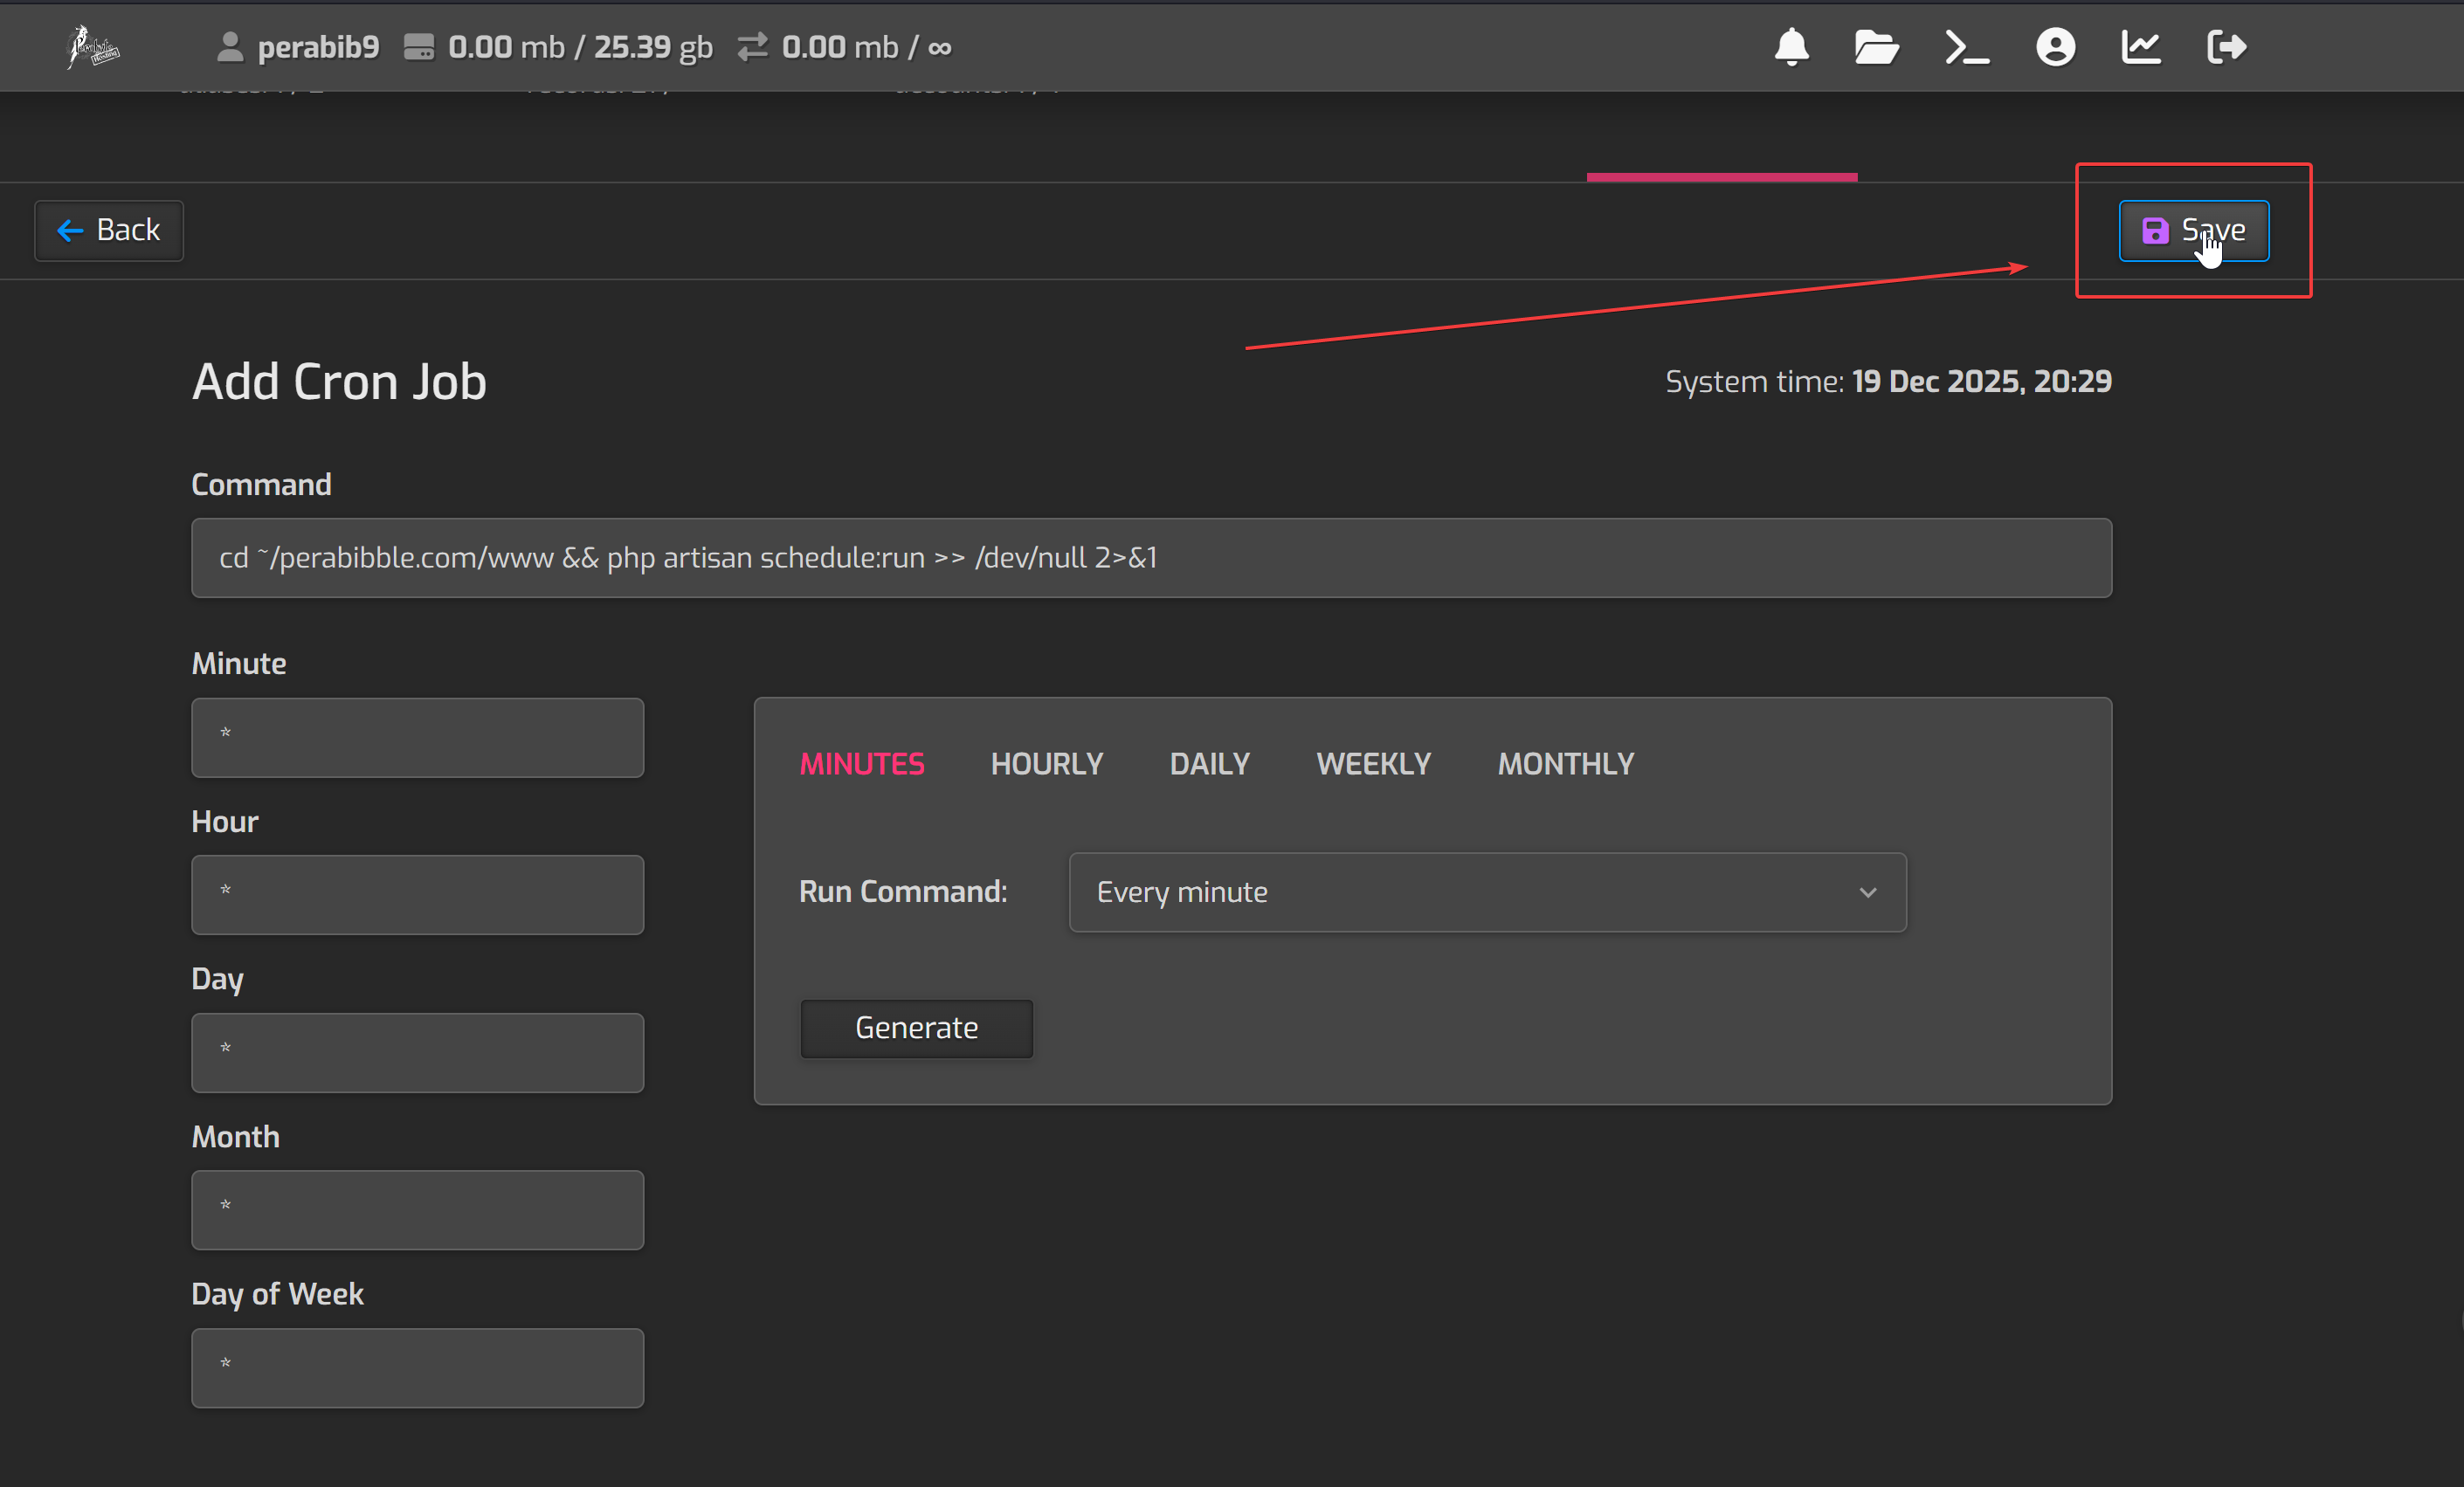
In the "Command" box, type in:
cd ~/YOURDOMAIN.COM/www && php artisan schedule:run >> /dev/null 2>&1
For example:
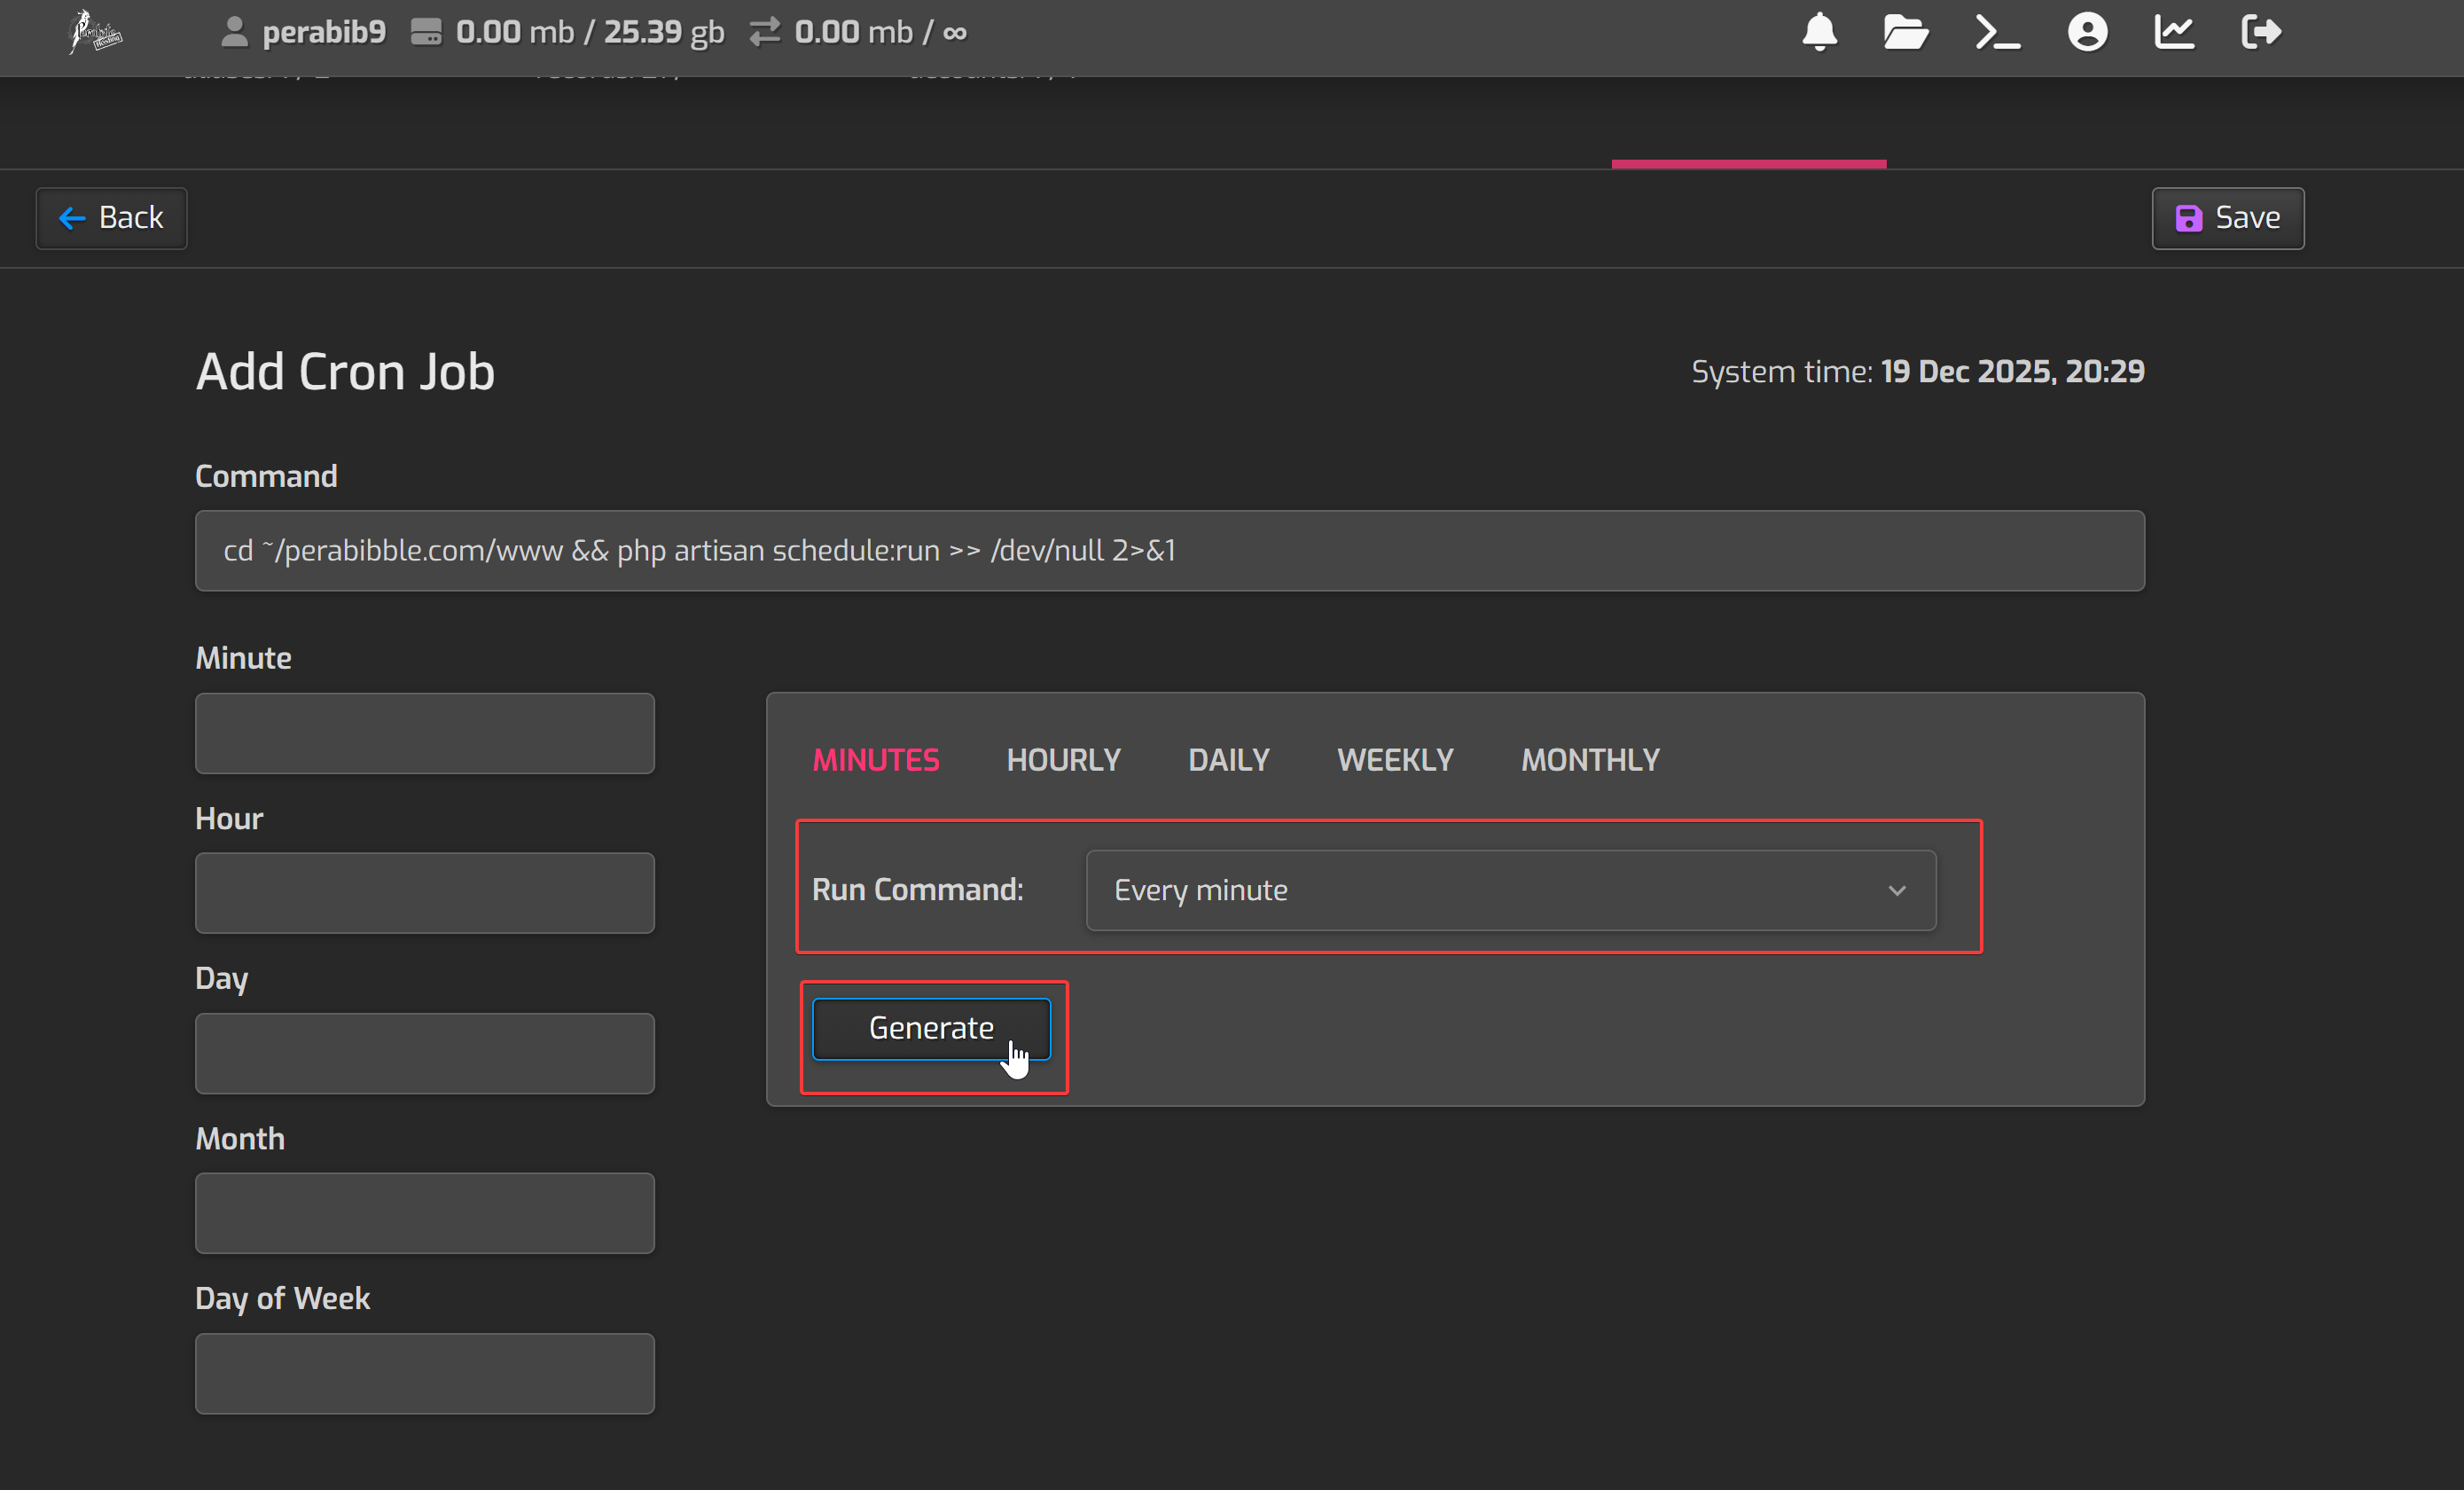
Next, next to "Run Command" select "Every Minute" and click "Generate".
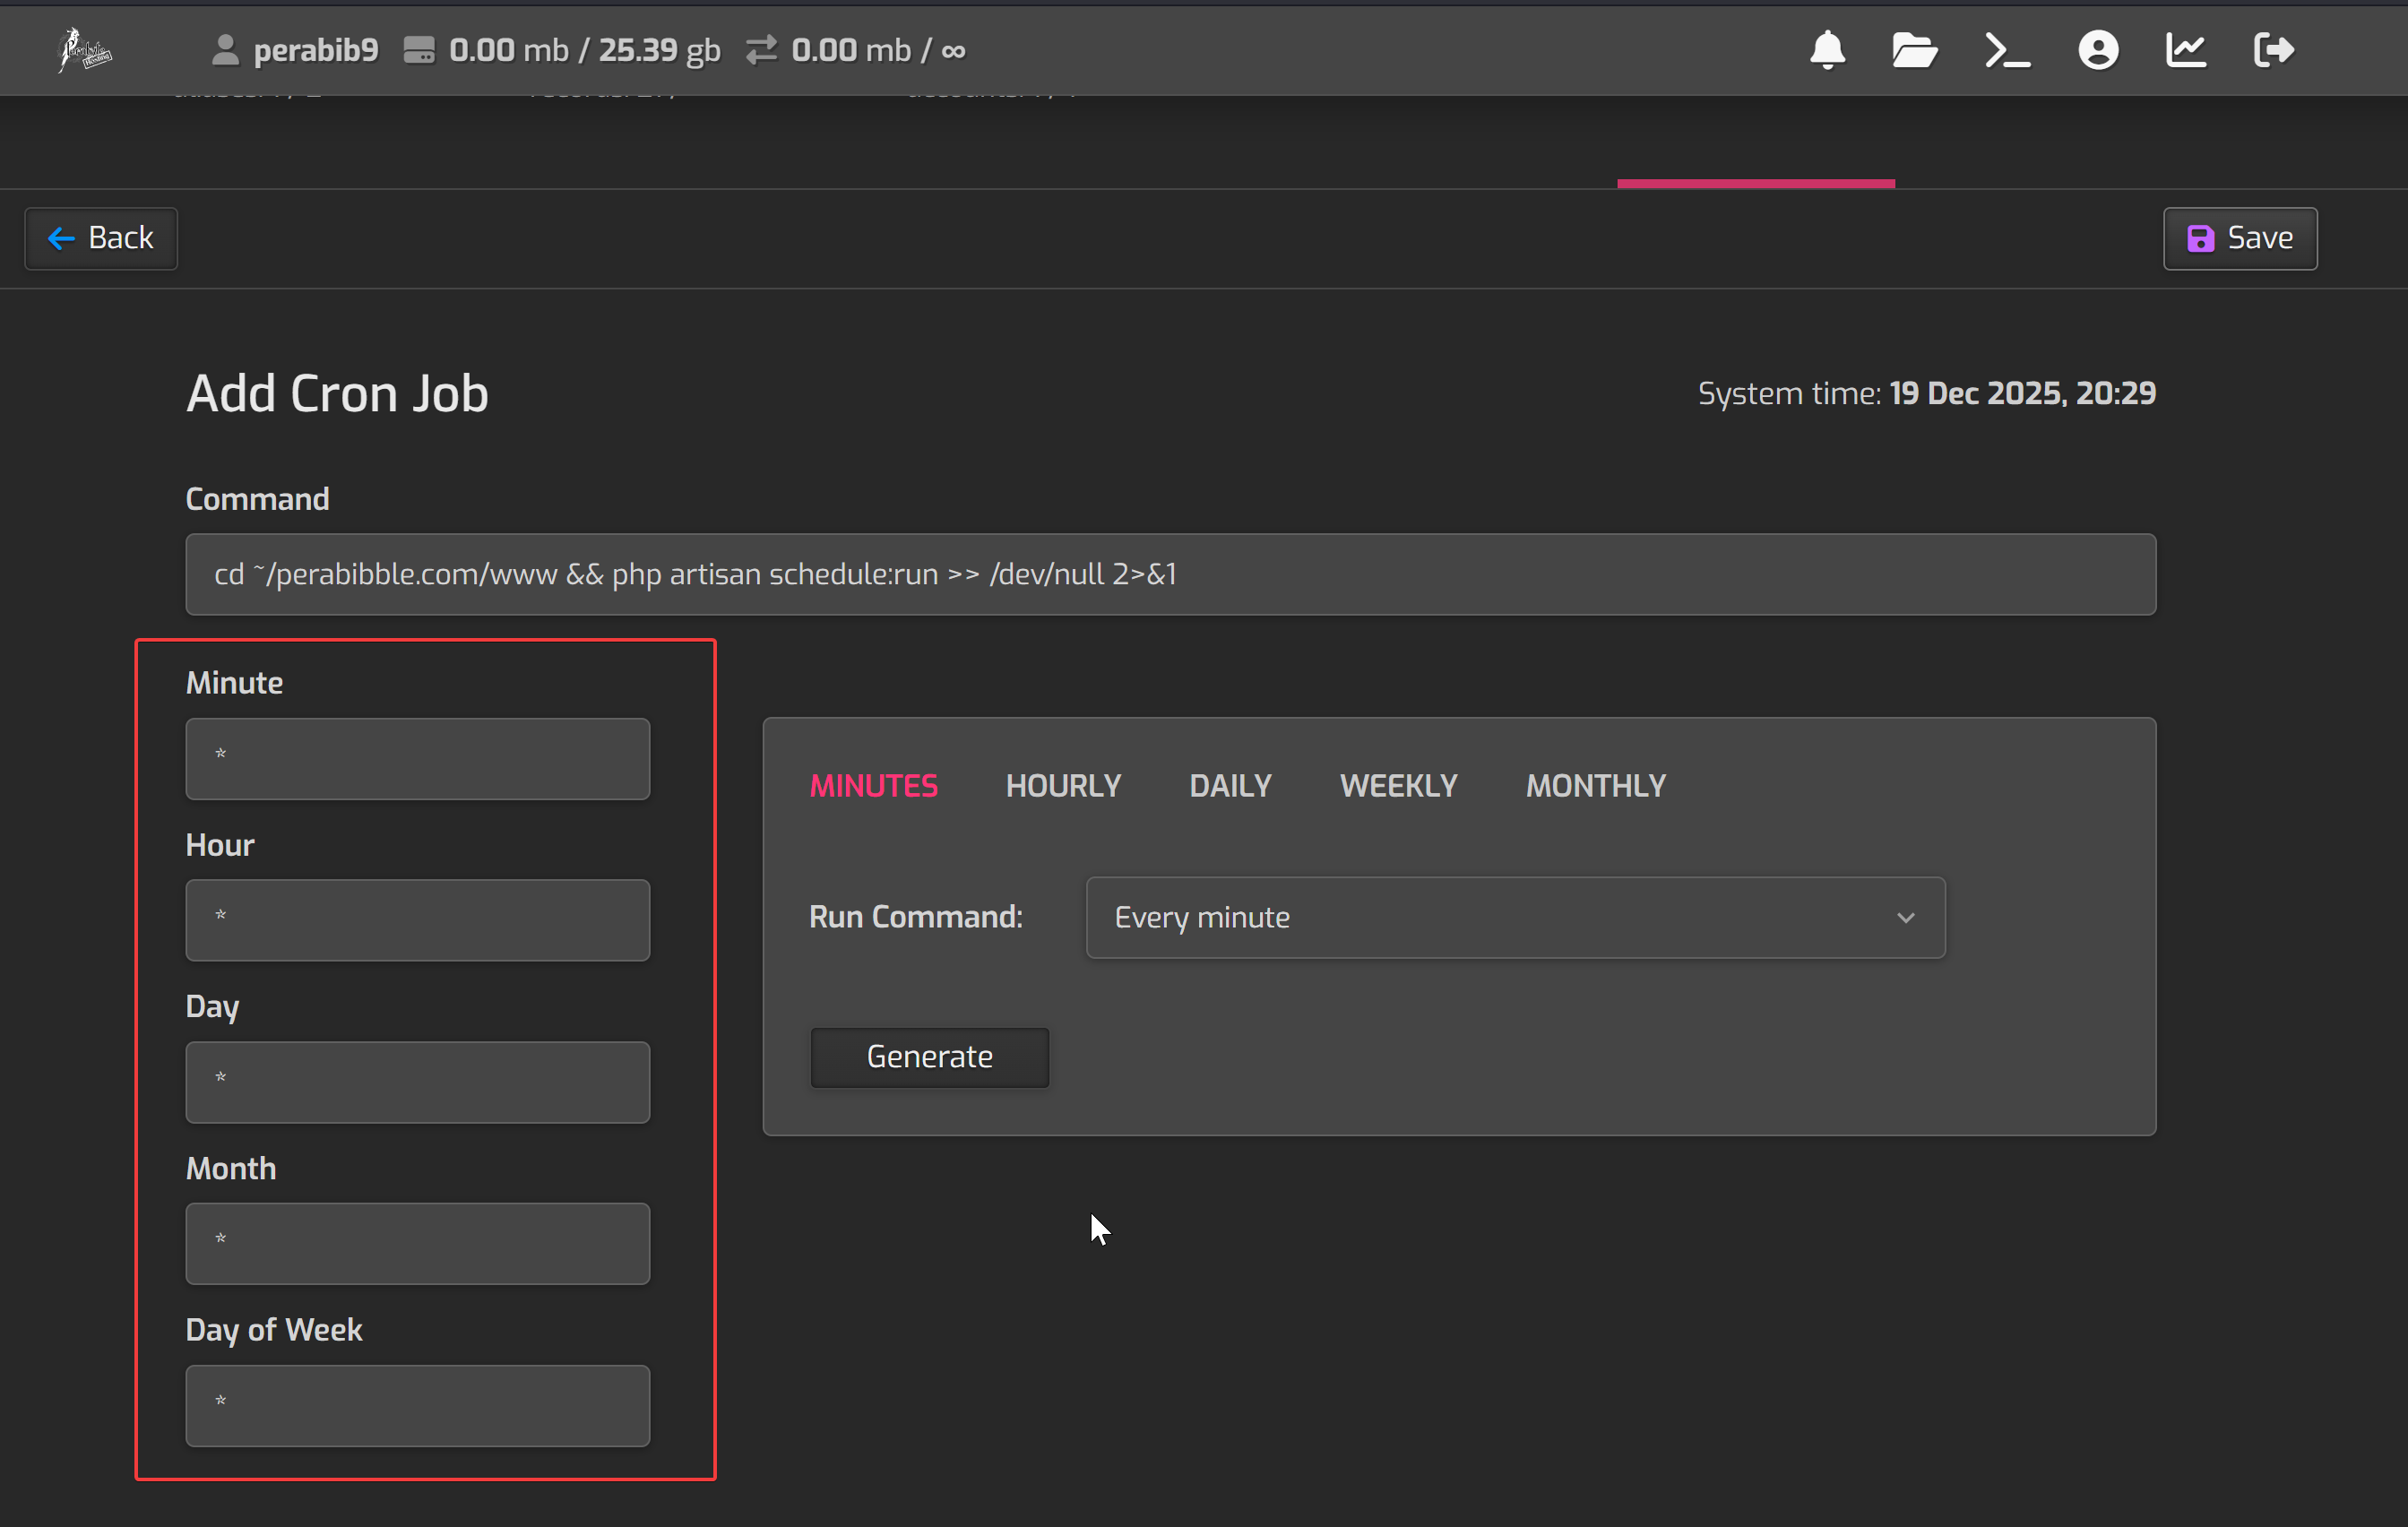
The left boxes should fill in automatically:
Click "Save".
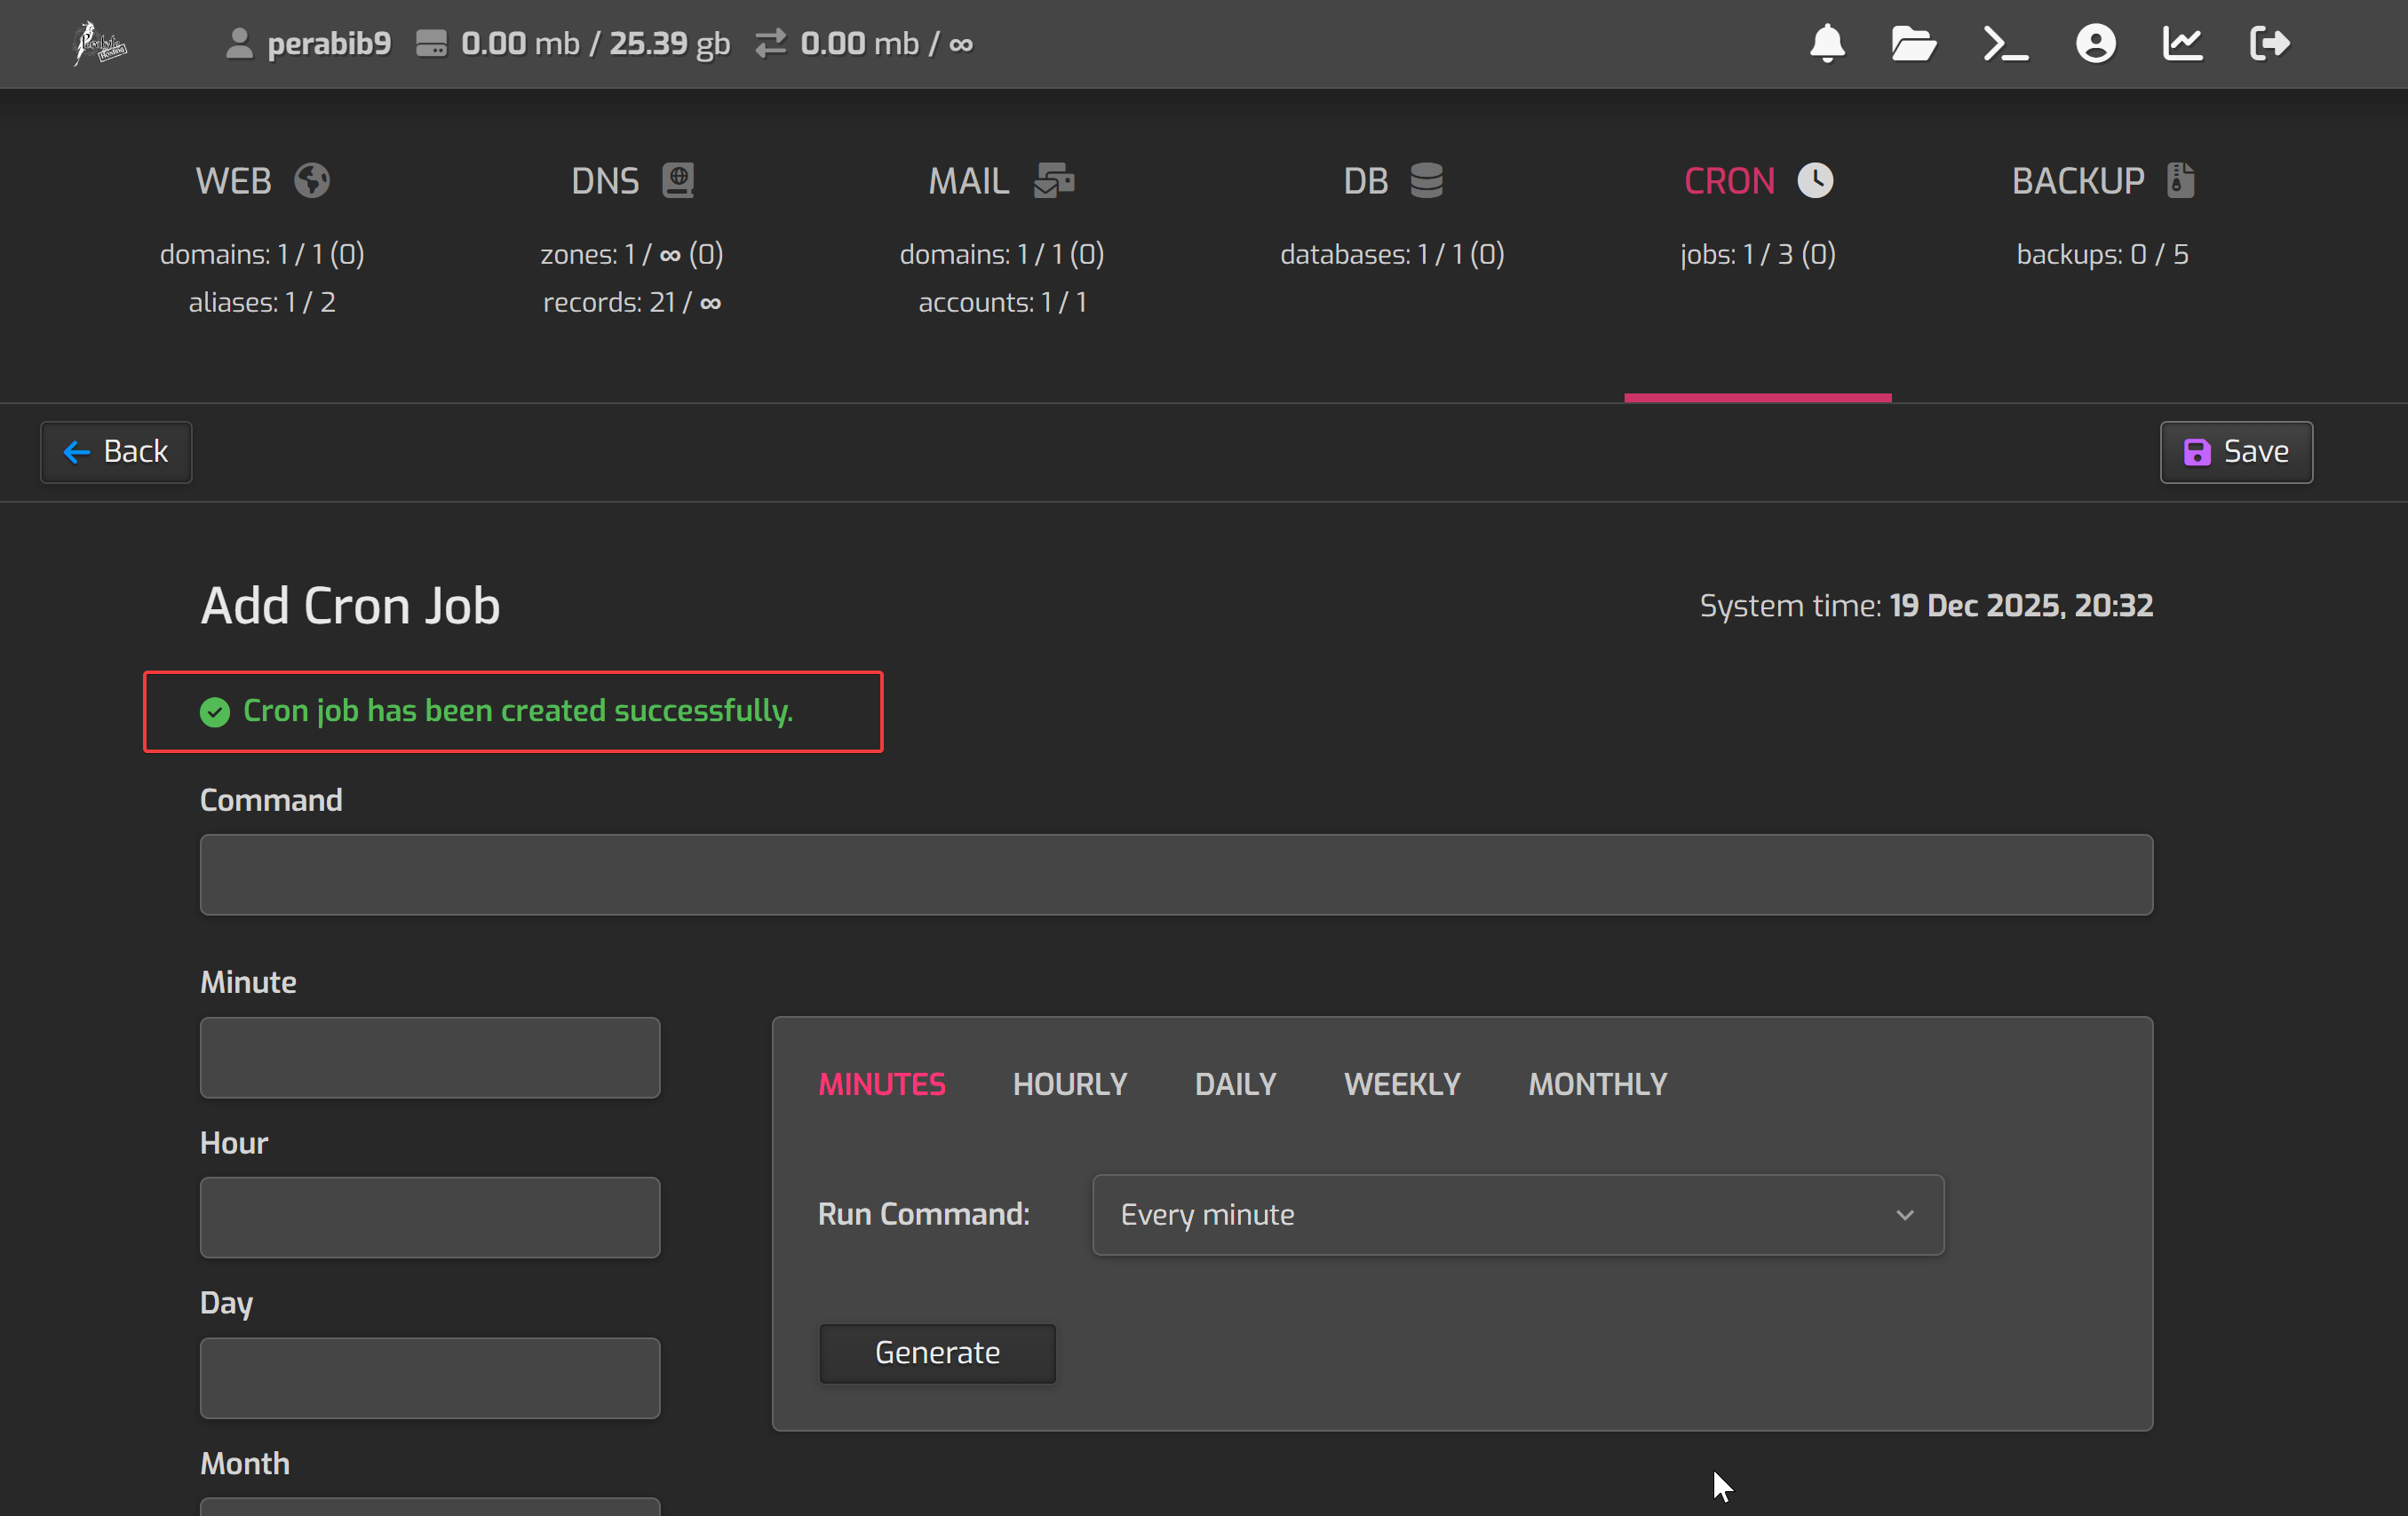
You should see a success message:
That's the last step we needed to do in the control panel!
Configuring the .env File
Using many of the values we generated earlier, we are going to create an .env file in the Lorekeeper directory. This will give Lorekeeper many of the configuration values it needs to run.
Copy the following text into Notepad or another ordinary text editor. You will edit it first, then paste the completed file into nano. We will go through each relevant line one by one.
APP_NAME is a name for your site. It must be all one word.
APP_ENVmust be production on a live website.
APP_DEBUGmust be false on a live website. Never enable debug on live!
APP_URL is the domain name for your site.
CONTACT_ADDRESS is an email and DEVIANTART_ACCOUNT is the dA account for the site. Both values are optional.
DB_HOST will always be sql.perabyte.host for us.
DB_DATABASE is the database name we selected earlier. For example: perabib9_db
DB_USERNAME is the database username we selected earlier. For example: perabib9_user
DB_PASSWORD is the database password we selected earlier.
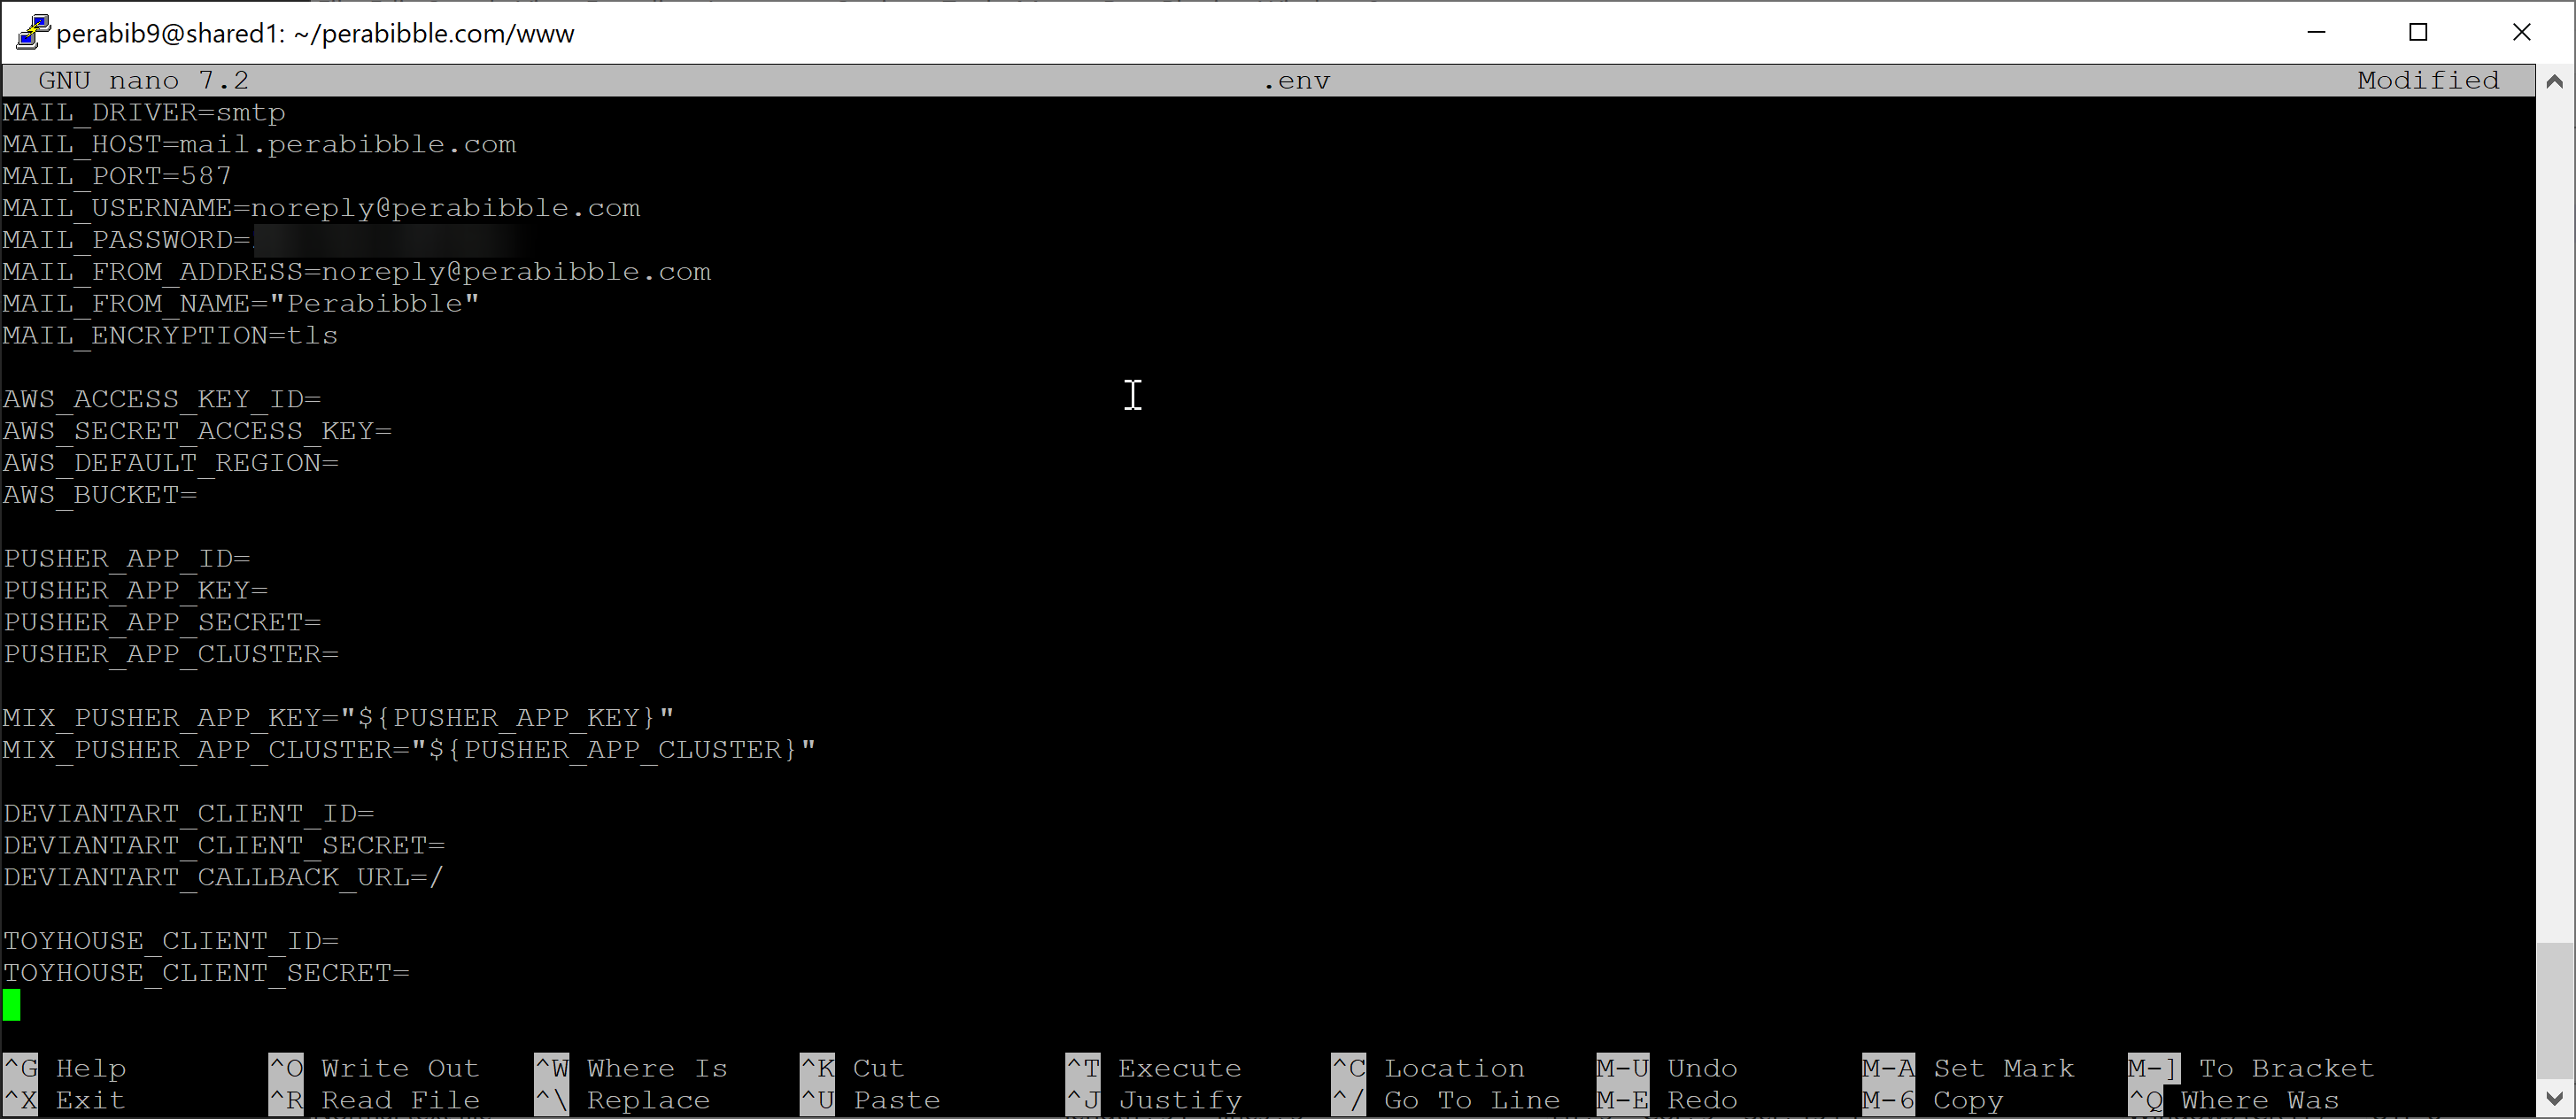
MAIL_HOST is mail.YOURDOMAIN.COM. For example: mail.perabibble.com
MAIL_USERNAME is the full email address for the username we selected earlier. For example: noreply@perabibble.com
MAIL_PASSWORD is the mail password we selected earlier.
MAIL_FROM_ADDRESS is the full email address for the username we selected earlier. It is the same as the username. For example: noreply@perabibble.com
MAIL_FROM_NAME is the name you would like all emails to be sent by. For example: "Perabibble"
Toyhouse and deviantART keys can be found by following the setup guides in the official Lorekeeper documentation. Here is the guide for Toyhouse, and here is the guide for deviantART. You will need to configure at least one social media authentication method.
Once you have filled out your .env file, go back to PuTTY/your SSH client. Type in the following:
cd ~/YOURDOMAIN.COM/www
nano .env
Copy paste all of the text we just edited here.
Remember that in PuTTY, it's right-click to paste!
It will look like this when you're done:
Press ctrl+x, type y, then press enter to save and exit.
We are now going to set the application key value. Run the following command once and it will save to your .env file:
php artisan key:generate
It should look like this when complete:
You should only ever set the application key once. This command should be run once and never again, unless you encounter errors specific to the application key.
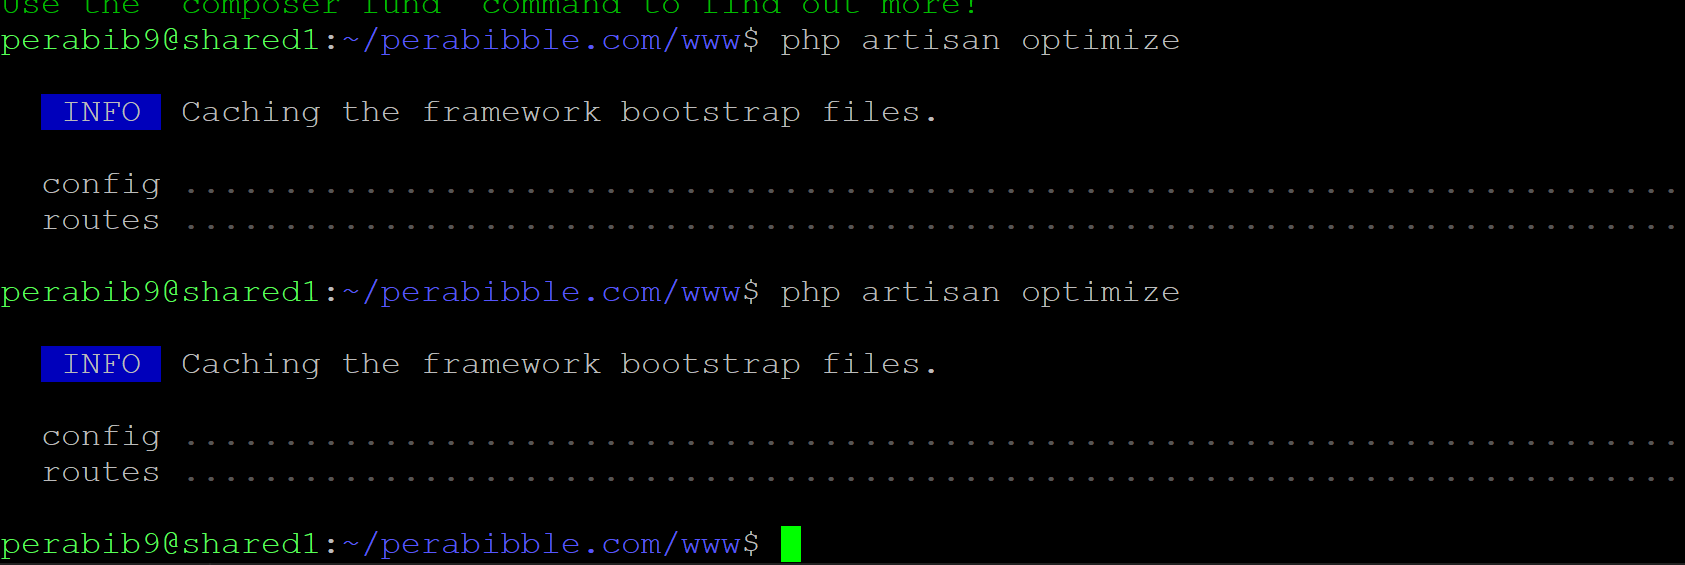
We are going to run a command to make the settings from our .env file save into the cache. Run the following command twice:
php artisan optimize
It should look like this when you're done:
Running PHP Artisan Configuration Commands
Next, we will populate our database with everything Lorekeeper needs to run. Run the following command once:
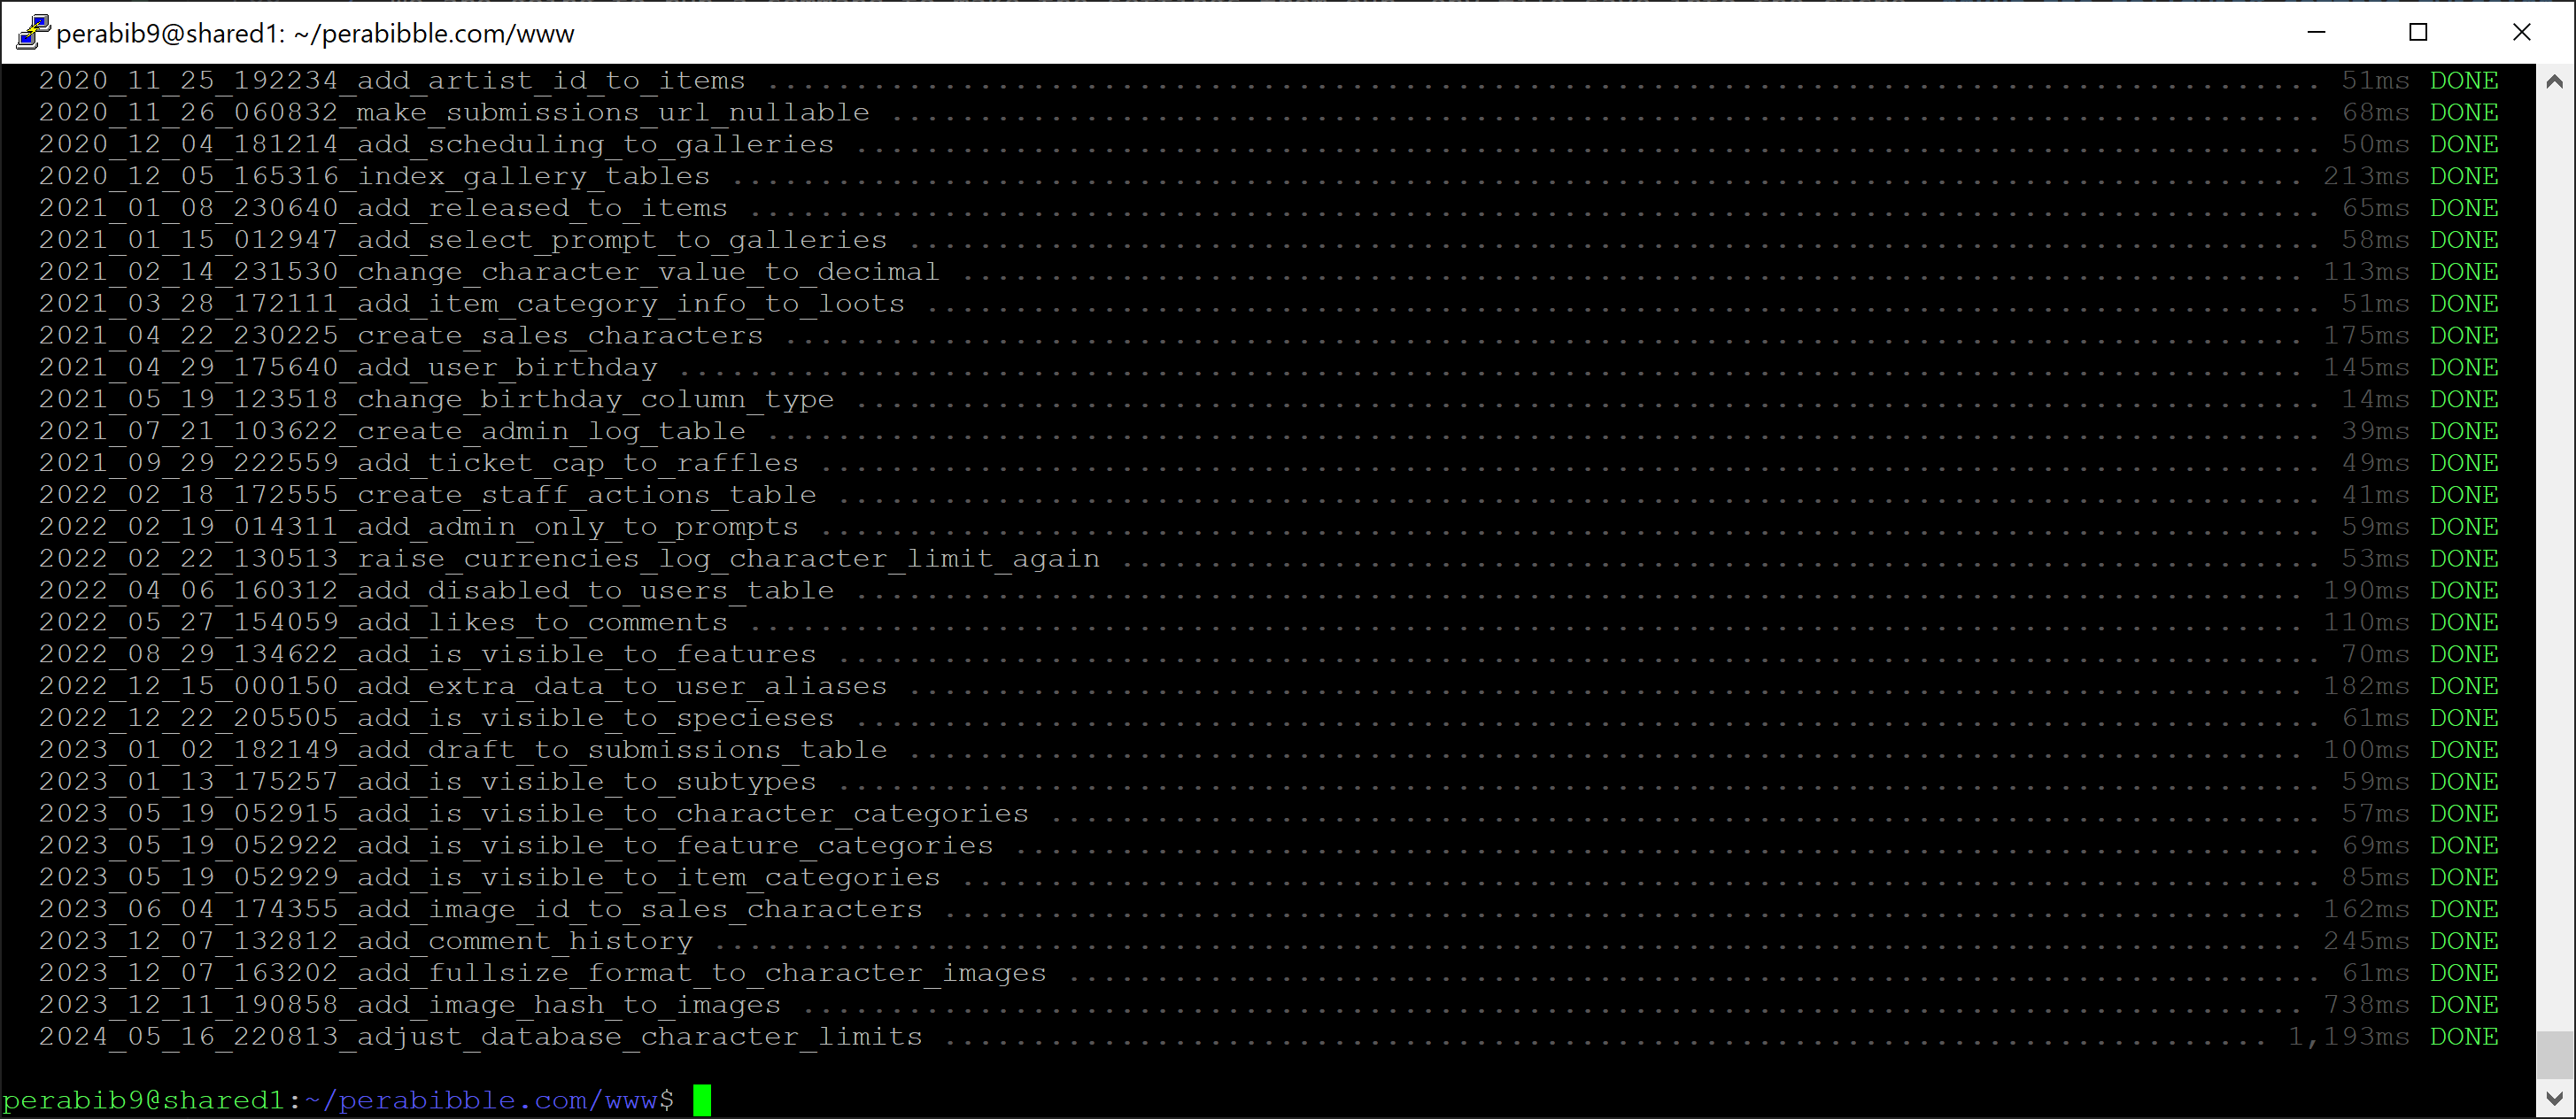
php artisan migrate
Use the arrow keys and press enter to confirm that you want to run this in production:
It should look like this when completed:
You may show a different list of migrations that ran. This was a copy of LK v3.0. The important thing is that there were no errors.
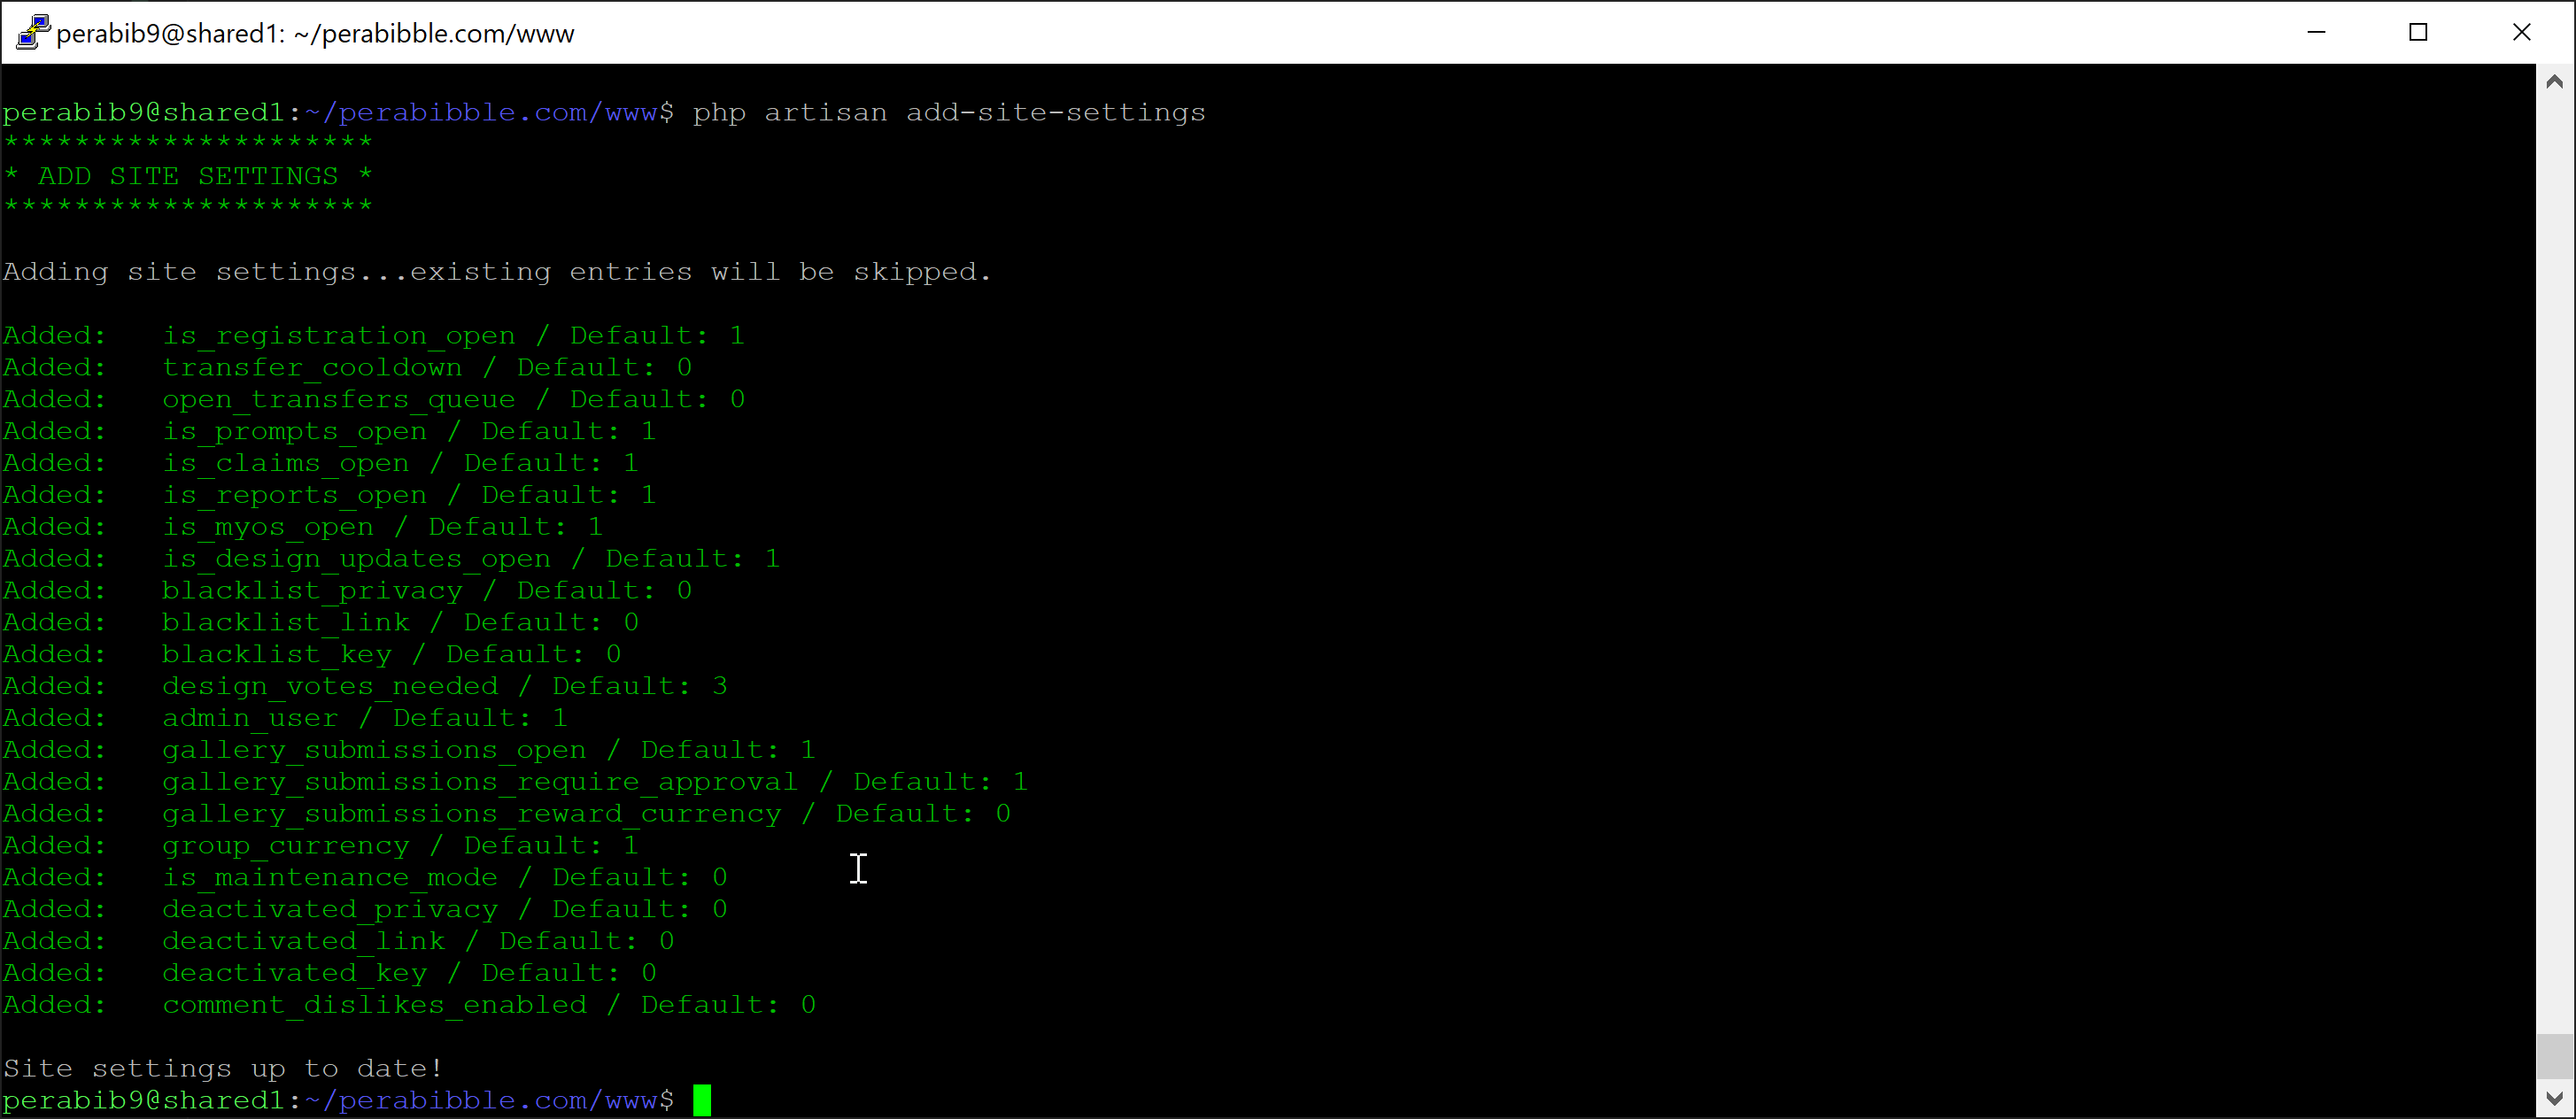
We will next add all of the site settings required by Lorekeeper. Run the following command once:
php artisan add-site-settings
It should look like this when complete:
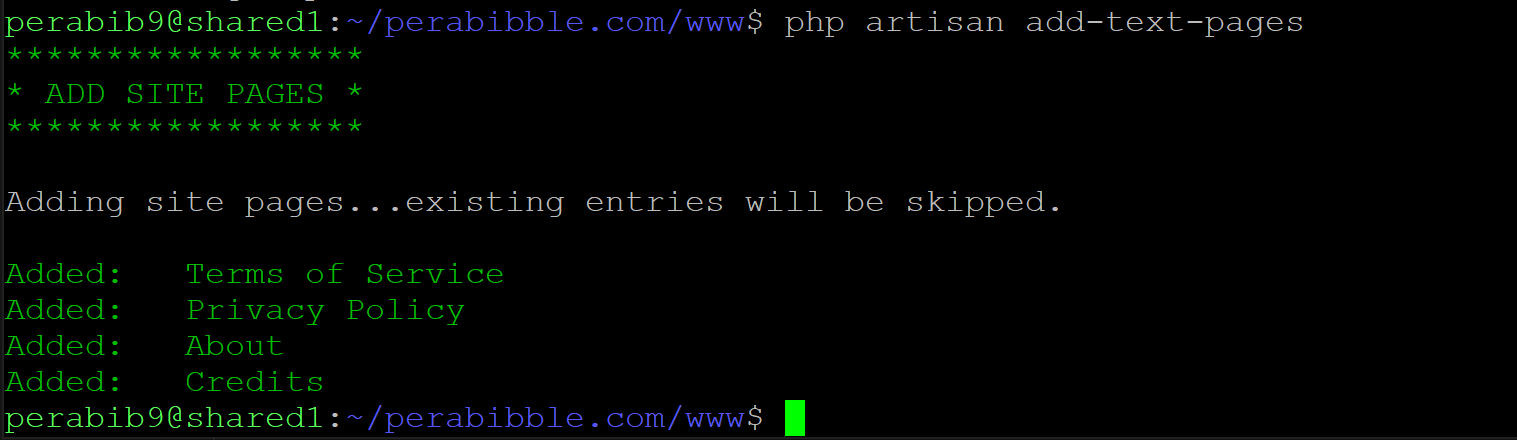
Next, we will add required default text pages. Run the following command once:
php artisan add-text-pages
It should look like this when complete:
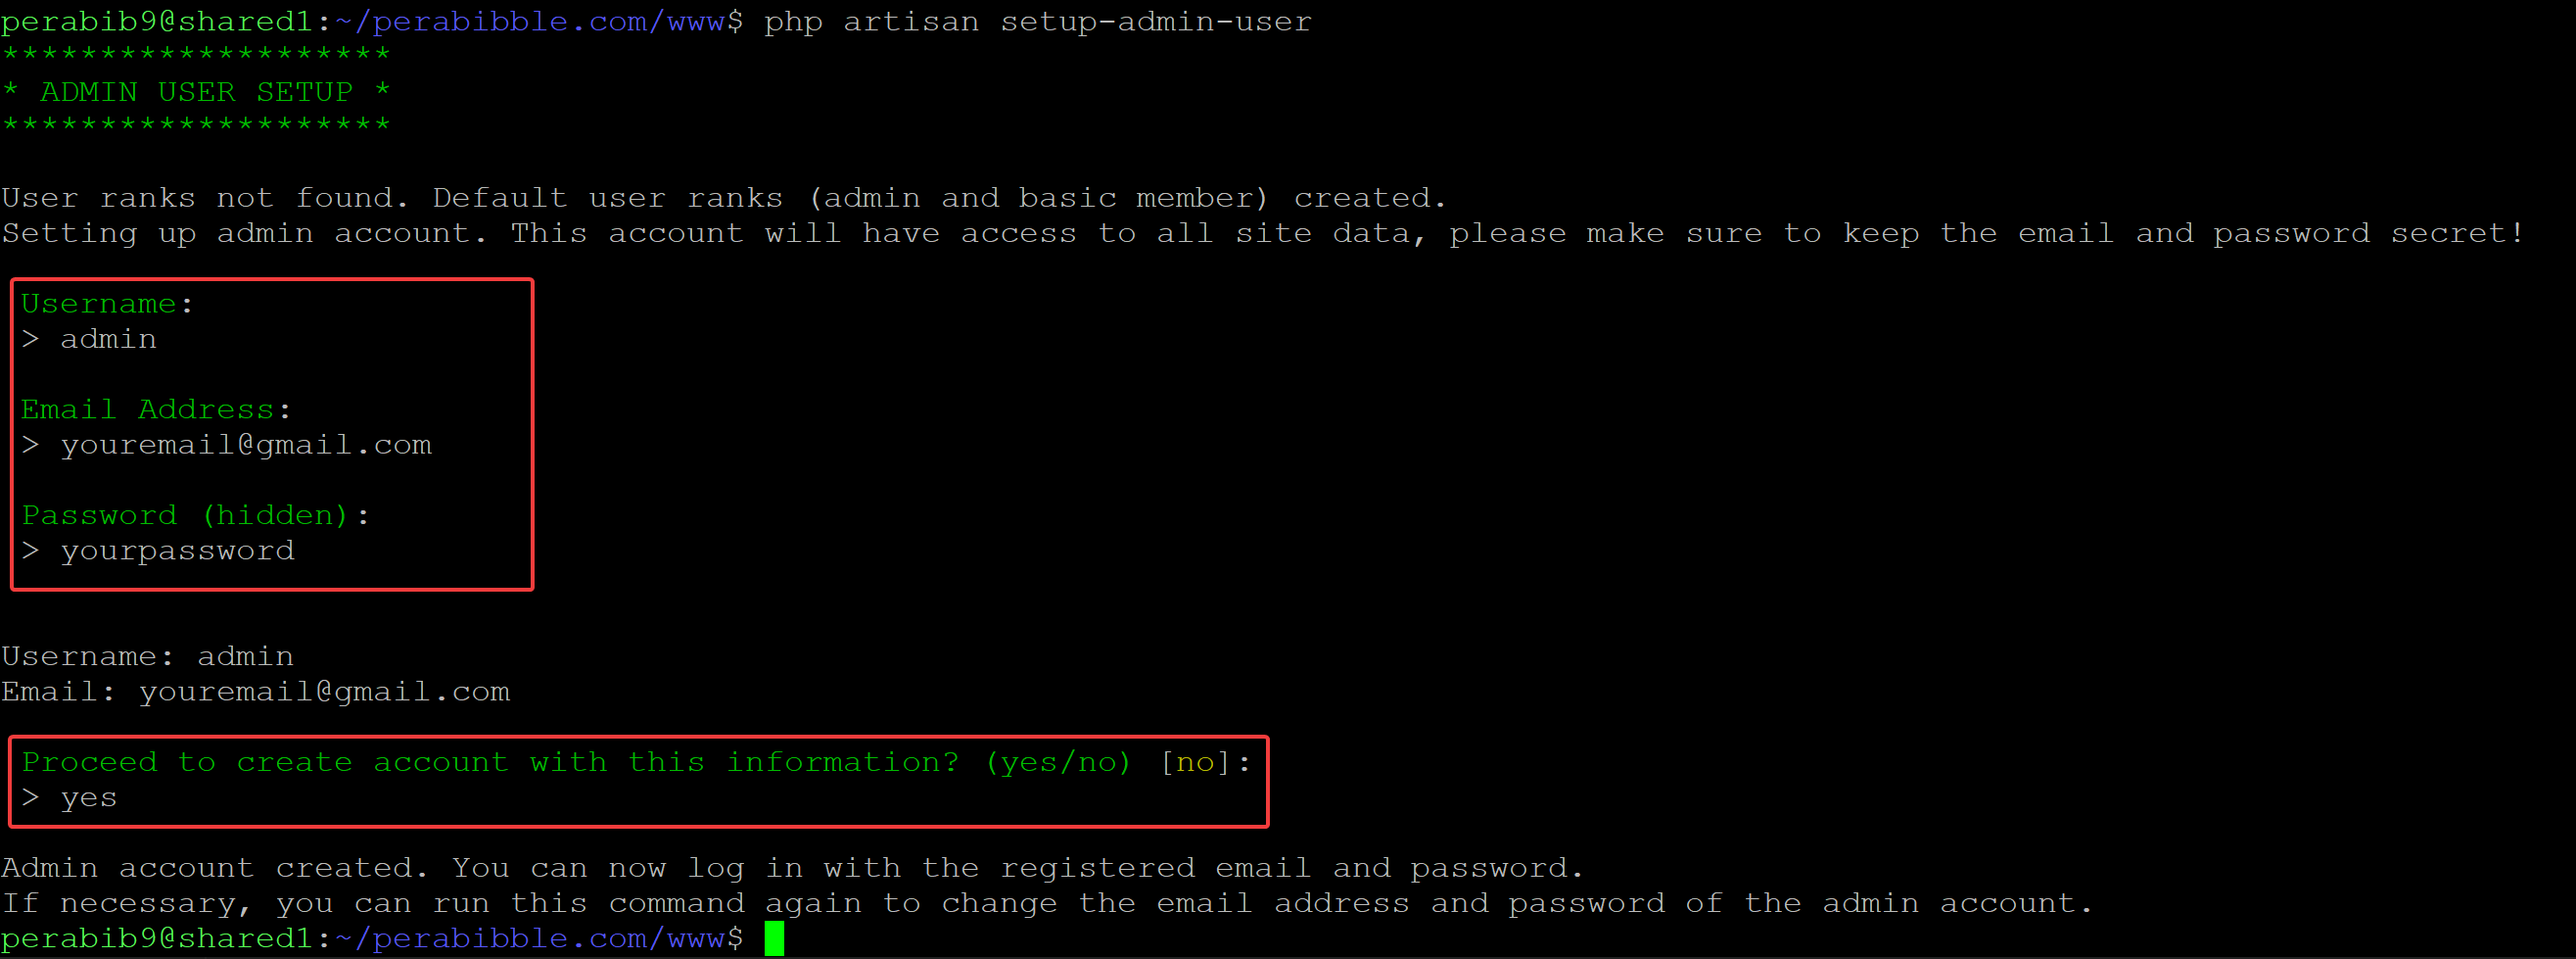
Finally, we will setup the admin account. Run the following command:
php artisan setup-admin-user
It will prompt for input four times. Type in your response, then press enter.
Username: Make this whatever you would like. Most people set it as just admin.
Email address: Make this a real email address as it will be needed to verify the account.
Password: Choose something secure!
And finally, when prompted "Proceed to create account with this information?" type in yes.
It should look something like this when complete:
Conclusion
Congratulations! Your site should now be live. You can login with your admin account and begin setting up different features.
What's Next?
Remember to configure the deviantART and/or Toyhouse authentication/verification if you haven't already. Always run php artisan optimize after making changes to your .env file!
You can start reading about the different features Lorekeeper has in the "Features" section of the official documentation. Typically, you will want to start with entering Rarities and Character Categories, as those are required by most other features.
You can also start thinking about making changes to your site's code. To change your site's name from the default "Lorekeeper", you will need to edit the file config\lorekeeper\settings.php. Use this to practice committing a change to SourceGit and push the change to your site!