Lorekeeper Migration Guide
Last Updated: Nov 2, 2024This guide is still a work in progress!
Follow any of this at your own risk.
Introduction
This is a guide for how to migrate your Lorekeeper website from one provider (such as Dreamhost) to another (such as DigitalOcean or Hetzner).
Before You Start
- This guide is for medium to advanced users. If you're still becoming familiar with git, the command line, etc, you should probably just stay on Dreamhost for now.
- This guide is NOT applicable to migrations towards Dreamhost. This will only apply to people who want to move away from DH.
- This guide assumes you have a local copy of your site setup. You need to set up a local first.
- DO NOT DO ANYTHING ELSE UNTIL YOU HAVE A WORKING LOCAL COPY OF YOUR WEBSITE.
- Try using this guide, and create a ticket in the Lorekeeper Discord if you need assistance.
- This guide assumes you are on Windows. Most of it will still apply to Linux and Mac, but you may have some differences regarding anything to do with SSH.
- Please read every step of this guide CAREFULLY. I highly recommend doing a full read-through before you even get started. Messing up one of this steps can lead to locking yourself out of your server, losing data, or worse. Please be careful!
Backing Up Your Data
There are three things you need to grab -- the SQL dump file, the .env file, and your public folder.
First, SSH into your current site and run php artisan down. This will put your existing site into maintenance mode and prevent anyone from reading/writing to the database or public folder while you're grabbing all your data.
Getting the Database
If you have PHPMyAdmin:
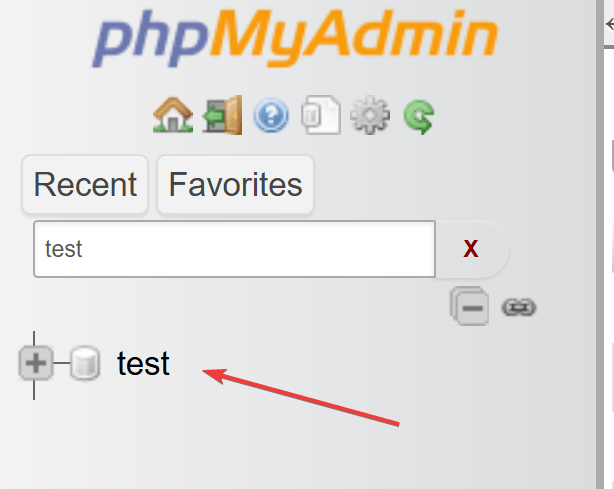
- Open up PHPMyAdmin and select your database from the sidebar.
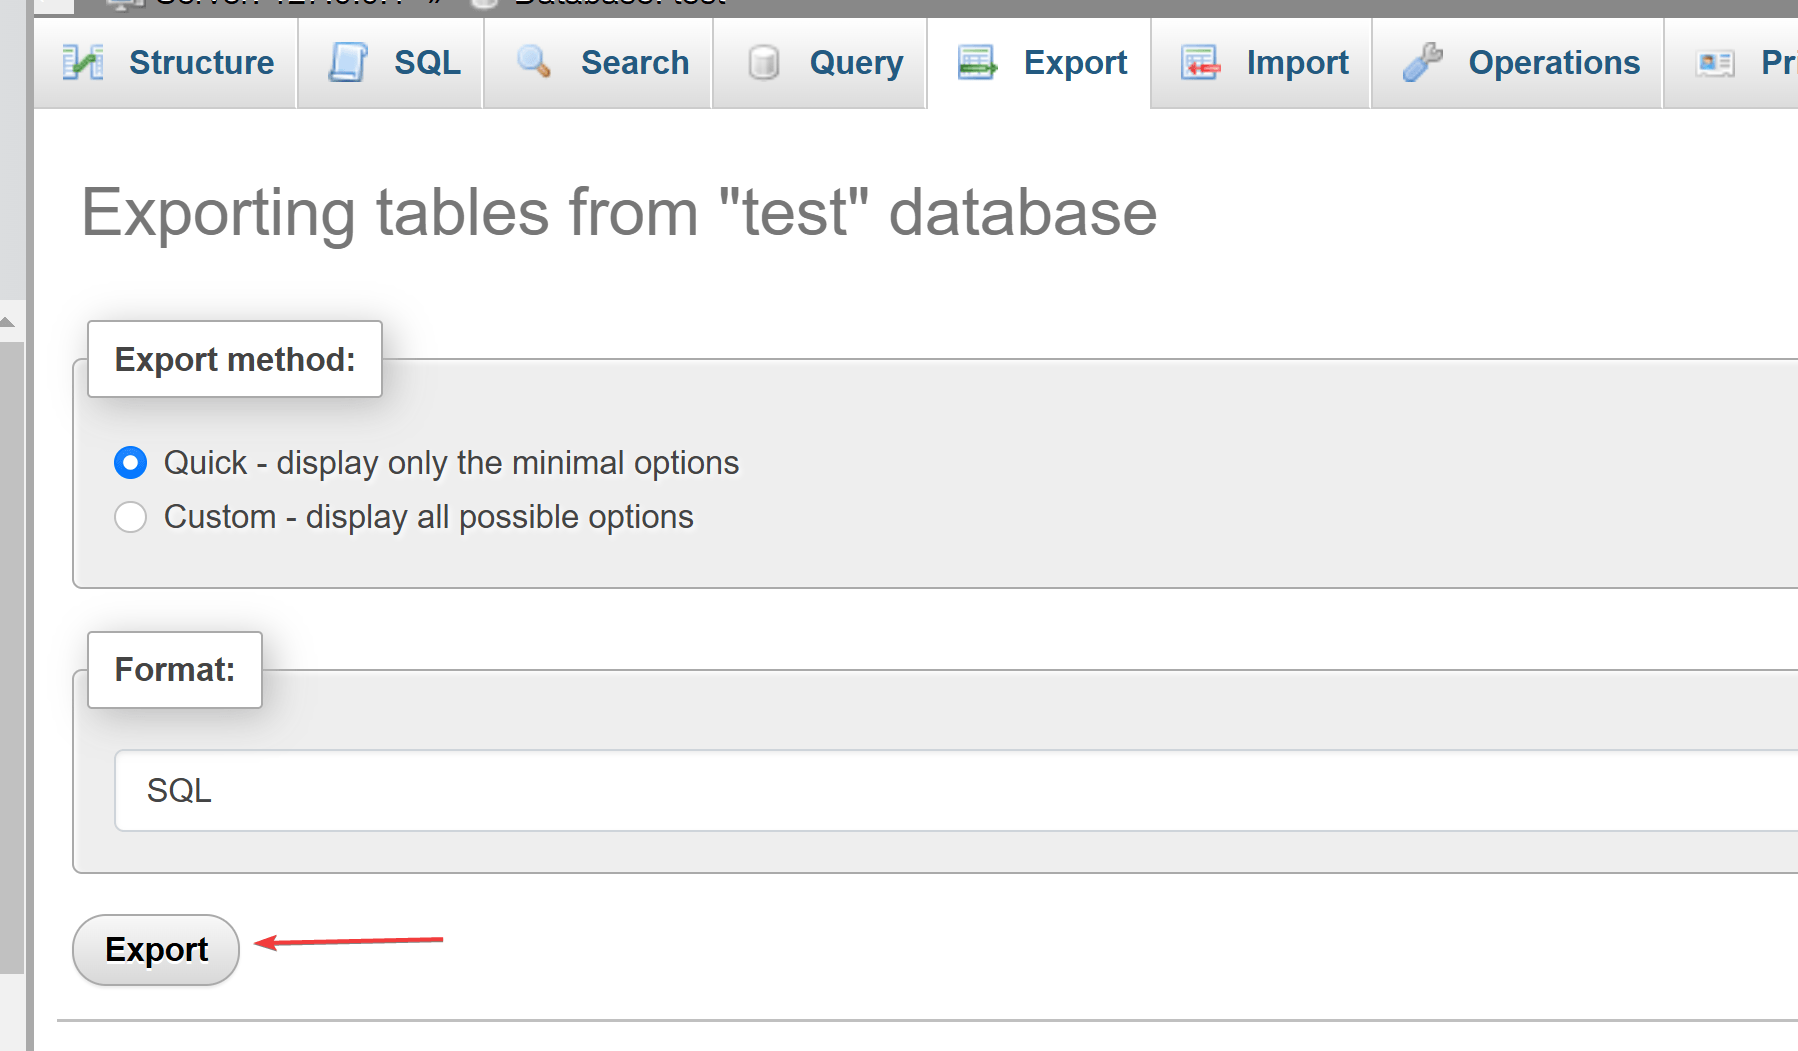
- Select "Export" from the top navigation.

- For most websites, the "quick" settings will be acceptable. Click "Export", download the file, and you're done!
If you do NOT have PHPMyAdmin: You will need to do this from the command line, or a standalone SQL client such as DBeaver or MySQLWorkbench. For simplicity's sake, I'll walk through the CLI option.
- SSH into either your server or, if applicable, your standalone database server.
- Make sure you are in your home directory(
cd ~) as this will make downloading the file easier. - Execute this command, replacing the YOURDATABASEUSERNAME and YOURDATABASENAME with the correct values. It may ask for password authentication -- enter the password you use to log into the database.
mysqldump --skip-lock-tables --column-statistics=0 --routines --add-drop-table --disable-keys --extended-insert --set-gtid-purged=OFF -u YOURDATABASEUSERNAME YOURDATABASENAME
- Log into your server (or database server) via FTP (Filezilla or WinSCP). You should see a file labeled
.sql. Copy this file to your hard drive.
Getting the /public Folder
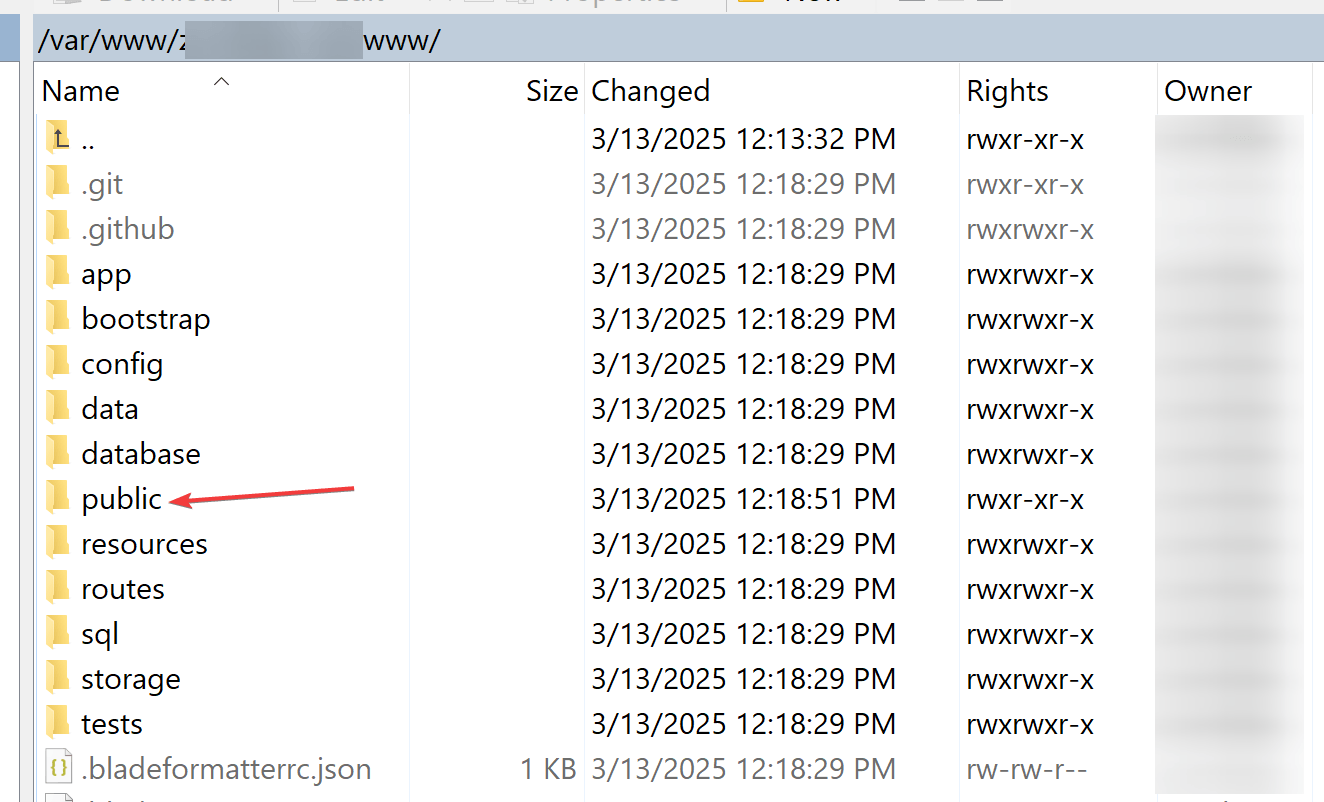
- While you are still connected via FTP, navigate to your site's files. You should see a folder labeled /public/, like so:
- Find a suitable location on your computer and copy over the entire /public folder.
- Wait for the files to copy. This may take a long time if you have a lot of data on your site! Just be patient.
- After the files finish copying, you're done!
Alternatively, you can use rsync, but that's for advanced users comfortable with Linux commands. FTP is fine for most use cases.
Getting the .env File
- While you are still in the location of your public folder, find the file called
.env. It may be greyed out and look something like this:
- If you do not have this file visible, STOP. Ask for help.
- Copy this file anywhere safe on your computer. (I like to store it alongside the public folder.)
- You're done!
IMPORTANT: LEAVE YOUR ORIGINAL WEBSITE AS-IS FROM NOW ON. If you make any changes, you will need to backup everything all over again!
Setting Up the Server
This section is based off of Mercury's guide here, with some of my own time-saving twists. You can also use the methods from this page of Moif's guide.
If you follow a different guide from this, do not create any new data or execute any commands related to creating a "new" Lorekeeper instance.
Given you already have an existing server, this section of the guide assumes a level of familiarity with executing commands on the command line. We also automate user creation with some tools available to us.
First, create a new server on your provider of choice. For this tutorial, I will be using Hetzner, but the process on DigitalOcean/Linode/etc will be very similar.
1. Provisioning Your Server
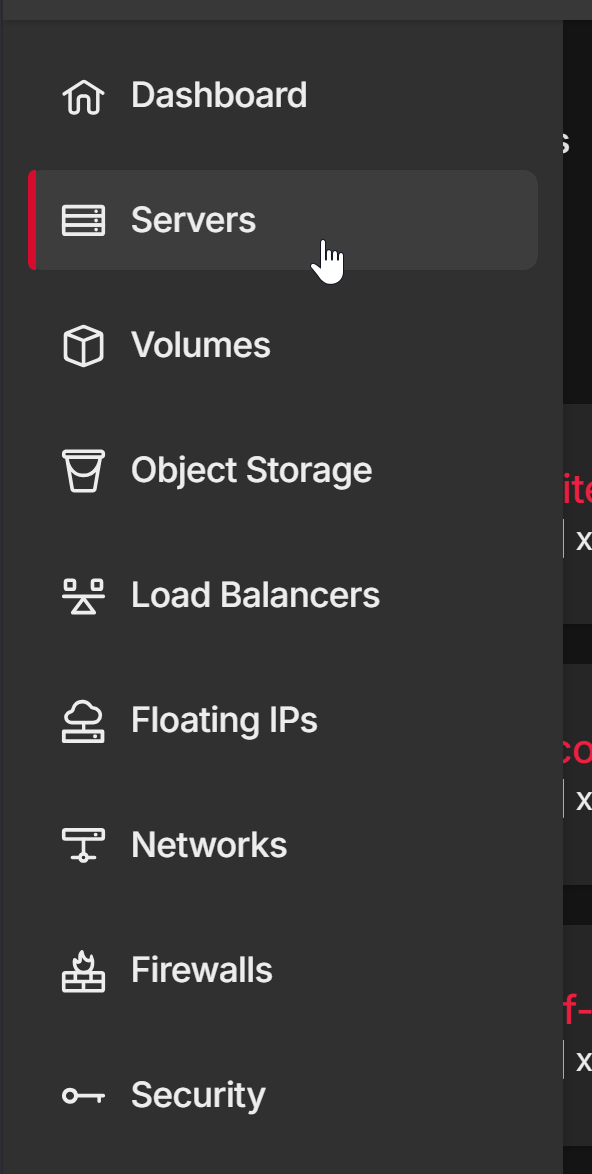
After logging into Hetzner Cloud, click "Servers" on the left-hand navigation.
Click "Add Server".

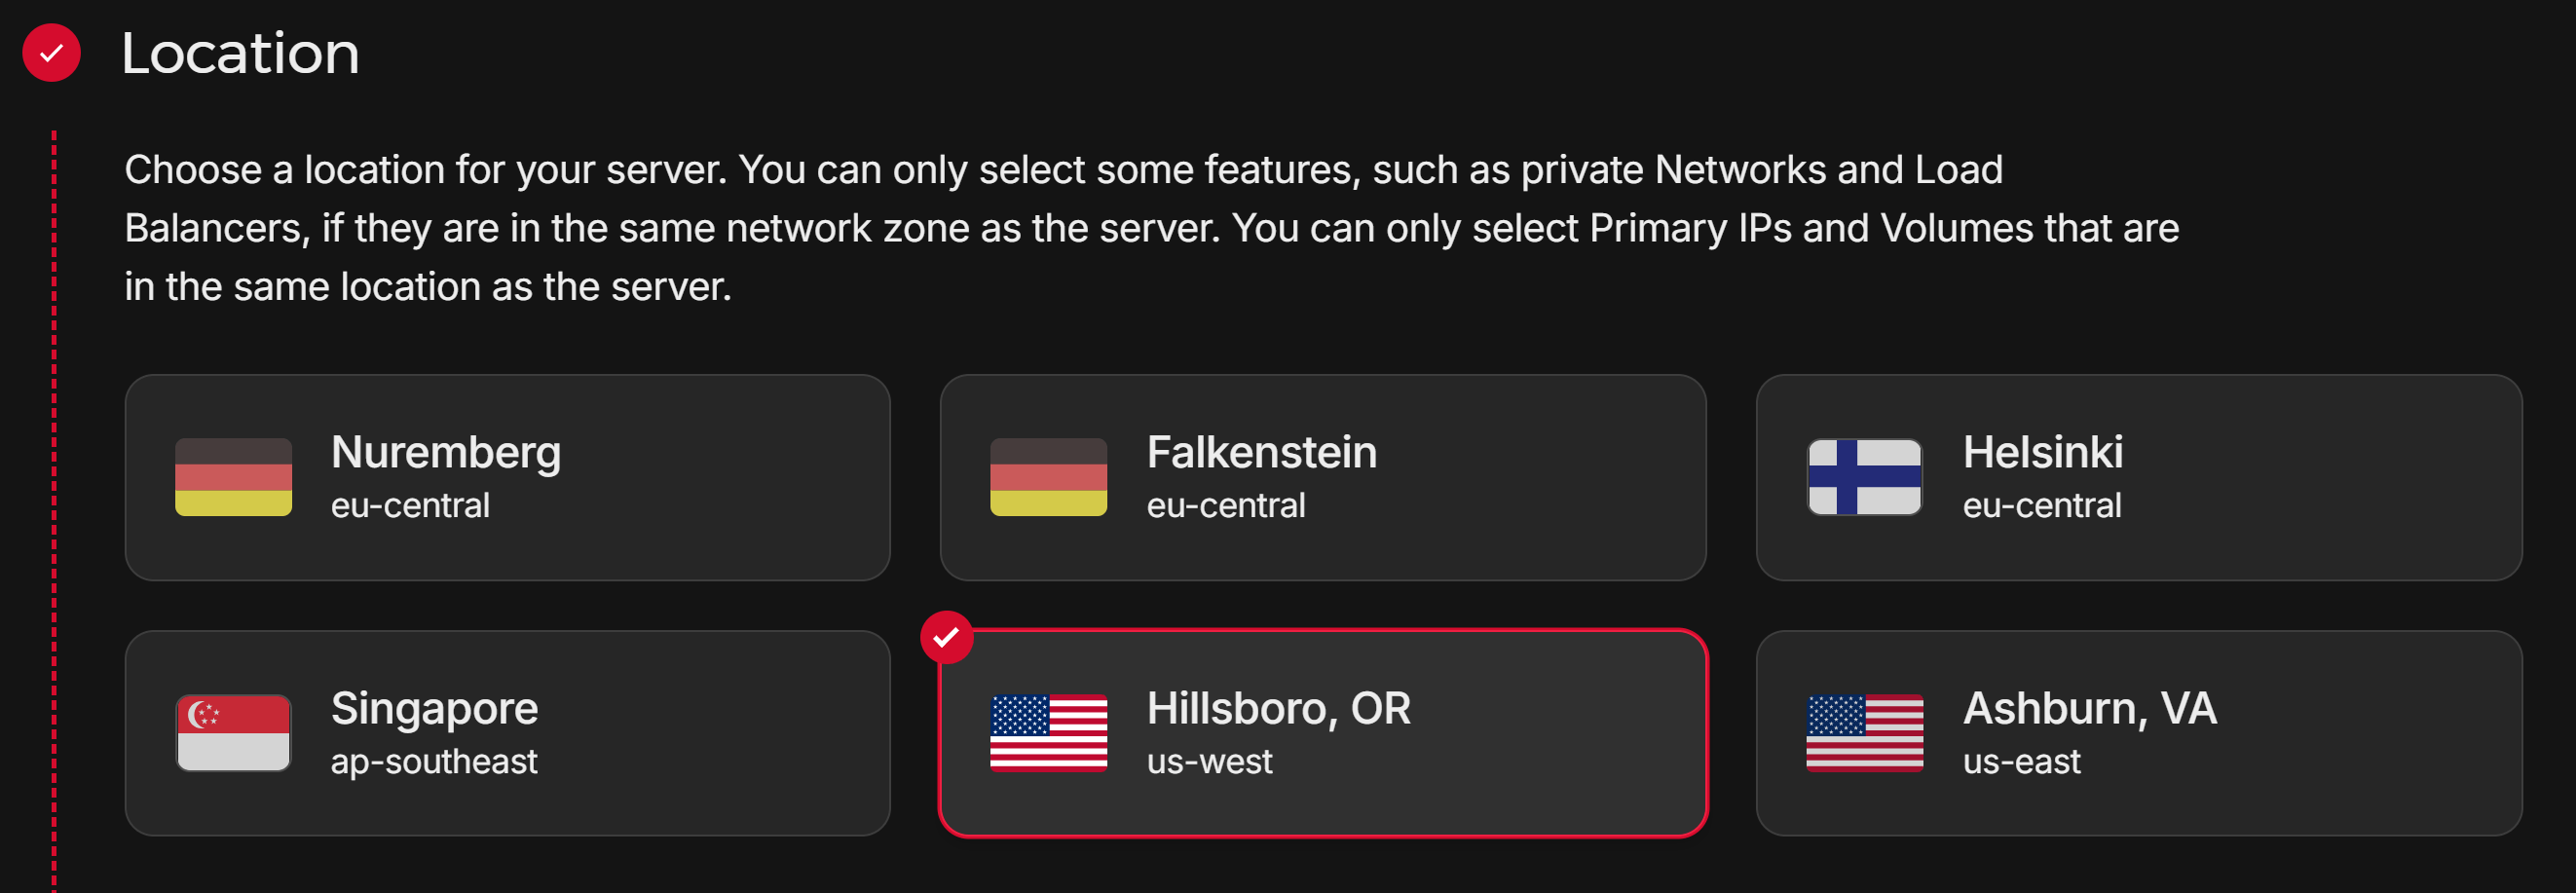
Select a server location that makes sense to you. I personally select us-west.
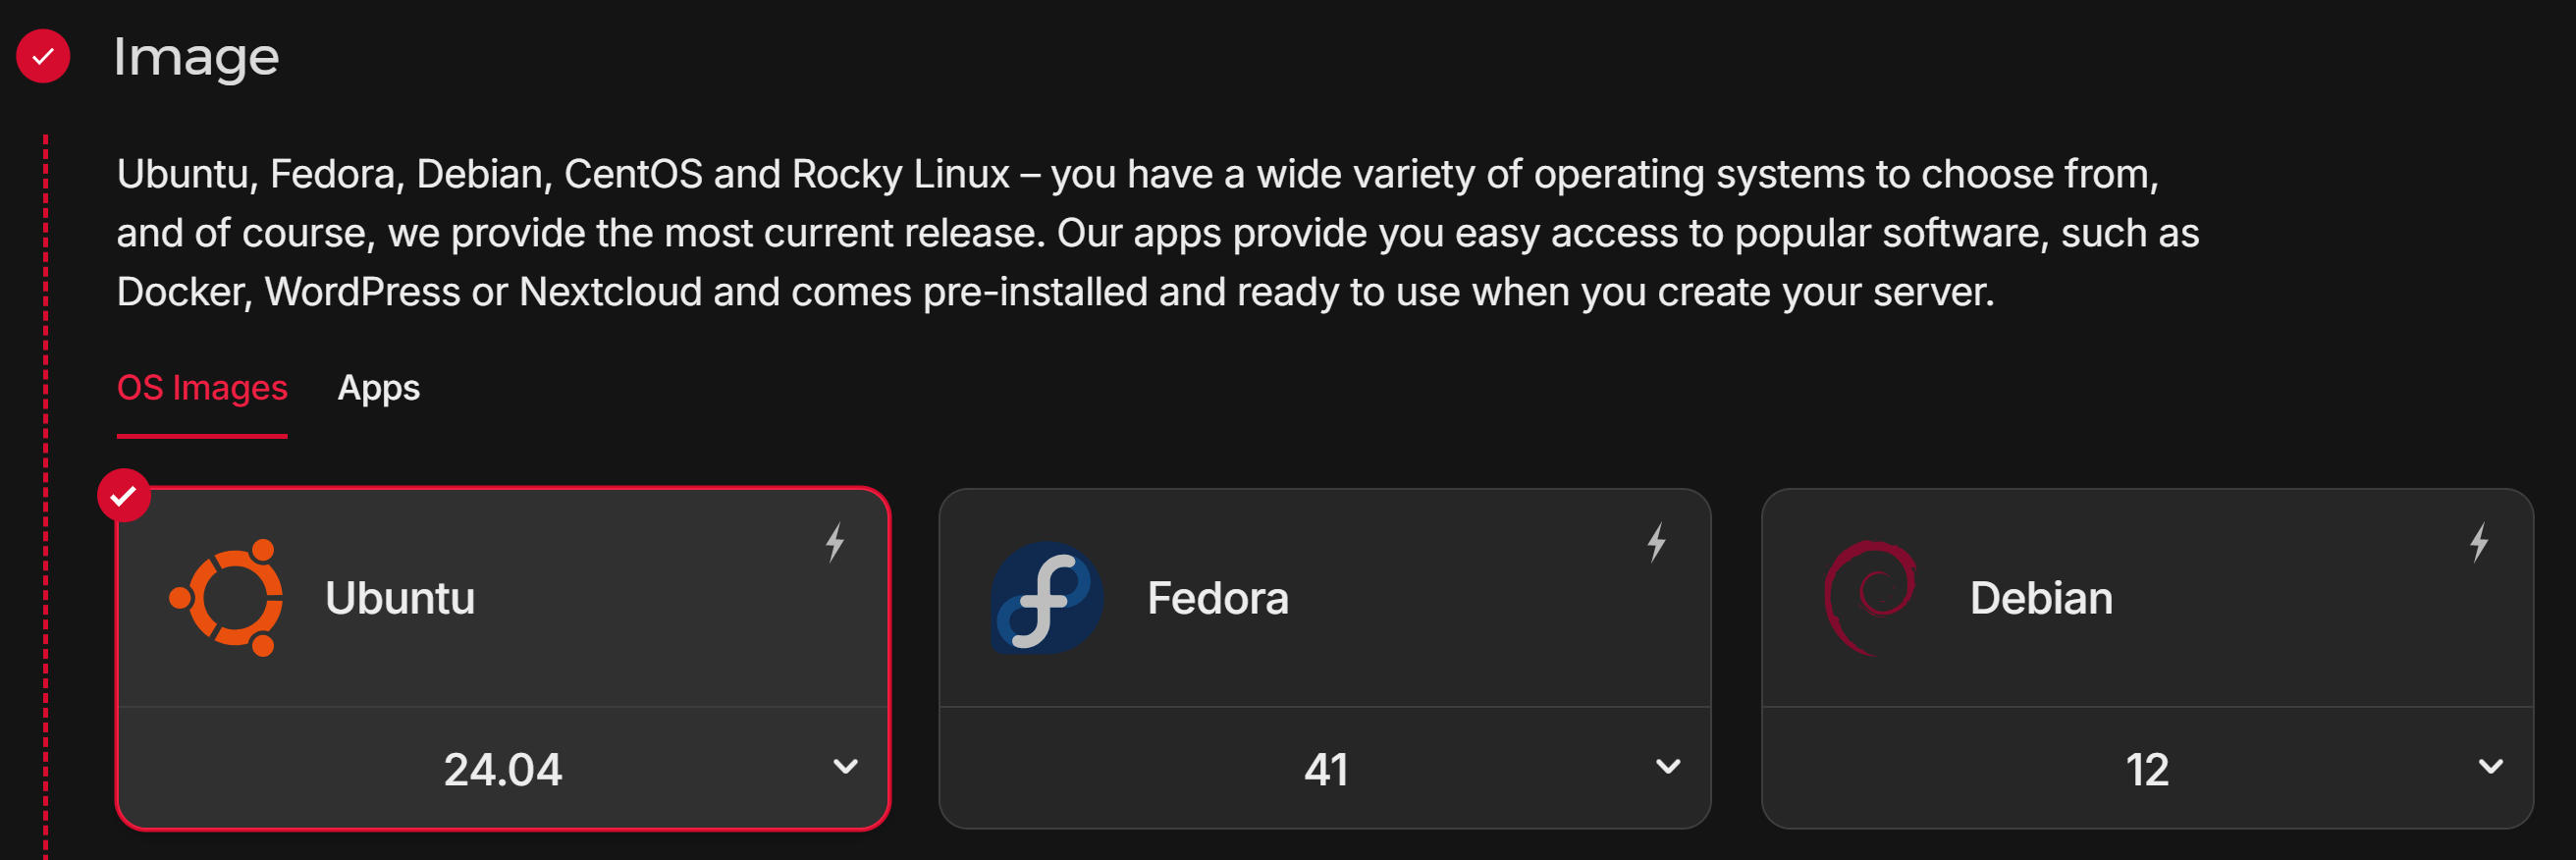
This guide will use the most recent version of Ubuntu, but Moif's guide uses Debian. Either is fine, though your commands may differ depending on your flavor of Linux. Don't use anything else unless you know what you're doing.
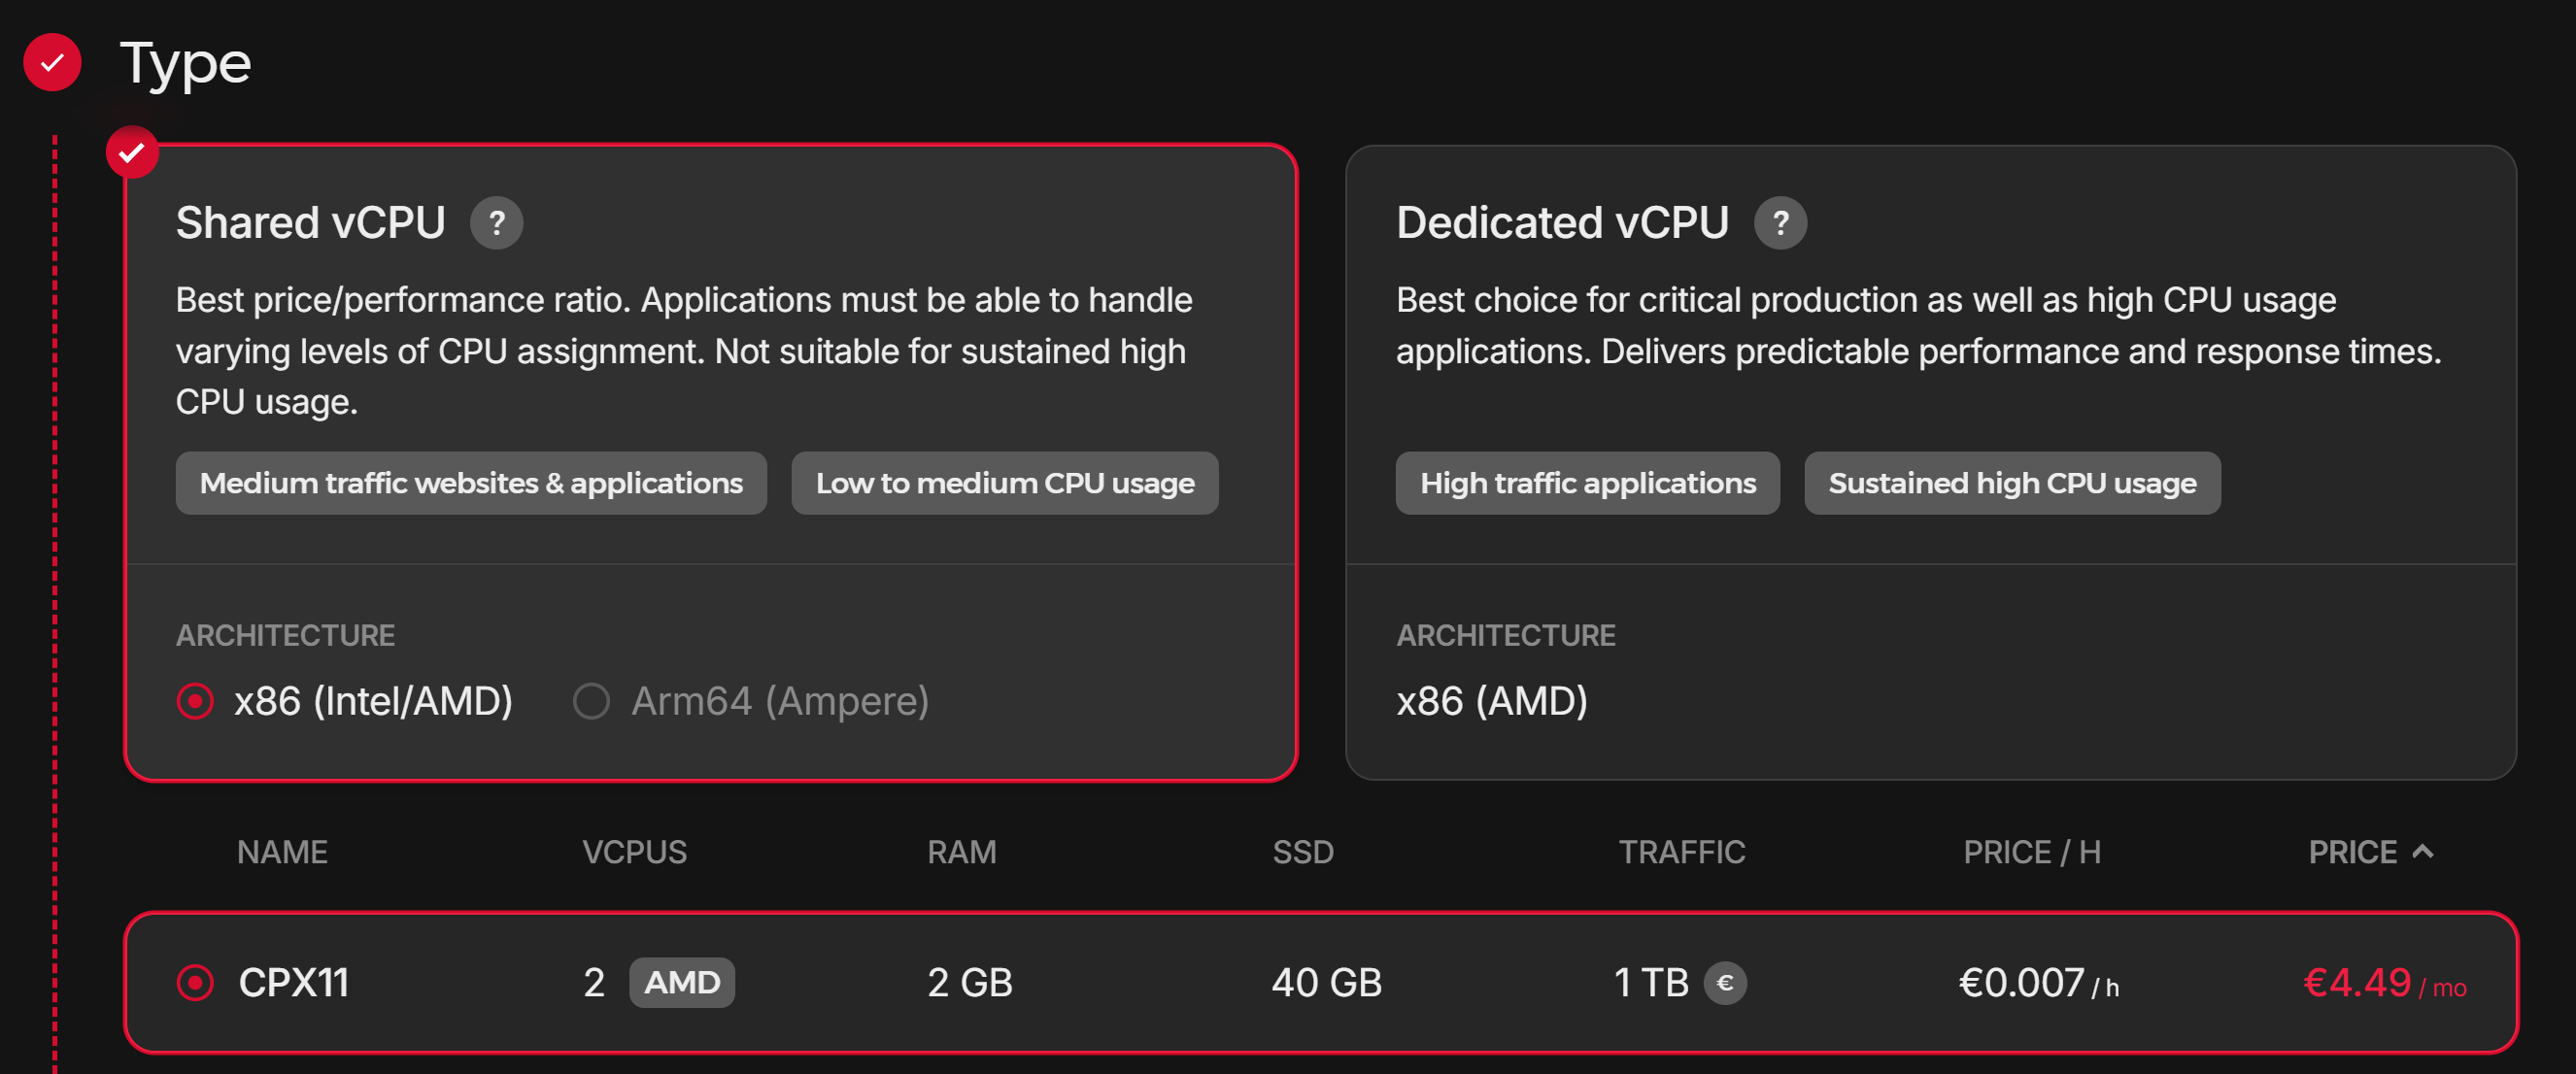
Select the hardware you'd like to have. The cheapest option is fine for small sites. You can always upgrade later!
Scroll to "SSH Keys". If you don't have one set up already, click "Add SSH Key".

First, we need your SSH key in OpenSSH format. You can use the same key you used on your previous server (and in fact you should, because it makes the transition much smoother).
-
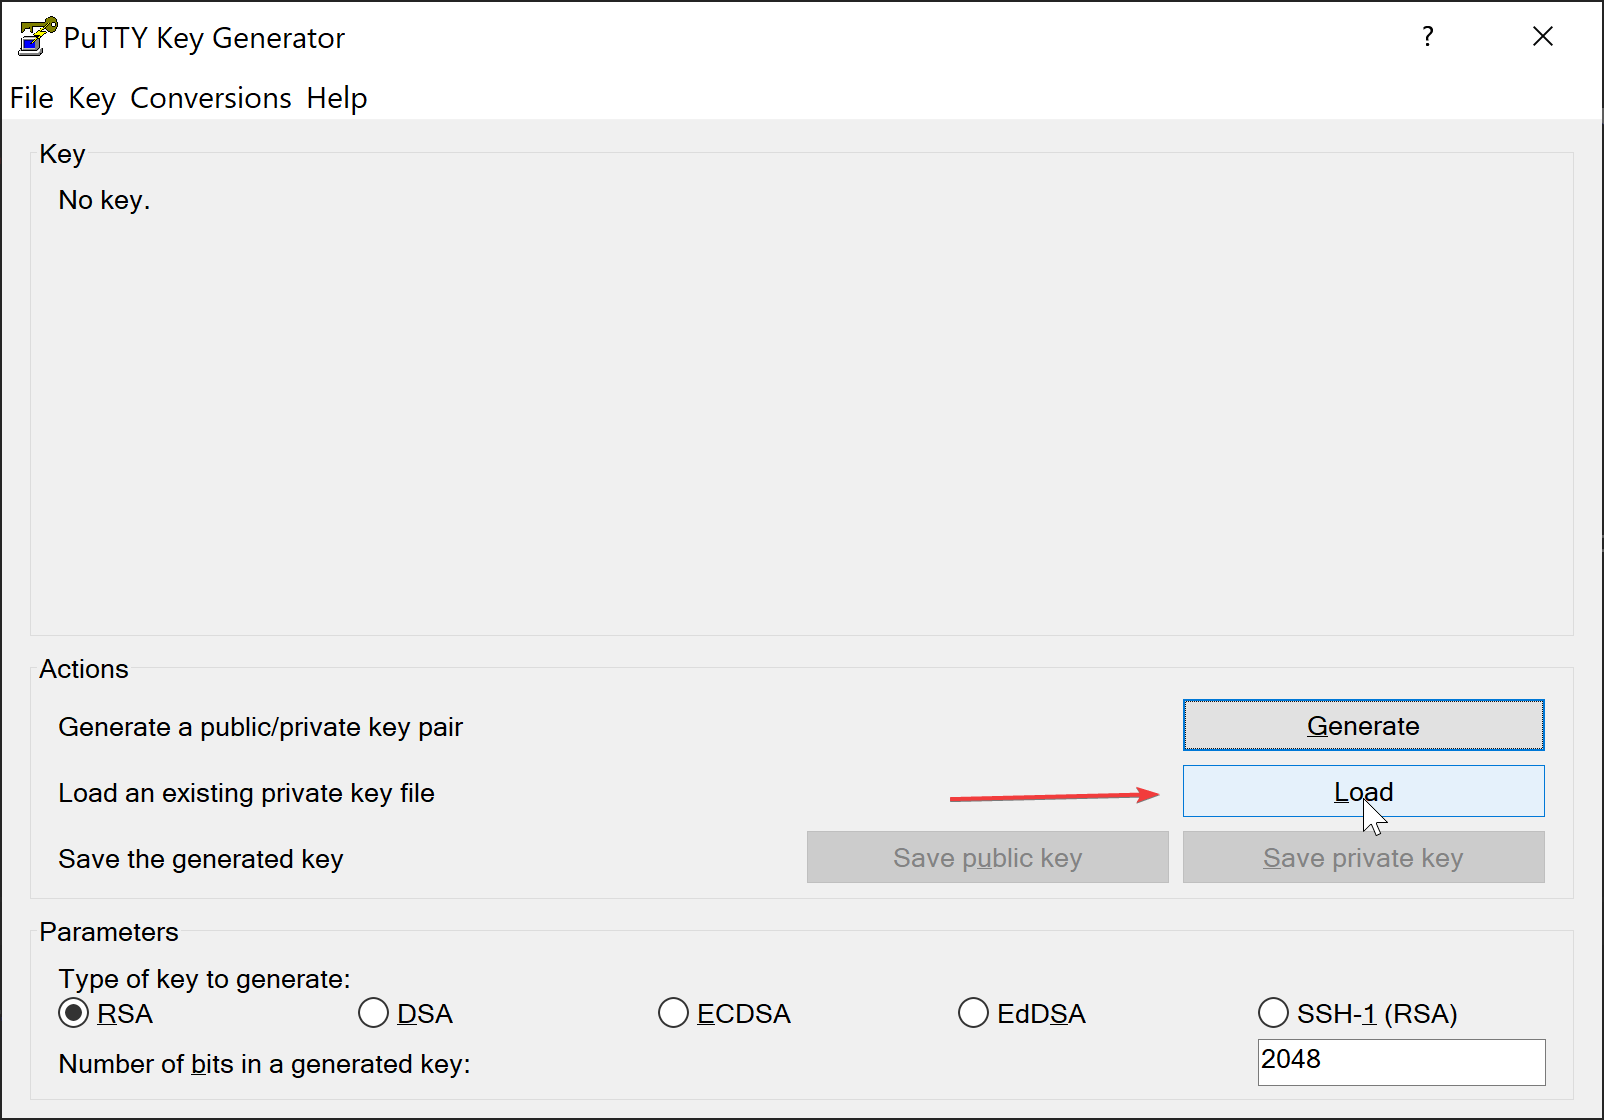
Open up PuTTyGen. This should be familiar to you from when you first created your key. Click "Load".
-
Select your existing .ppk file.
-
Copy everything in the highlighted box.
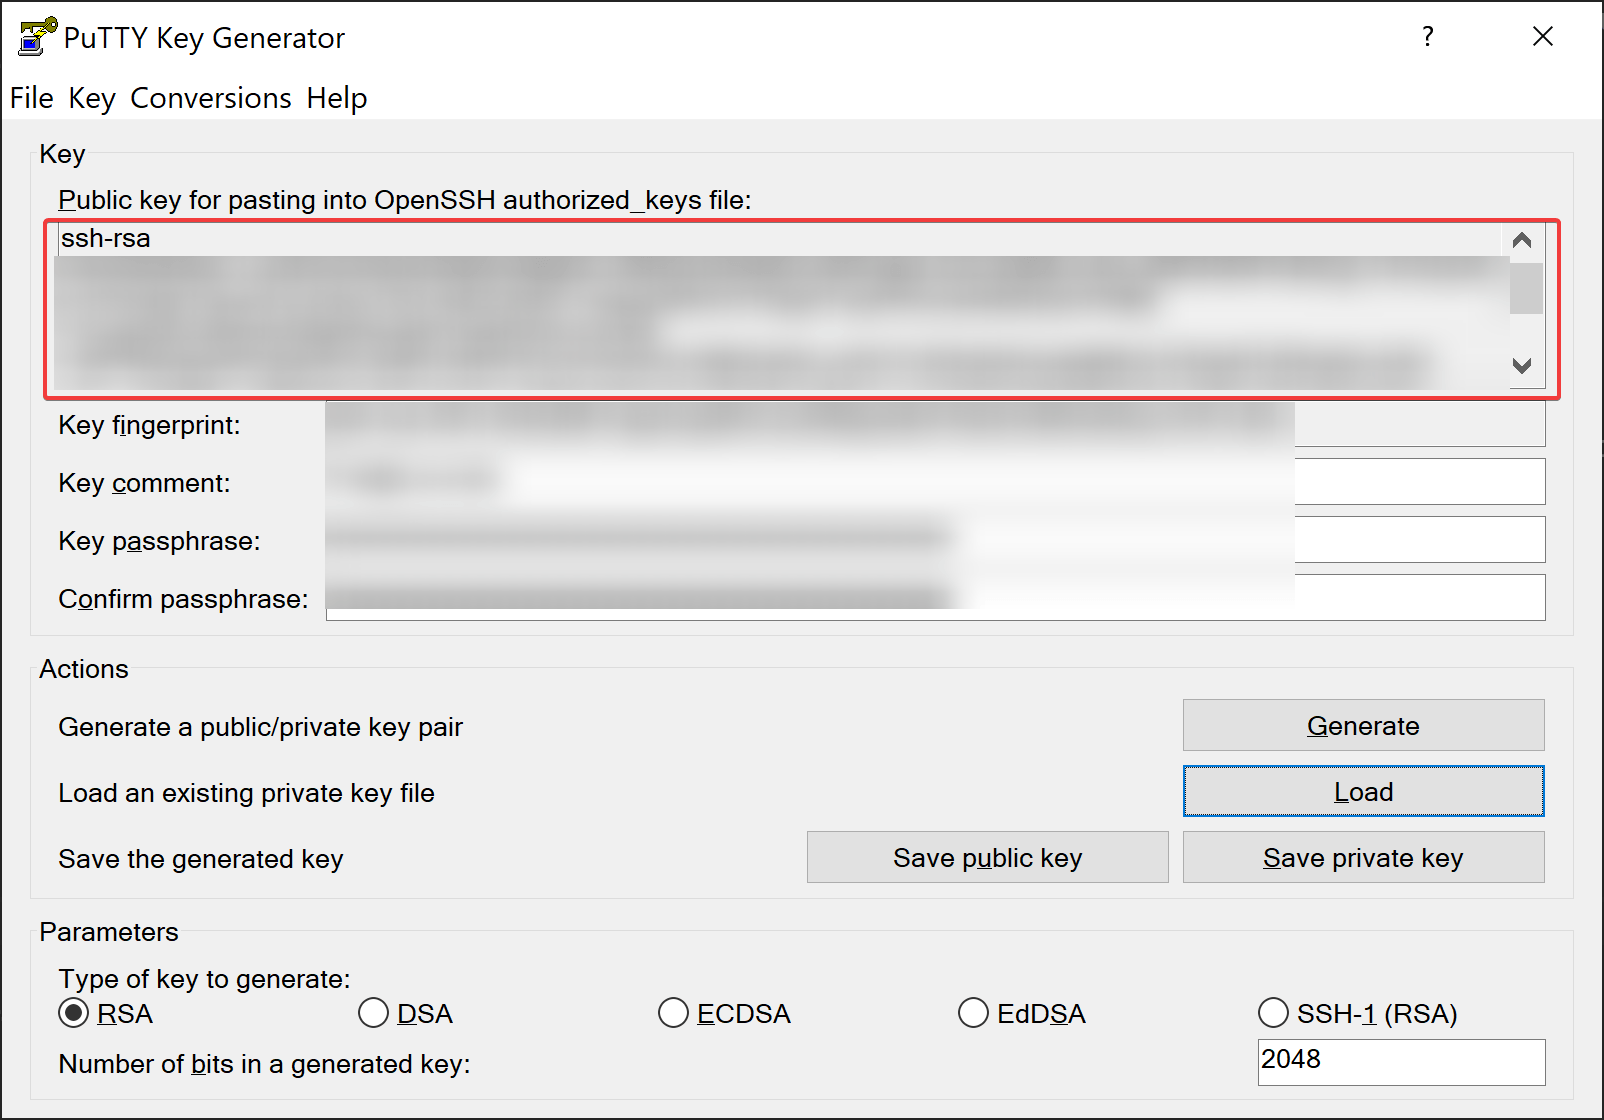
-
Paste it into Hetzner like so:
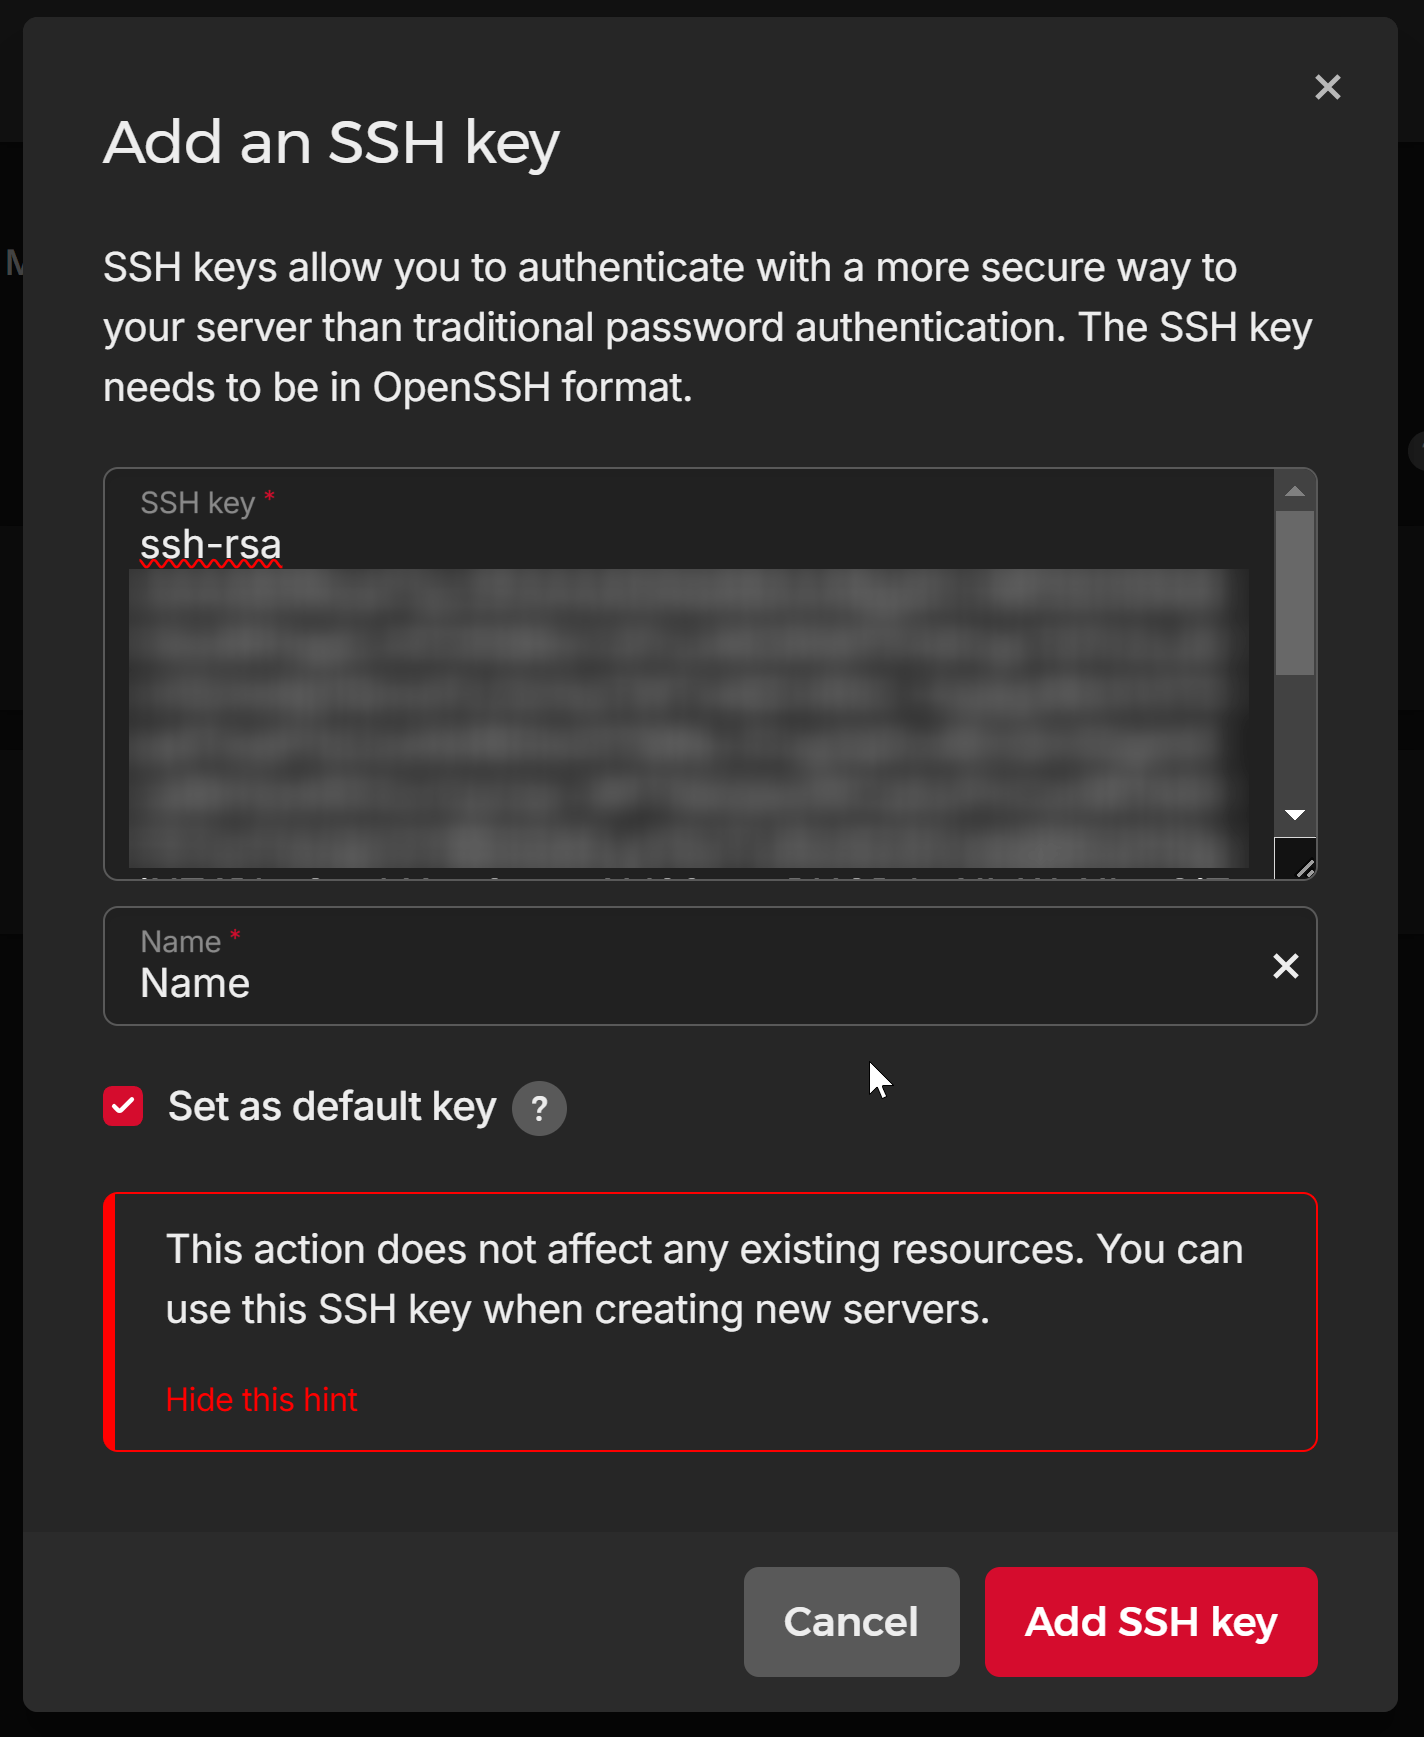
Now, save some time by loading in your SSH key before you've even created your server!
You can use the cloud-config.yaml to create your site user at the same time as your server.
Both Hetzner and DigitalOcean support cloud-config. On DigitalOcean, you will need to select the "Advanced" options at the bottom of the page to open up the text box.
- Open up Notepad and paste in this text.
#cloud-config
ssh_pwauth: false

users:
  - name: YOURSITE
    gecos: user
    sudo: ALL=(ALL) ALL
    shell: /bin/bash
    ssh_authorized_keys:
      - "YOUR_SITE_KEY"
- Replace the YOURSITE with the name of your site and SITEKEY with the entire text of your OpenSSH public key within quotation marks. This is the same SSH key you just copied a few steps ago. It'll look something like this:
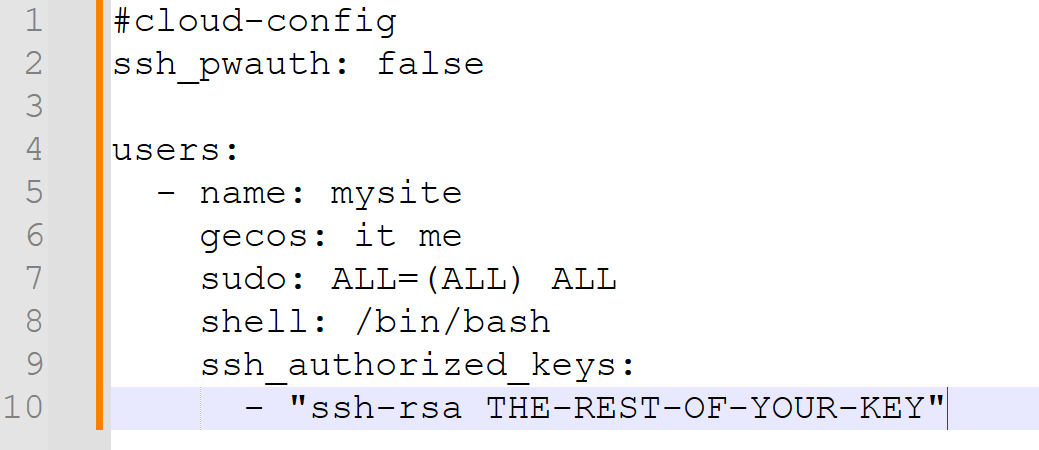
NOTE THAT THIS WILL DISABLE PASSWORD AUTHENTICATION ON YOUR SERVER. This is recommended for security purposes. If you need password based authentication for any reason (such as multiple coders working on your site, or you don't know how to use SSH with FTP), delete the line ssh_pwauth: false from the above text.
-
Go back to Hetzner, and paste in the cloud-config. Like so:
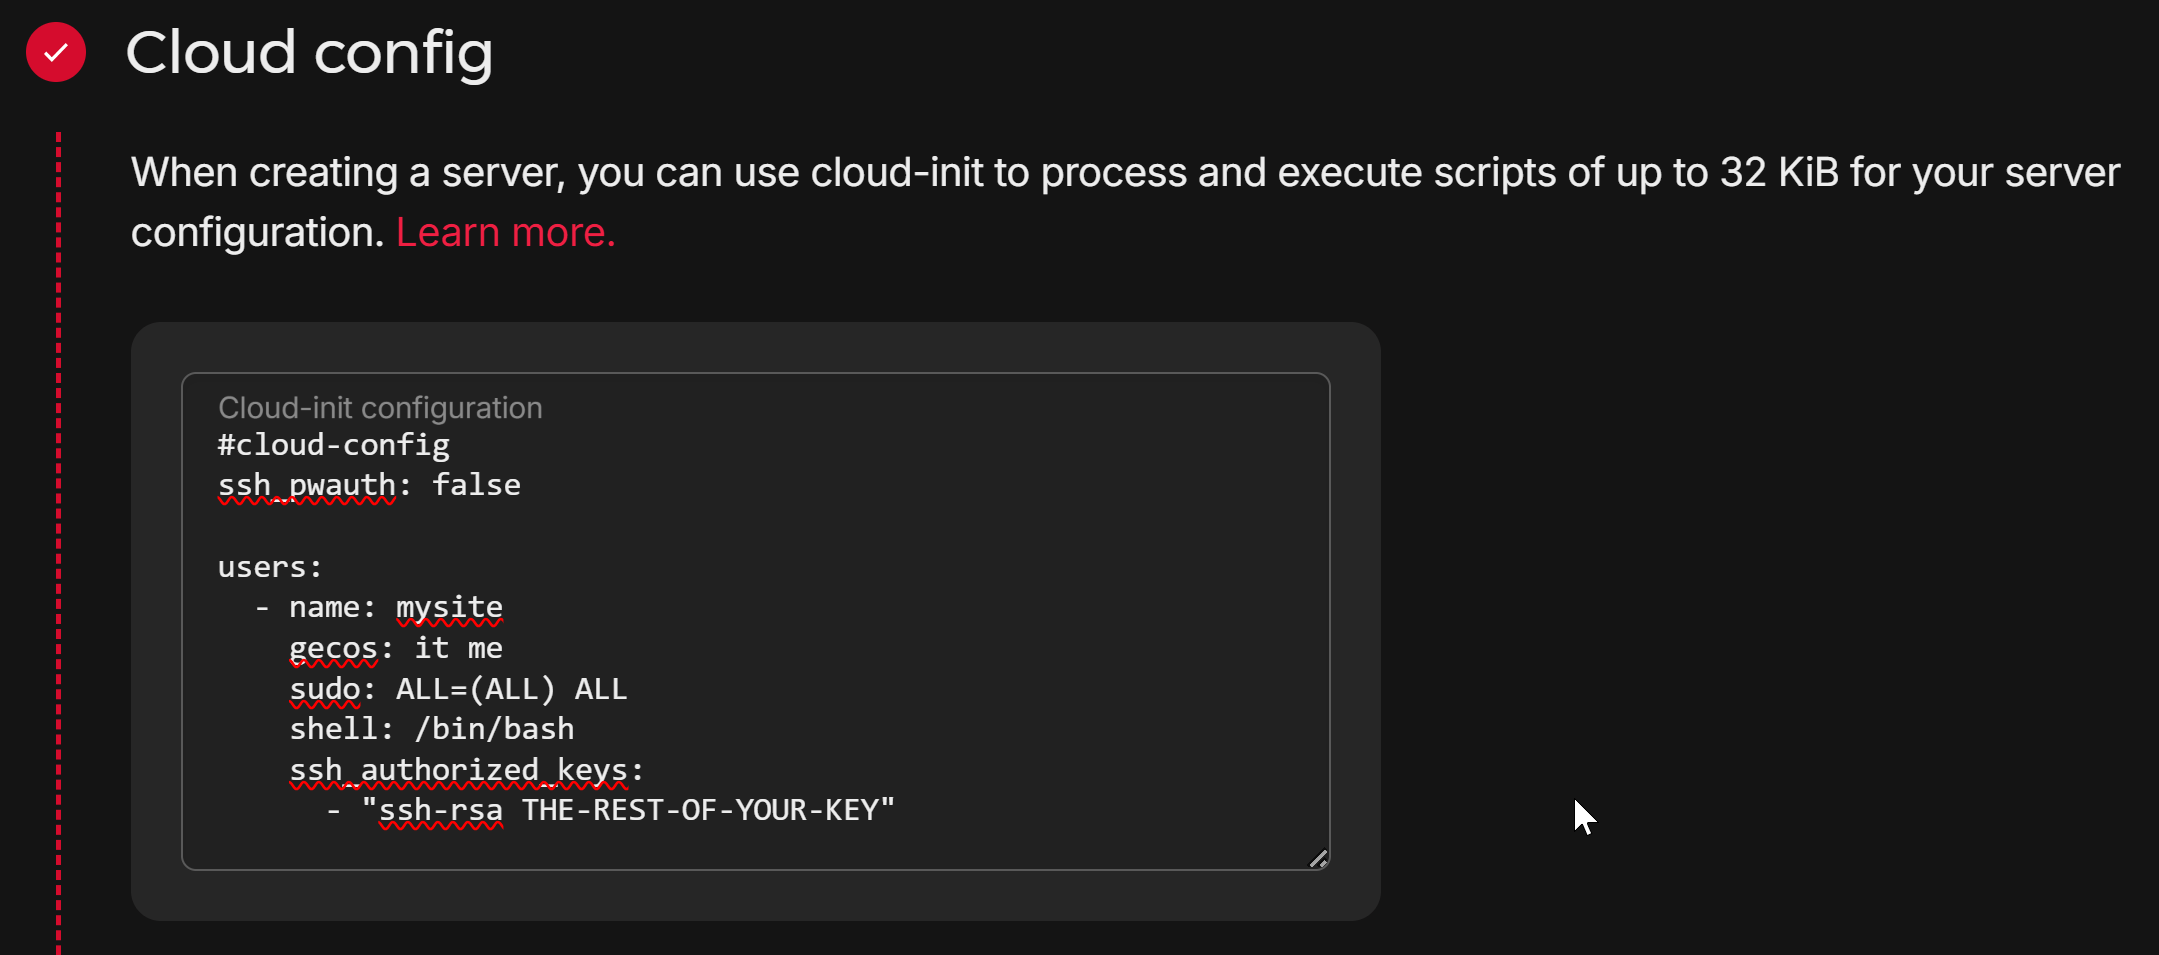
-
Name your server:

-
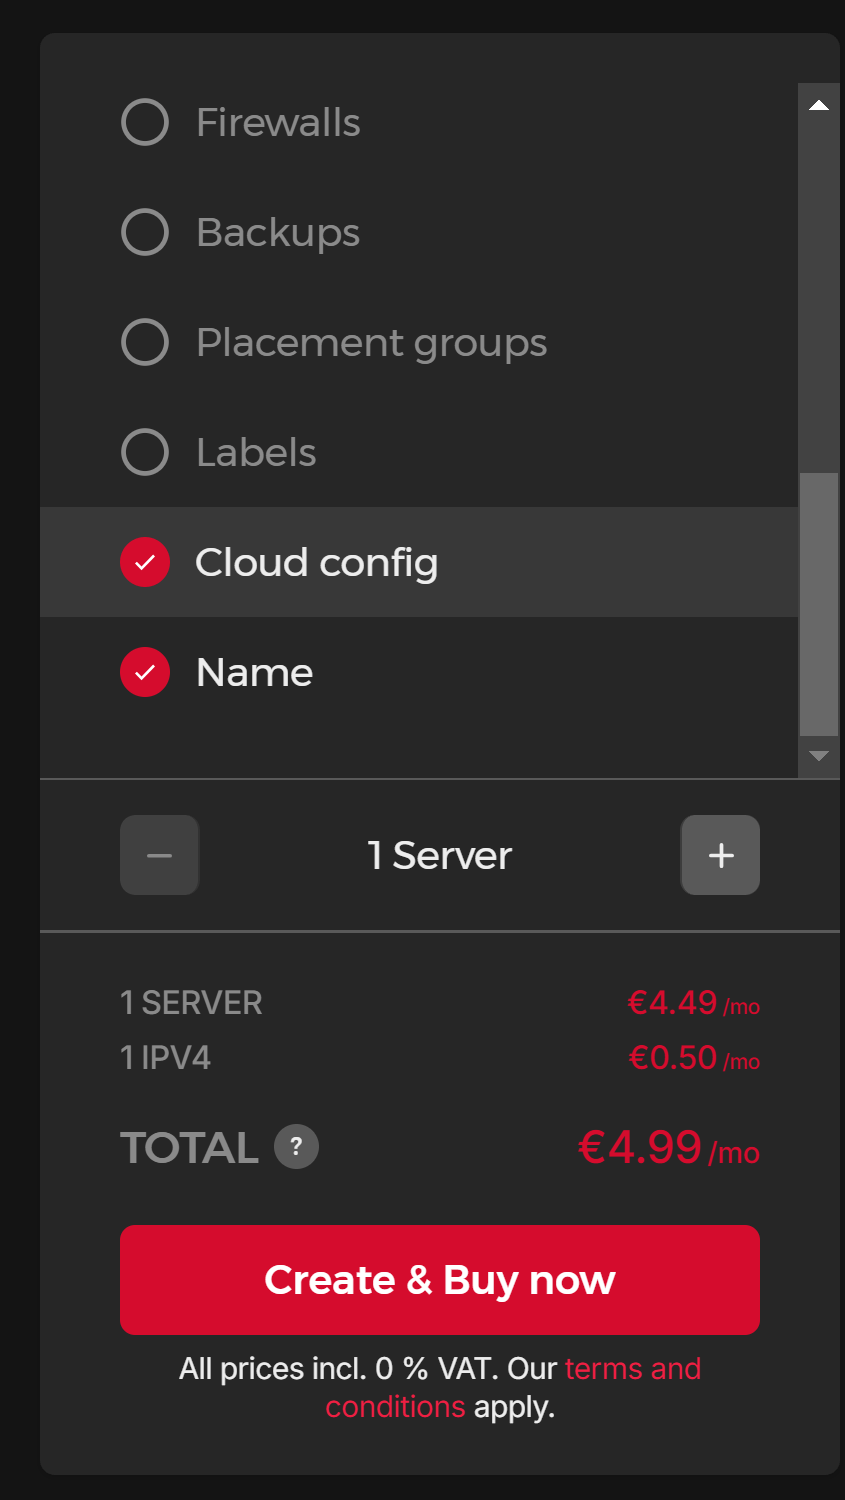
Select "Create and Buy Now".
2. Setting Up Your Server
-
After a little bit of setup time, your server will be created. Copy the IP address generated by Hetzner:

-
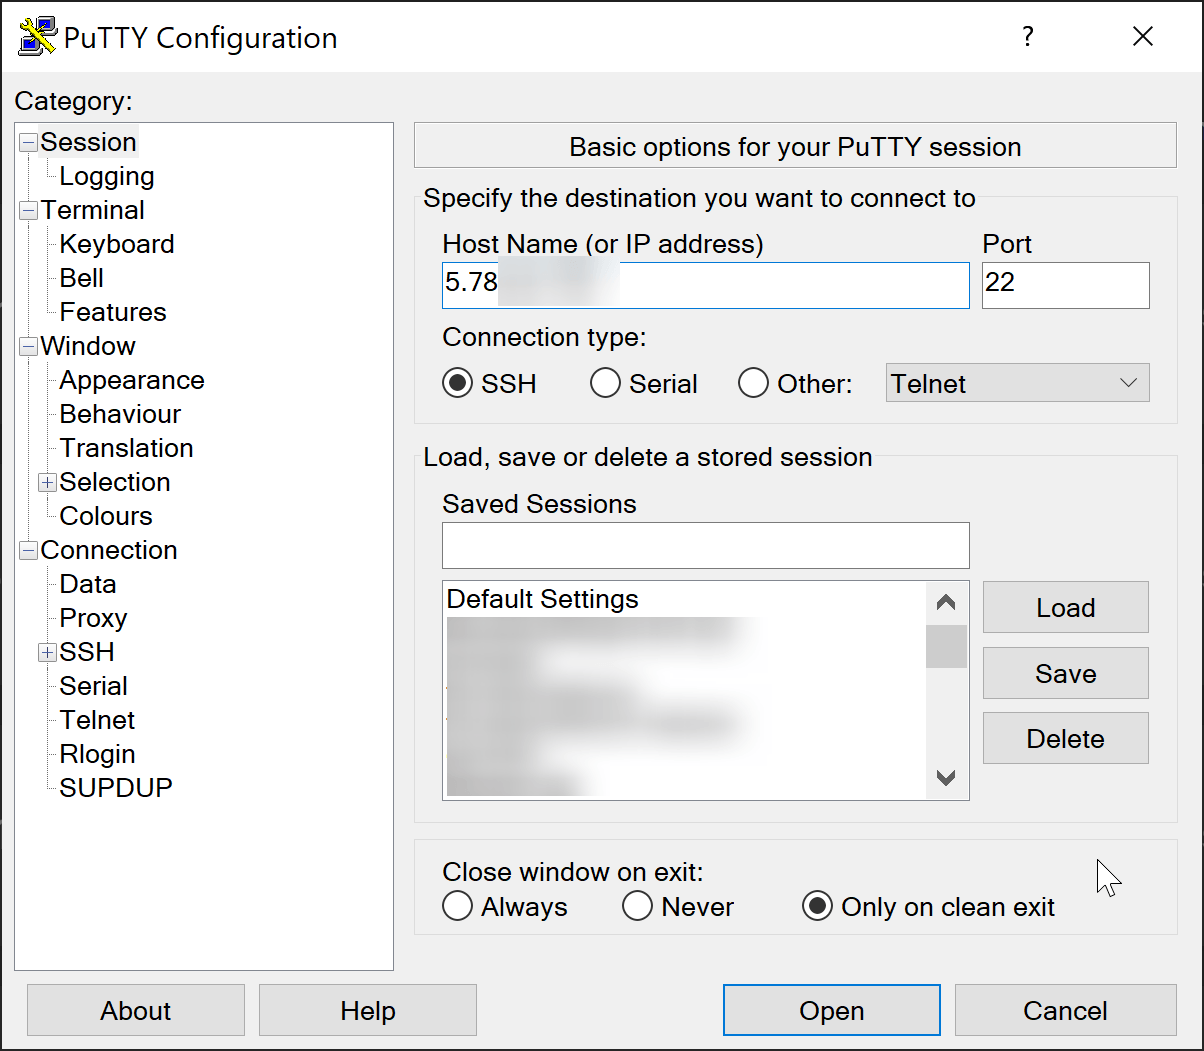
In PuTTY, load your saved server credentials, but type in your new IP address instead. Make sure you aren't automatically logging in with a username -- it should look something like this:
-
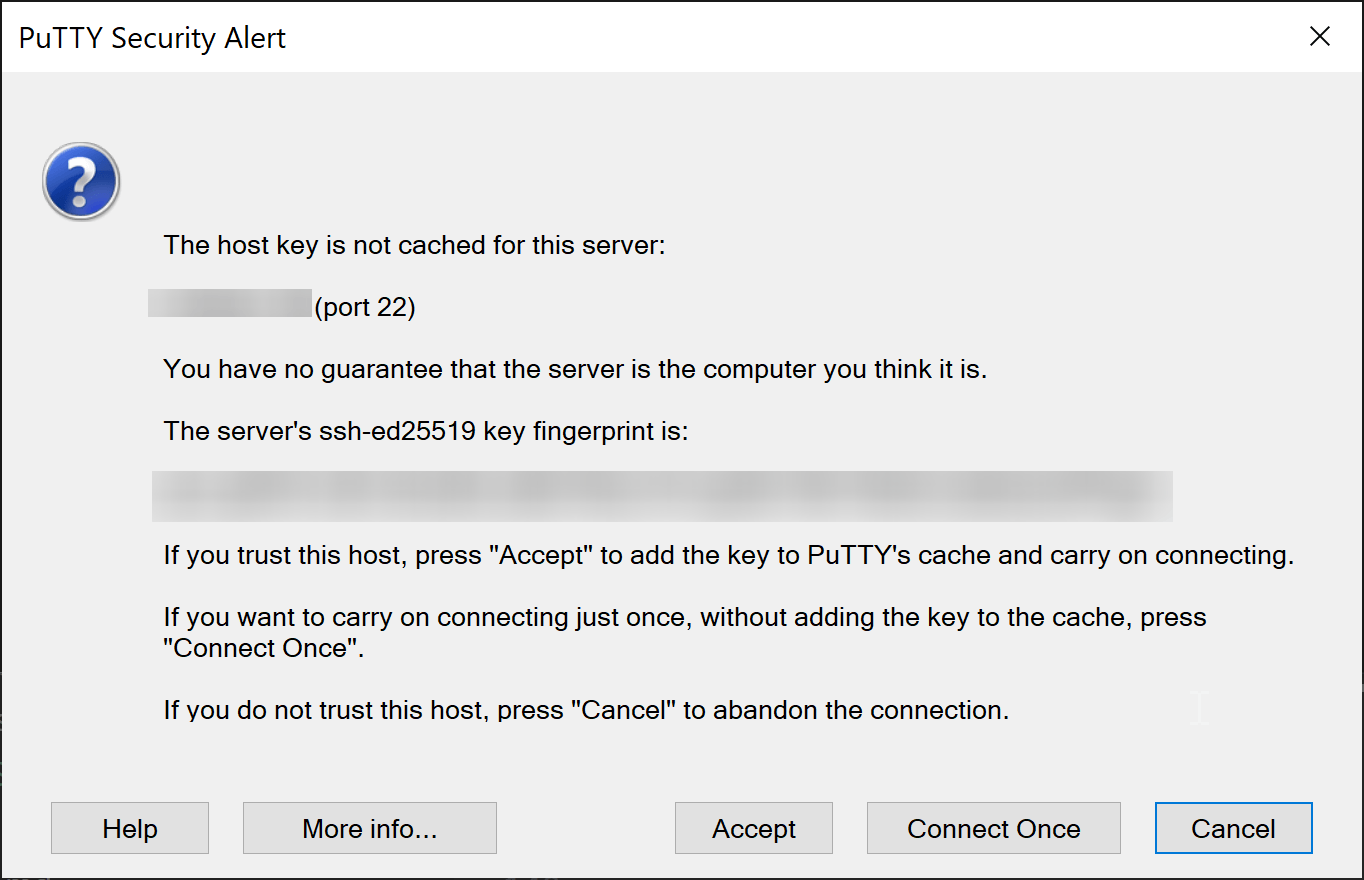
Click "OK". If prompted with something like this, click "Accept".
-
When prompted for a username, type "root" and hit enter. You should be automatically logged in. If not, check that your SSH key is set correctly in PuTTY.
-
We need to set a password for your user account so that you can use sudo (superuser) commands. Enter this information, but replace with your password of choice:
echo "USERNAME:PASSWORD" | sudo chpasswdIt should look something like this (but with a better password!):

-
Close PuTTY.
-
Re-open putty and re-enter the IP address of your new server. Feel free to save this new configuration, but do not overwrite your old one! Call it something like
site-new.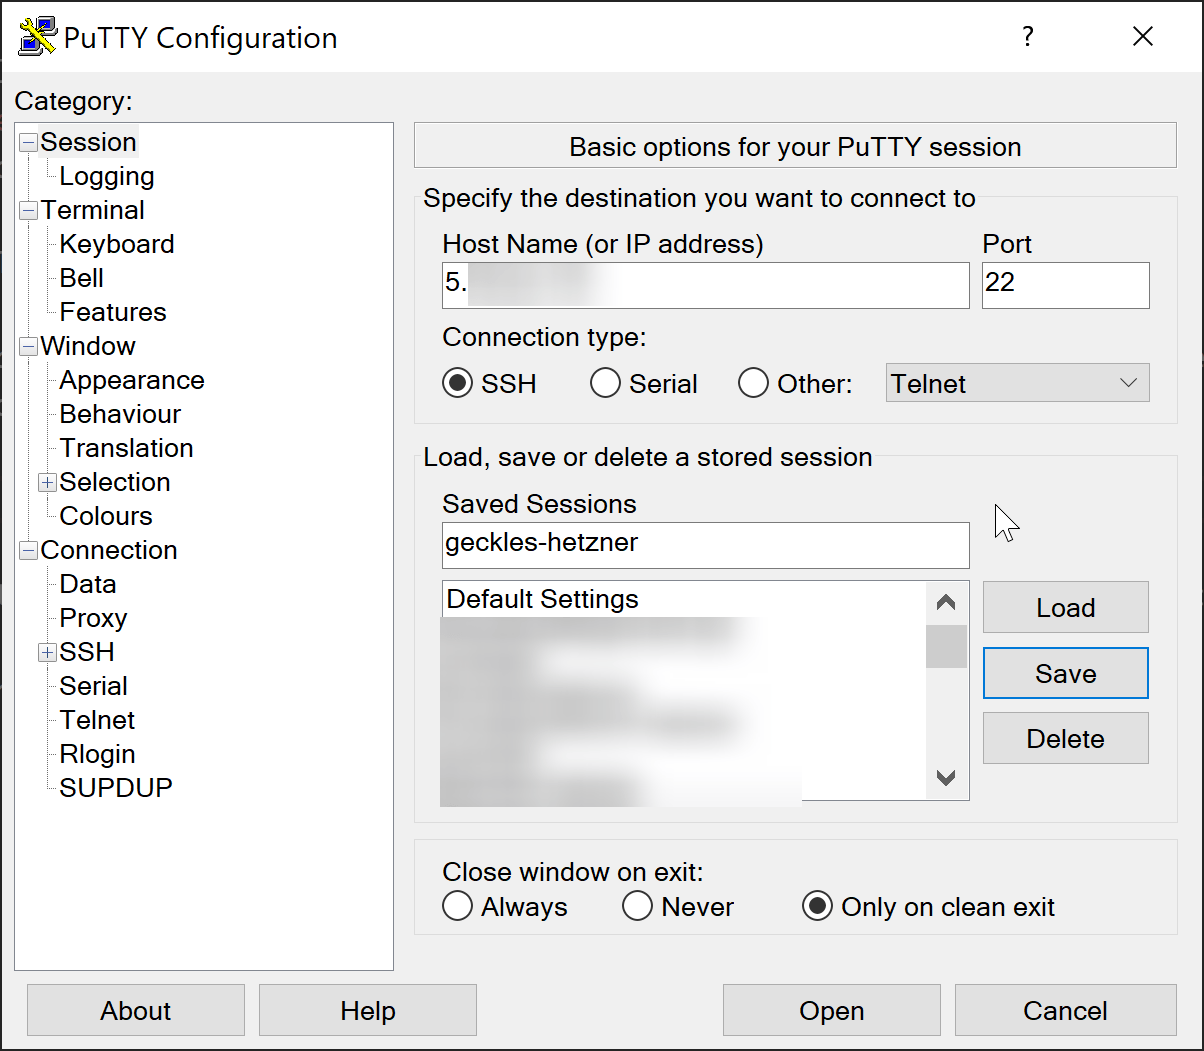
-
This time, log in with your normal username. You should be automatically logged in again.
-
We will now disable the root login for security purposes. Type in the following command, and hit "enter":
sudo nano /etc/ssh/sshd_configWhen prompted for your password, enter the password you previously set as root withchpasswd.
-
Use the arrow keys to scroll to the line starting with
#PermitRootLogin(depending on your provider, it may look slightly different):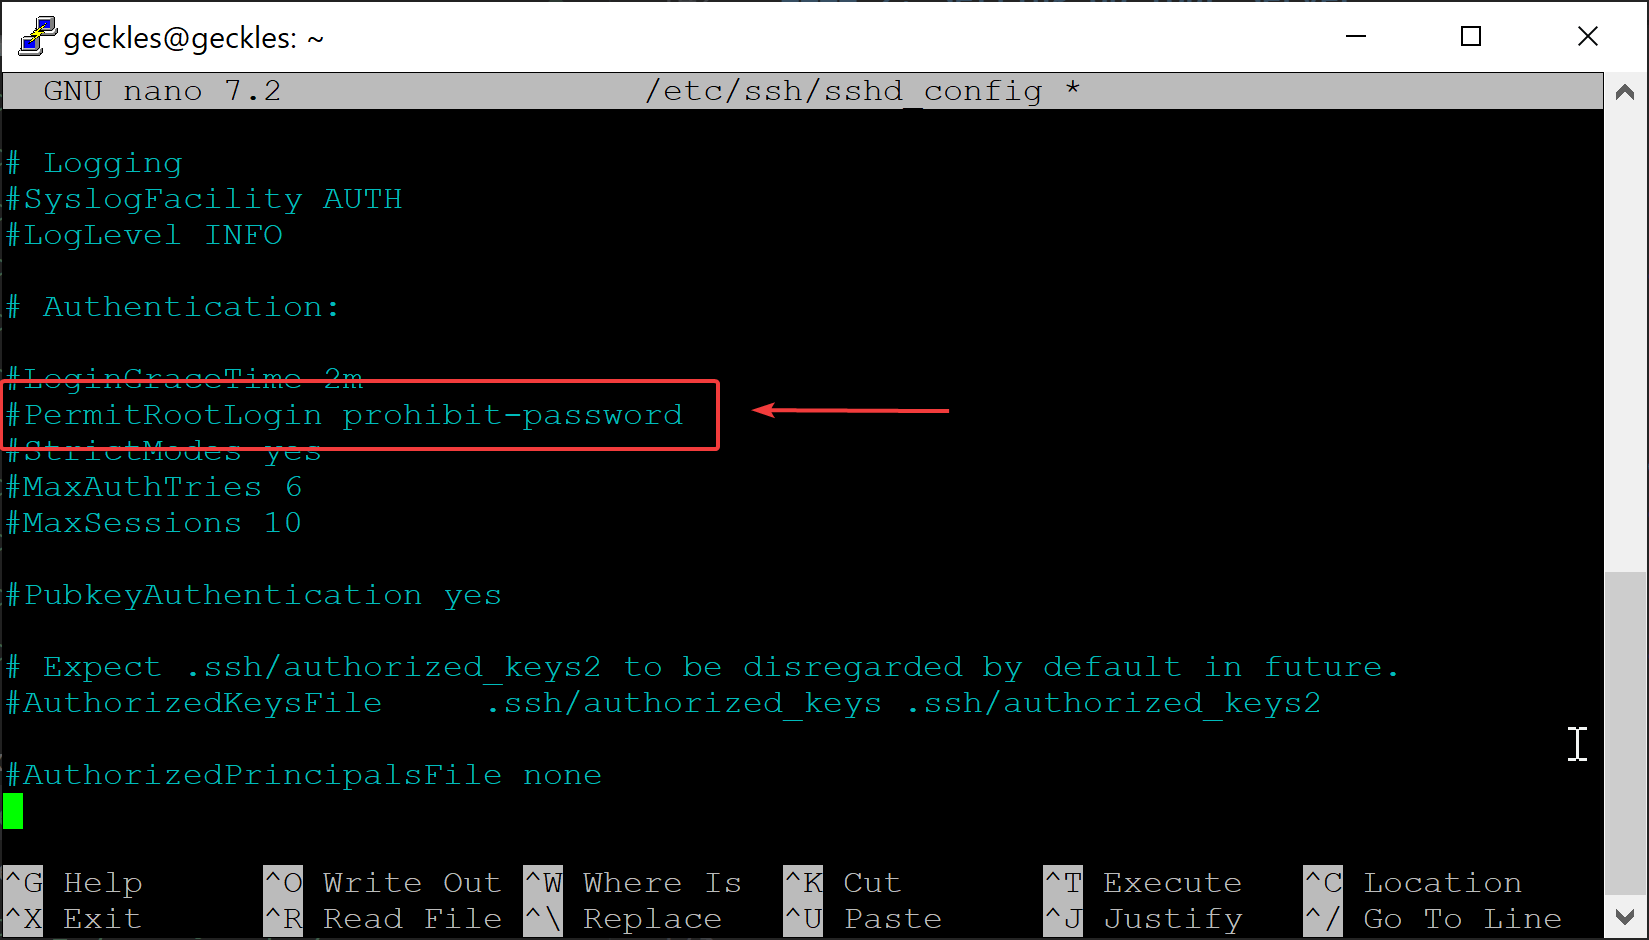
-
Change it to
PermitRootLogin no: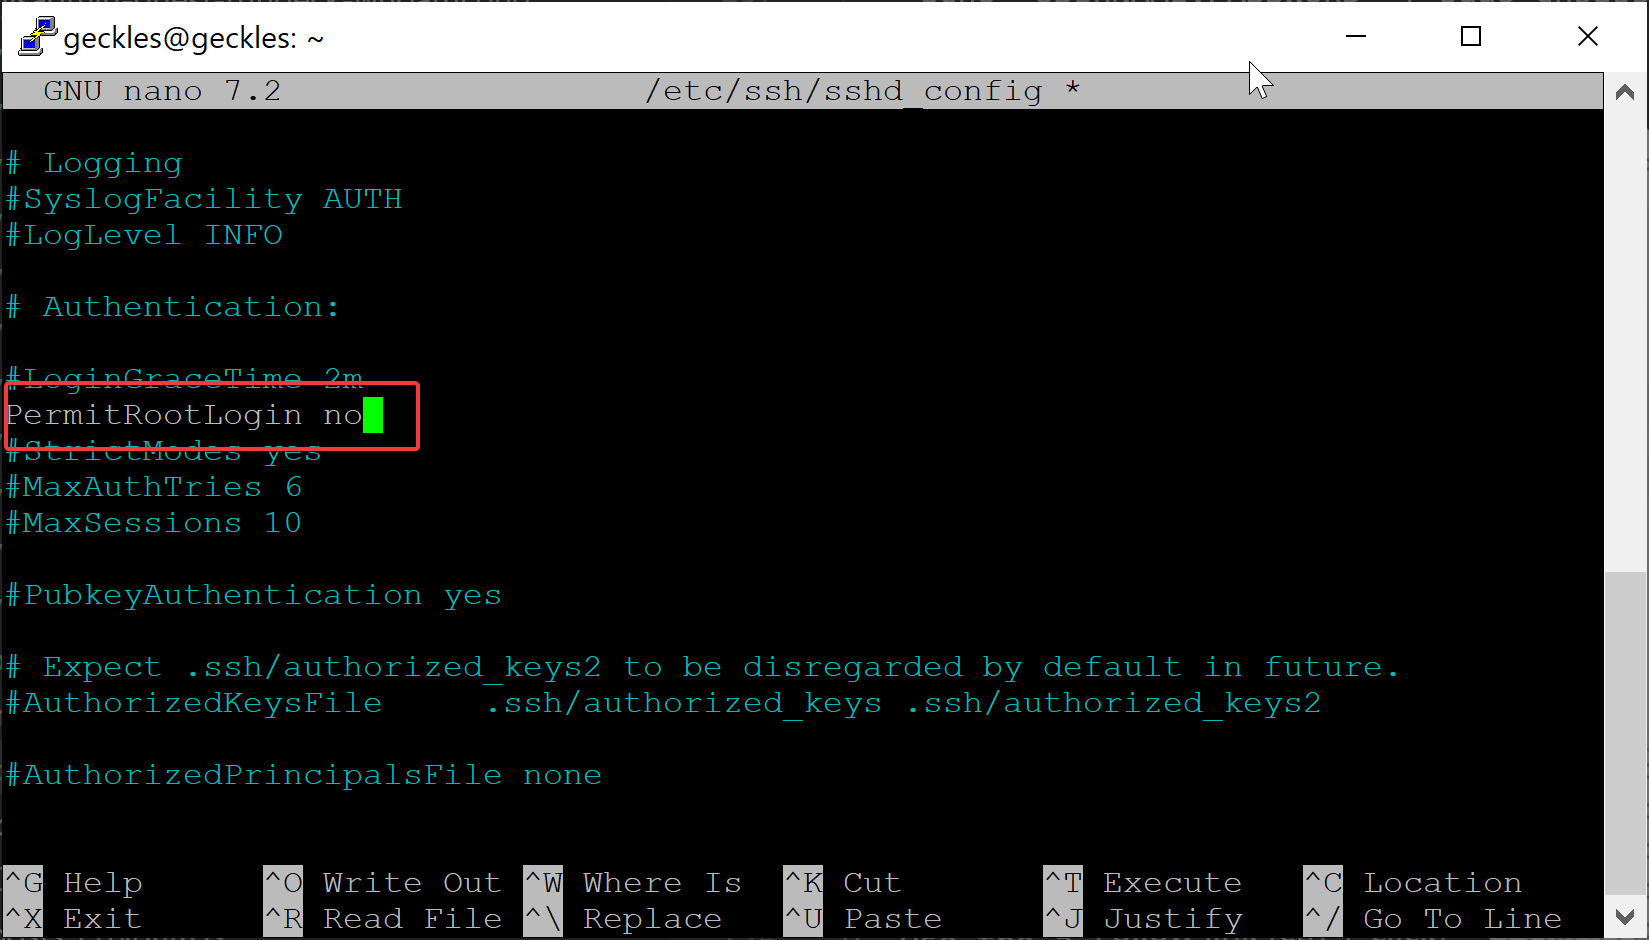
-
Type in
sudo systemctl restart ssh. If you see no feedback, that means it worked!
3. Setting Up Packages
We are now going to run several commands to update various system packages.
Copy the following commands into PuTTY, in order:
sudo apt update
sudo apt upgrade
You should see feedback fly by for each one -- type y and hit enter if prompted with any questions.
Next, copy paste this monster of a command:
sudo apt install nginx curl wget mariadb-server mariadb-client php-fpm php-bcmath php-json php-mbstring php-mysql php-tokenizer php-xml php-zip php-curl php-gd php-intl php-imagick imagemagick phpmyadmin composer fail2ban
Type y when prompted.
When prompted to select a web server, we don't want any of these options, because we'll be using nginx.
Press tab. This will automatically select the OK button. Then, hit enter.
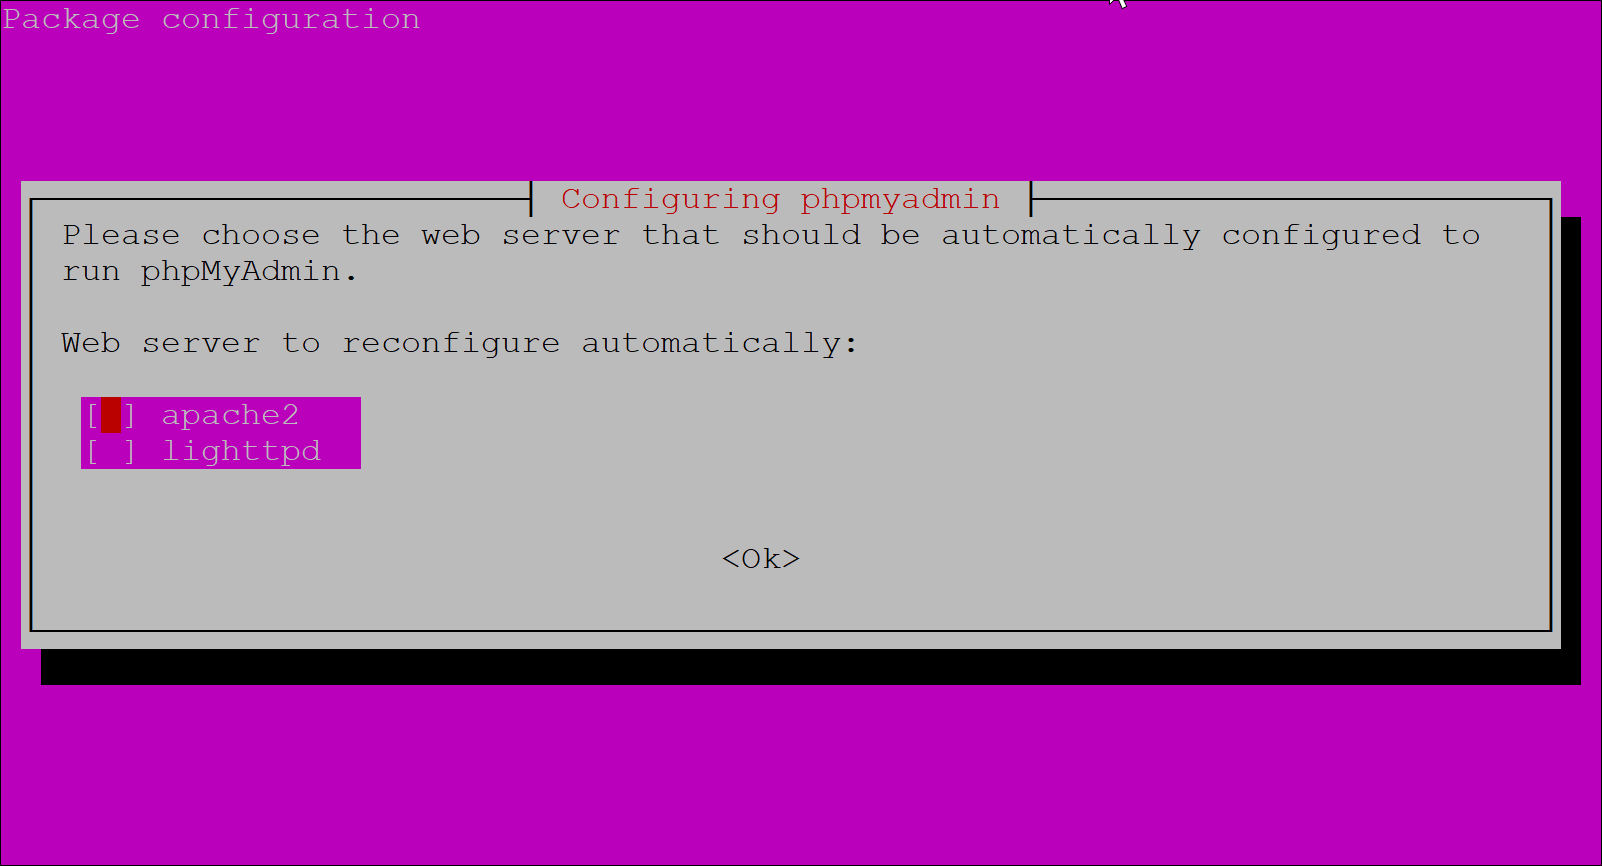
These all may take a while to install. That's OK! Just be patient.
When prompted again for PHPMyAdmin, use the arrow keys to select "No".
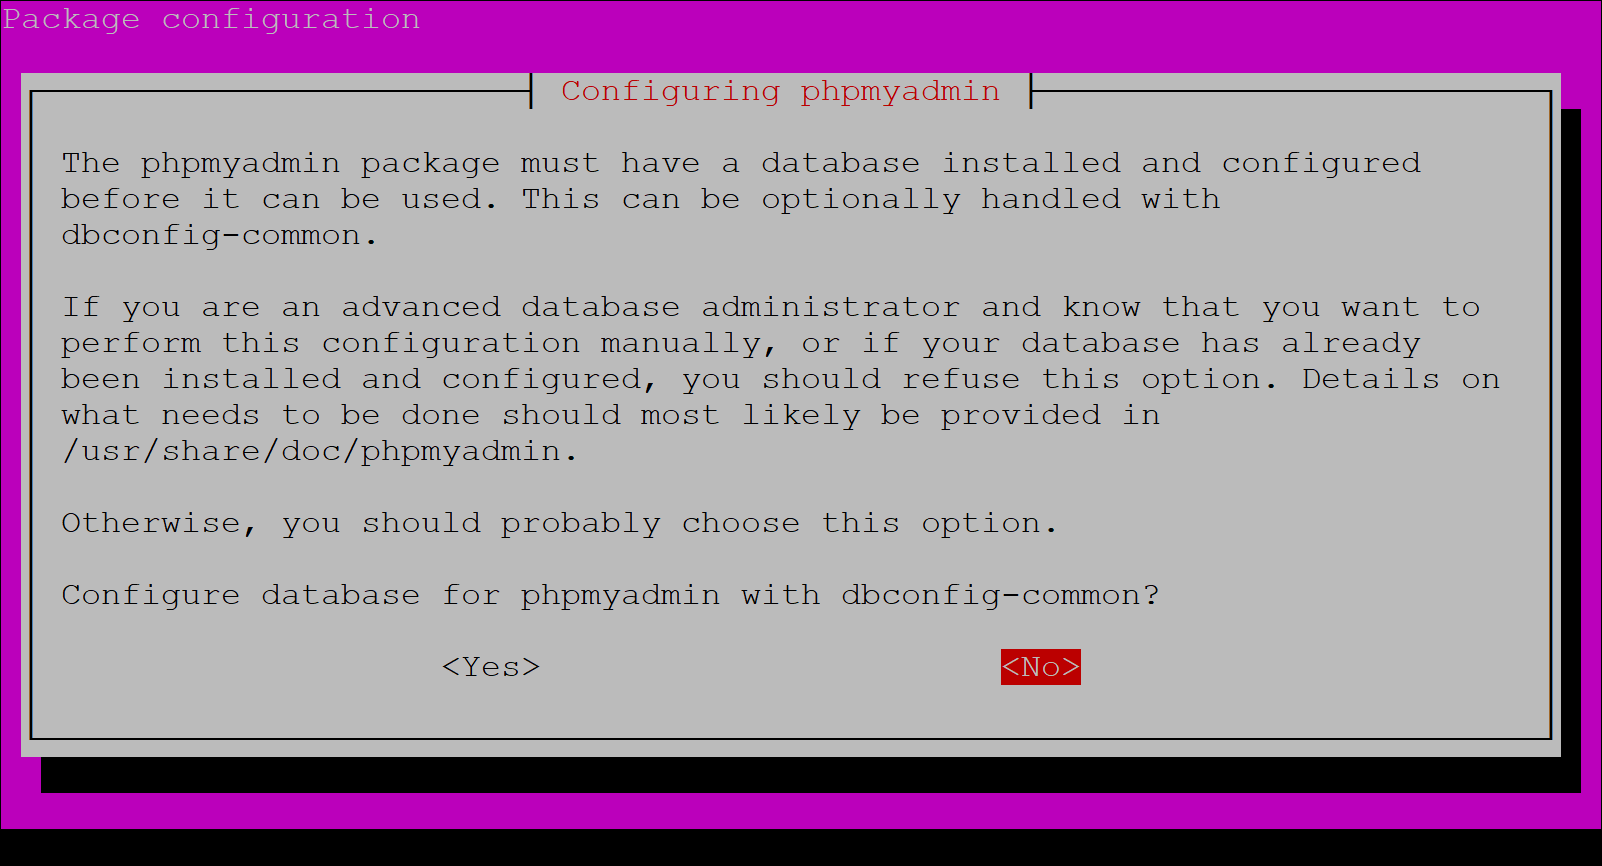
4. Hardening the Server
On Dreamhost, a lot of security settings are configured for you. When we own our own private server, we have to configure them ourselves.
First, we are going to set up UFW (or, Uncomplicated Firewall) to block all ports except the ones we need.
-
Type in
sudo ufw app list. Ensure that these options are available:
-
Type in these two commands:
sudo ufw allow 'Nginx Full'
sudo ufw allow 'OpenSSH'
-
Type in
sudo ufw enable. When prompted, type inyand hitenter.
-
Type in
sudo ufw status. You should see something like this:
Next, we will install Fail2Ban. This will automatically ban IPs that try to brute force their way into your server.
-
Type in
sudo systemctl start fail2ban && sudo systemctl enable fail2ban. You should see something like this:
-
Type in
sudo fail2ban-client status. You should see something like this:
Important Note With Fail2Ban: Sometimes, F2B can ban genuine connections, especially if you have multiple coders working on your site. Typically, these are freed after an hour or two. However, to delete all bans immediately, you can always execute the command sudo fail2ban-client unban --all.
5. Configuring PHP
Setting Up the Database
Enter the following command into PuTTY:
sudo systemctl start mariadb
Then, type in:
sudo mysql_secure_installation
Select the following options:
- NO to unix_socket authentication
- YES to change root password
- YES to remove anonymous users
- YES to disable root login
- YES to remove test database
- YES to reload privilege tables
These next steps are, in my opinion, simplest to do from the command line. So let's do it!
First, type in cd ~ to go to your home directory, if you're not there already. This will be helpful later.
Type in sudo mysql -u root -p and enter the password you just set up.
Remember the .env file you copied? Open it up in Notepad! You should see a block like this:
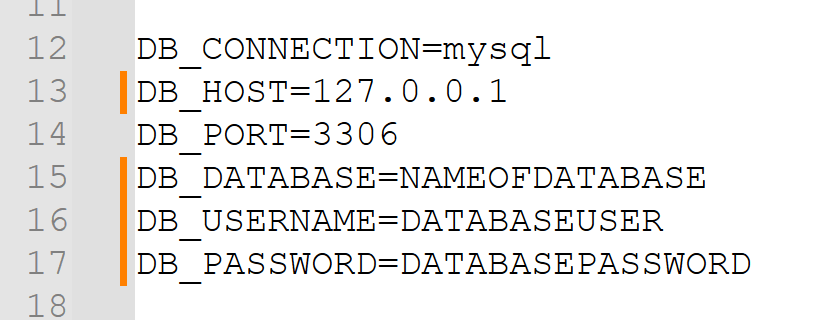
We're going to do some things with these values. Once you are in the MySQL "shell", copy paste this command, with the appropriate value changed:
CREATE DATABASE NAMEOFDATABASE;
It should look something like this:

Next, we will create a database user and grant it privileges on this table you just set up.
GRANT ALL PRIVILEGES ON NAMEOFDATABASE.* TO 'DATABASEUSER'@'localhost' IDENTIFIED BY 'DATABASEPASSWORD';
It should look something like this:

Type exit to leave the MySQL shell, and you'll get a message that says Bye.
Now, open up your FTP client. We are going to load in the .sql file that you got earlier!
Connect to your new server using the IP from Hetzner. I use WinSCP with SSH configured, so my window looks like this:
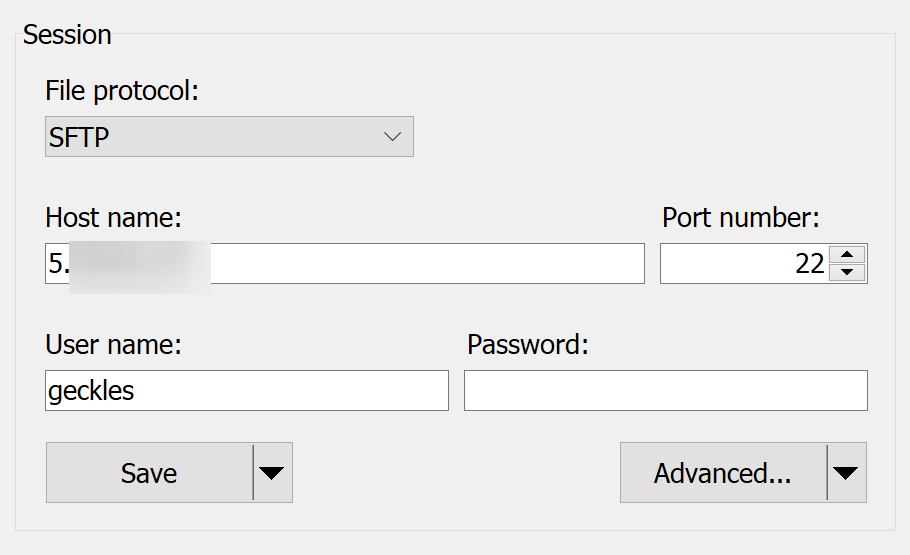
Next, you're going to copy over the SQL dump file into your home directory. For me, it looks like this:
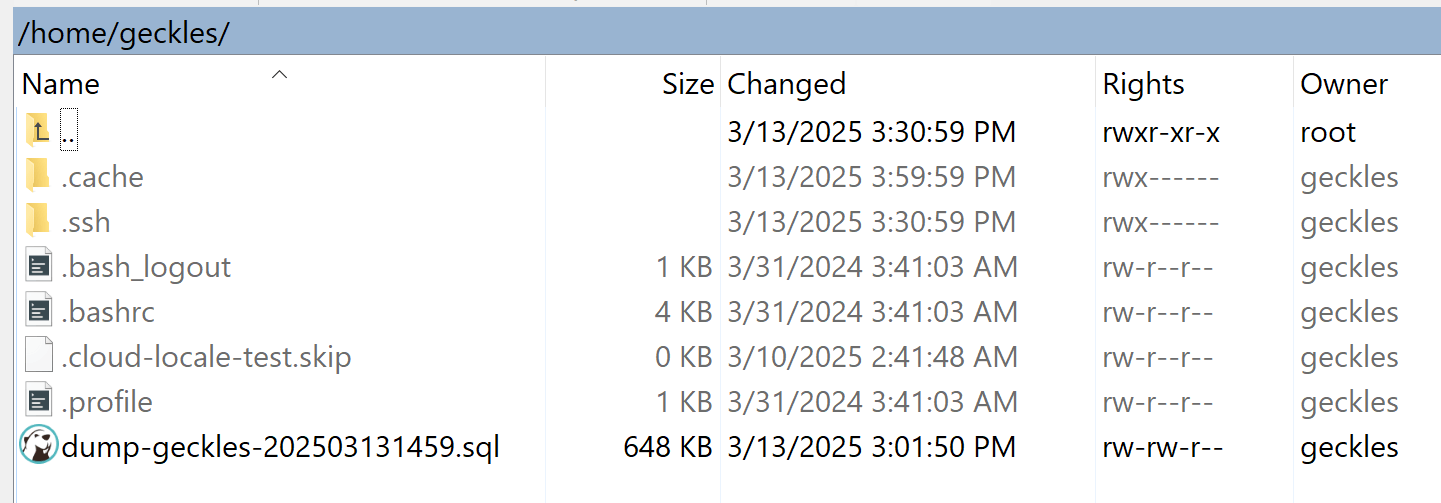
Once that's done, go back to PuTTY. We will run this command:
mariadb NAMEOFDATABASE < NAMEOFBACKUPFILE.sql
It should look something like this:

You'll notice you didn't get any feedback. That's OK.
We're going to validate that the database loaded correctly. Type in sudo mysql -u root -p and enter the password again.
Type USE NAMEOFDATABASE;. For example:

Next, we will type in SELECT * FROM users LIMIT 10;. This will get us the first 10 users in the database. If everything worked correctly, you'll see a whole bunch of text fly by, with some familiar emails and usernames!
For obvious reasons, I can't show you a full view, but it'll look something like this:

Next, let's set up PHPMyAdmin!
We are going to place PHPMyAdmin behind this thing called an HTTP gateway. This will prompt for an additional authentication any time you visit sql.yourdomain.com and very effective against brute force attacks and spam bots.
- First, let's generate a hashed version of the password you would like. Enter this with your password of choice:
openssl passwd
-
Enter your password when prompted. It should print out a hashed password, like this. Make note of it!

-
Next, create the authentication file:
sudo nano /etc/nginx/pma_pass
-
Enter the credentials you would like in this format, with the hashed password, all on one single line:
USERNAME:HASHEDPASSWORDFor example:

-
Press
ctrl+xand thenyto exit and save. -
Create a new file in the nginx sites_available:
sudo nano /etc/nginx/sites-available/sql.YOURDOMAIN
- Paste these contents:
server {
    listen       80;
    server_name  sql.YOURDOMAIN;

    root /usr/share/phpmyadmin;
    index index.php;

    location ~ \.php$ {
        fastcgi_split_path_info ^(.+\.php)(/.*)$;
        fastcgi_pass unix:/run/php/php8.3-fpm.sock;
        fastcgi_index index.php;
        fastcgi_param SCRIPT_FILENAME $document_root$fastcgi_script_name;
        include fastcgi_params;

        auth_basic "Admin Login";
        auth_basic_user_file /etc/nginx/pma_pass;
    }

}
-
Press
ctrl+xand thenyto exit and save. -
Now, tell nginx where the file is:
sudo ln -s /etc/nginx/sites-available/sql.YOURDOMAIN /etc/nginx/sites-enabled/
And your PHPMyAdmin install should be good to go!
I'm what they call a ~SQL power user~ (sarcasm) so I typically do not do PHPMyAdmin installation. Please ask in the Lorekeeper discord if you're having difficulty with this step -- I'm not very experienced with it!
Setting Up Lorekeeper
Now we're going to actually put the code on your server!
Run all of these commands, replacing YOURDOMAIN with the URL of your site. You won't receive feedback for all of them -- that's OK, it means it worked! If prompted for a password, enter the password you set up for your account earlier. (also, don't replace the $USER with anything! Keep it the way it is!)
sudo mkdir /var/www/YOURDOMAIN
sudo mkdir /var/www/YOURDOMAIN/www
sudo mkdir /var/www/YOURDOMAIN/www/public
sudo chown -R $USER:$USER /var/www/YOURDOMAIN
sudo chmod -R 755 /var/www/YOURDOMAIN
ln -s /var/www/YOURDOMAIN /home/$USER/YOURDOMAIN
git config --global --add safe.directory /var/www/YOURDOMAIN/www
git config --global --add safe.directory /var/www/YOURDOMAIN/site_hub.git
Now, we'll type in this command, which will open up a text file.
sudo nano /etc/nginx/sites-available/YOURDOMAIN
Paste this into the text file, changing ONLY the YOURDOMAIN value:
server {
    server_name YOURDOMAIN www.YOURDOMAIN;
    root /var/www/YOURDOMAIN/www/public;

    add_header X-Frame-Options "SAMEORIGIN";
    add_header X-Content-Type-Options "nosniff";

    index index.php;

    charset utf-8;

    location / {
        try_files $uri $uri/ /index.php?$query_string;
    }

    location = /favicon.ico { access_log off; log_not_found off; }
    location = /robots.txt  { access_log off; log_not_found off; }

    error_page 404 /index.php;

    location ~ \.php$ {
        fastcgi_pass unix:/var/run/php/php8.1-fpm.sock;
        fastcgi_param SCRIPT_FILENAME $realpath_root$fastcgi_script_name;
        include fastcgi_params;
        fastcgi_hide_header X-Powered-By;
    }

    location ~ /\.(?!well-known).* {
        deny all;
    }
}
Enter ctrl+x and then y and enter to save and exit.
Now run these commands. Again, it's OK if it gives you no feedback, it just means it worked!
sudo rm /etc/nginx/sites-enabled/default
sudo ln -s /etc/nginx/sites-available/YOURDOMAIN /etc/nginx/sites-enabled/
sudo nginx -t # Test for config errors
sudo service nginx restart
Great! We're done in the server for now.
Open up your git client. I personally use GitKraken, but this will be applicable to Sourcetree as well.
Essentially, we're going to copy our existing connection to the old site, duplicate it, and change the IP address.
My old remote looked like this:
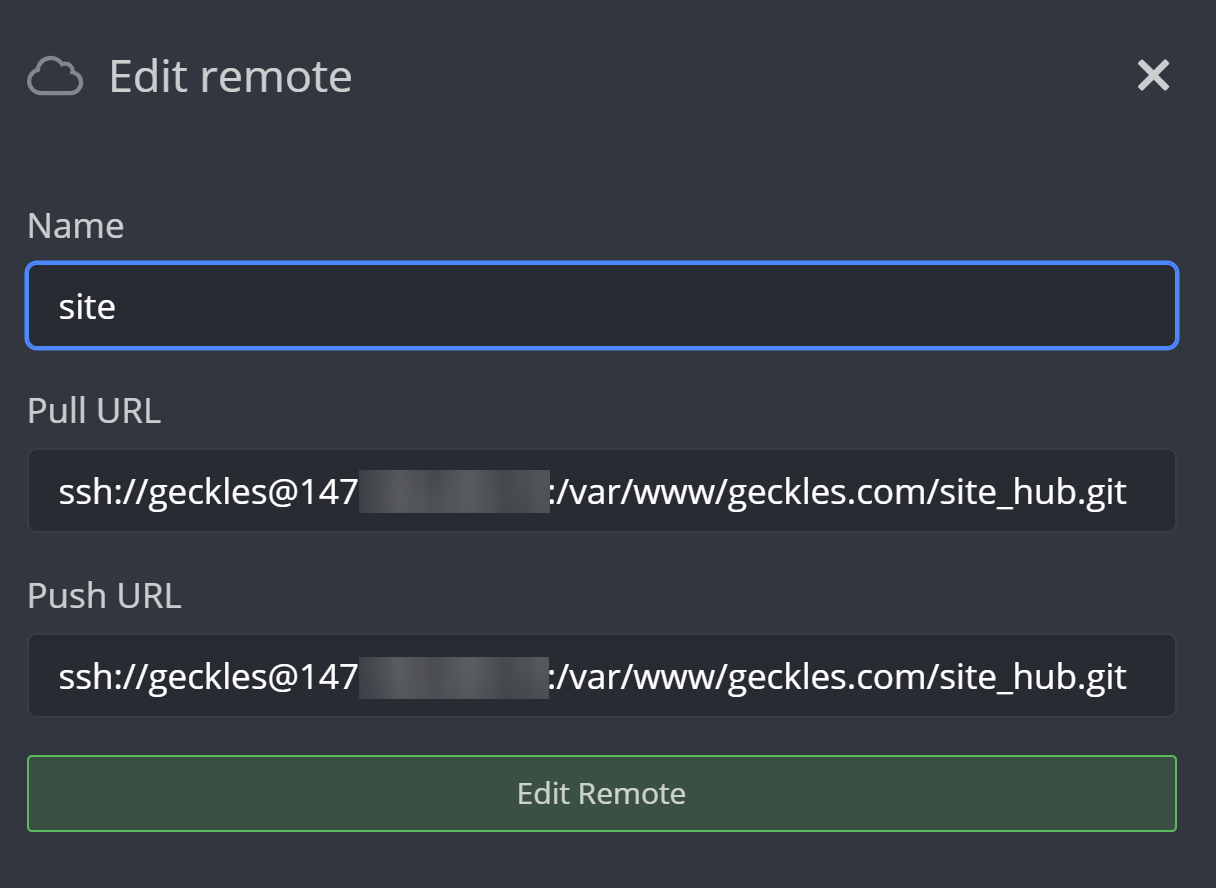
So my new remote is this:
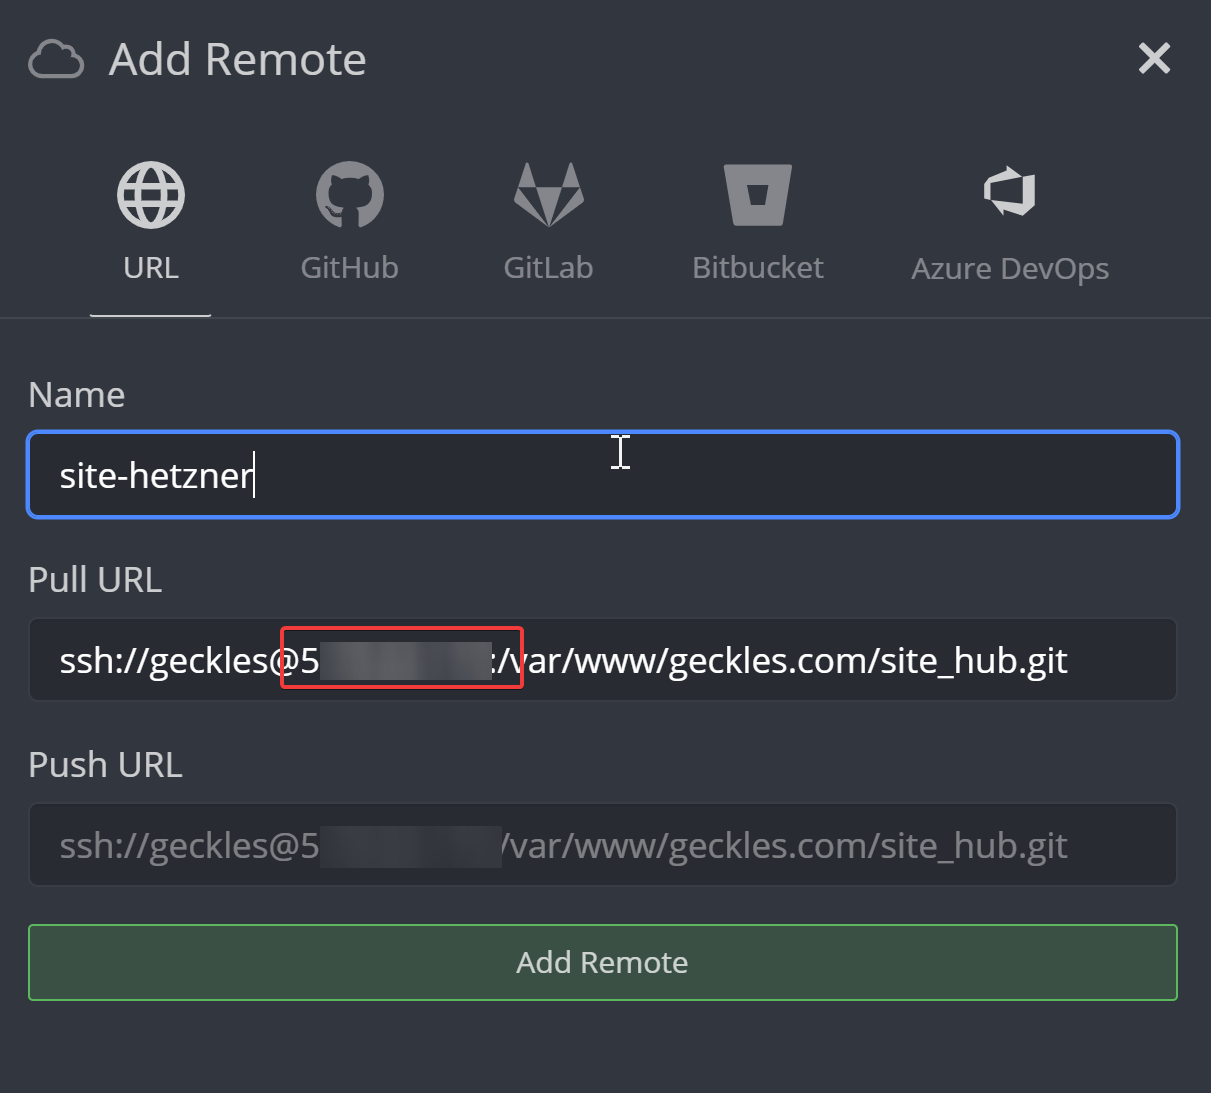
Yours will look different from mine. That is OK. We copying exactly what you had before, and are ONLY changing the IP address/URL.
If you previously had your URL there instead (such as geckles.com instead of an IP address), change the URL to the direct IP.
Push to this new remote in your preferred way. If everything is configured correctly, you shouldn't receive any errors.